

Restringing a weed eater takes four steps: remove the spool from the trimmer head, wind new line of the correct diameter onto it in the direction of the spool’s arrow, thread the ends through the exit holes, and lock the cap back in place. Once the trimmer is off and the right line is on hand, the work is mostly careful winding.

Two details about your trimmer decide how you do it. The first is the line gauge your head is built for. The second is whether the head feeds one line or two, because a dual-line head needs two equal pieces wound into separate channels.
Most restringing problems come from the wind, not from the line. Crossed layers, slack loops, or line wound against the arrow let the strands bind inside the spool. The head then stops feeding the first time you bump it on the ground, and you end up taking it apart again in the middle of the job.
What You Need Before You Start
You need replacement trimmer line in the gauge your head accepts, scissors or a utility knife, and work gloves, plus the owner’s manual if you still have it. The line matters most, since the wrong diameter either jams in the exit holes or snaps against fence posts.
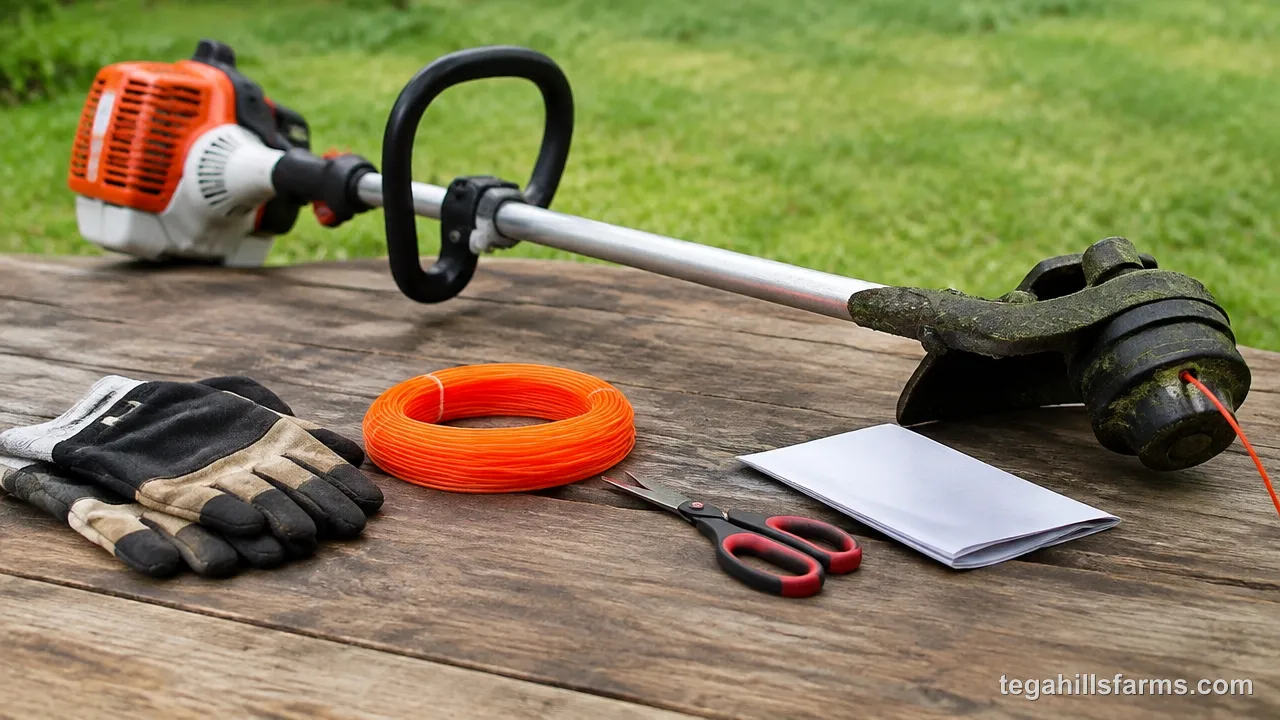
- Trimmer line: a roll or pre-cut length in the diameter printed on your trimmer head.
- Spool: the one already in your head, or a replacement if the old one is cracked or its anchor slot is worn.
- Scissors or a utility knife: heavier line is stiff, so a clean cut keeps the end from fraying before you thread it.
- Work gloves: they protect your hands from the cutting-line guard blade and from grass packed around the head.
- Owner’s manual: it shows the line gauge, the winding direction, and how your cap comes off.
If you’re still deciding which trimmer fits your yard, start with how to choose a string trimmer to match your lot size and the work you do most.
What Type of Trimmer Head Do You Have?
Most home trimmers use a spool-based head, and the way it lets out new line tells you whether you’ll be winding line at all. Look at the head before you buy line or pull anything apart. The release method sets the rest of the job: a wound spool needs a full restring, while a head that takes short pieces only needs fresh segments pushed into place. If you know your head type, you can skip the guesswork and avoid prying on tabs or caps that were never meant to come off. The model name on the head or in the manual confirms it.
Bump-Feed Head
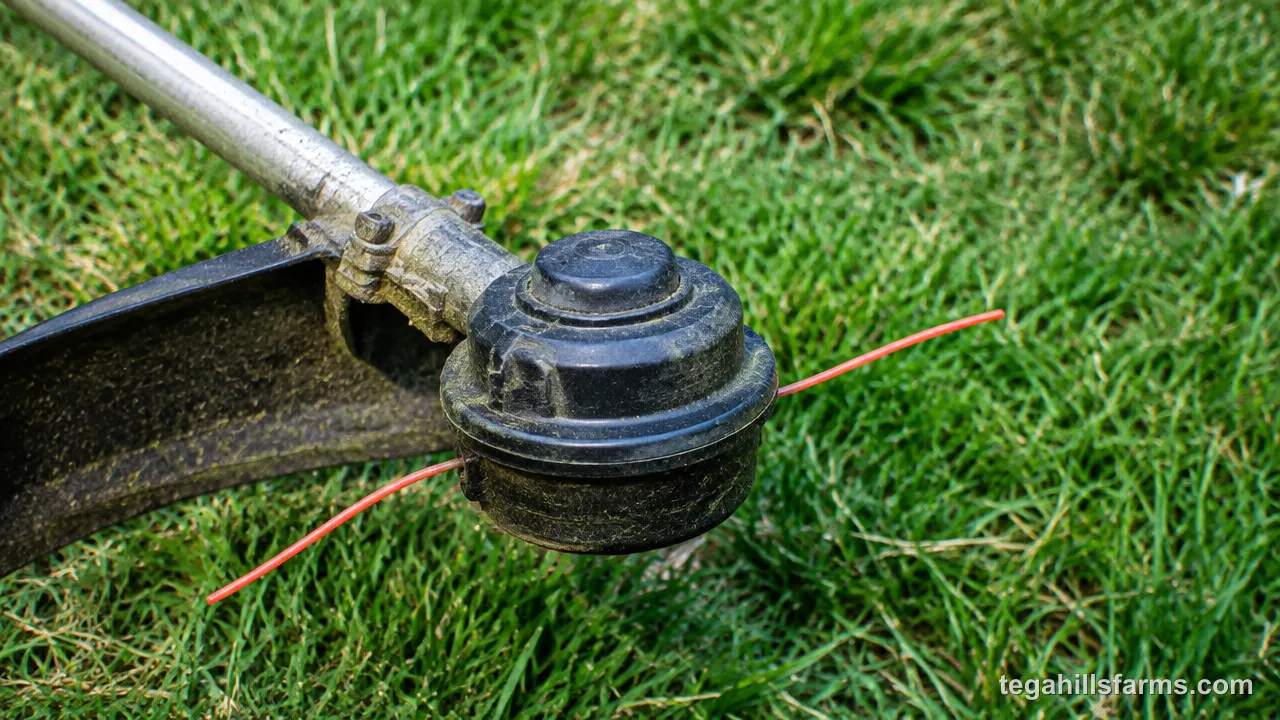
A bump-feed head releases more line when you tap the bottom of the spinning head against the ground. You can recognize it by the rounded, knob-like cap on the bottom, often called the bump knob, and by two or more line ends sticking out of eyelets on the sides of the housing.
A spring inside holds the spool locked against the housing. When you bump the knob, the spool is pushed up against that spring and briefly unlocks, so centrifugal force pulls a short length of line out before the spool locks again. This design is the most common type on homeowner trimmers, and it’s the one this guide focuses on. If your head has a bump knob and wound line inside, every winding step below applies to it.
Automatic-Feed Head
An automatic-feed head lets out line on its own while the trimmer runs, without any tap on the ground. The bottom of the head is usually smooth, with no bump knob, and many have a single line end coming out of one eyelet.
On some designs, the line advances when the motor slows down or shuts off. On others, a centrifugal mechanism or a cutter on the guard keeps the line at a set length. Either way, the head still holds a wound spool, so you restring it the same way as a bump-feed head. The difference is that you have no knob to clear a jam by tapping. That makes an even, tight wind more important, because the head can only feed line that unwinds cleanly.
Fixed-Line Head
A fixed-line head holds short, pre-cut pieces of line, or sometimes plastic blades, instead of a wound spool. You’ll see two or more stubby lengths of heavy line locked into slots or eyelets, and the head usually has no internal spool to take out.
To replace the line, you pull out the worn pieces and push new ones through the slots until they lock. Because nothing is wound, the winding steps in this guide don’t apply. Fixed-line heads are common on brush-clearing setups because they take thicker line. They are easy to reload, but you have to stop and replace pieces as they wear down.
How to Choose the Right Trimmer Line
The right line is the diameter your trimmer head is rated for, cut to a length the spool can hold without overfilling. Both limits come from the head, not from the roll on the store shelf. Thicker line cuts tougher weeds, but only up to the size the eyelets and motor can handle. A head stuffed with too much line binds as the layers press against the cap. For a closer look at diameters and when to step up, see what size of trimmer line fits your head and your typical cutting.
Finding the Correct Line Diameter
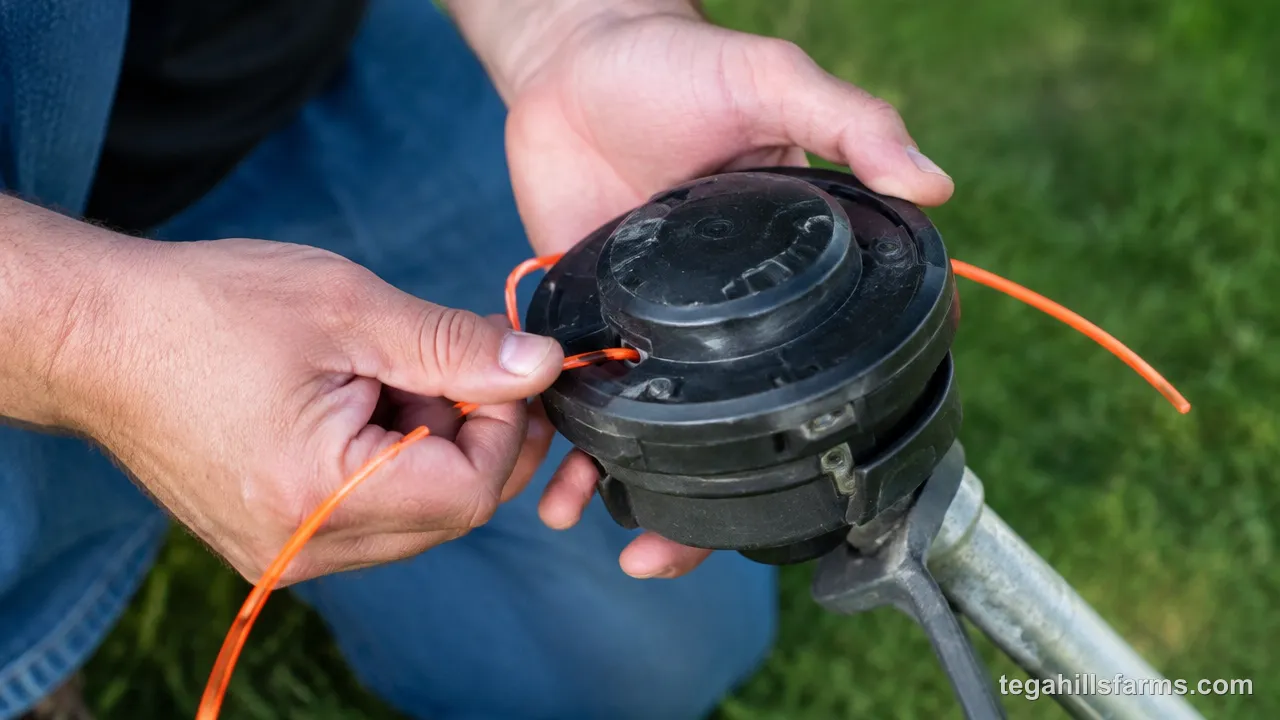
The correct diameter is printed on the trimmer head or listed in the owner’s manual, and that is the only gauge to follow. Look for a molded or stamped marking on the head housing, often near the eyelets or on the spool itself, or check the specifications page of the manual.
The rating matters because the exit holes and the line-cutter blade on the guard are sized for that diameter. Line that’s too thick can jam in the eyelets, fail to feed, and put extra load on a small motor or battery, which cuts runtime. Line that’s too thin wears down quickly against concrete edges and breaks more often. If the marking is worn off and the manual is gone, the model number on the trimmer’s shaft or motor housing lets you look up the specification from the manufacturer.
How Much Line Do You Need?
The right amount is whatever fills your spool without the line reaching past the rim of the spool’s flanges. Your manual may list a specific length for your head, and that figure is the one to use.
If it doesn’t, wind straight from the roll and stop when the layers sit just below the edge of the flanges, then cut. Overfilling is the more common mistake. Line packed against the cap can’t slide off the spool, so the head won’t feed even though it’s full. A dual-line head needs two pieces of identical length, one for each channel, so both sides run out at the same time. A single-line head takes one continuous piece wound into a single channel.
How to Remove the Spool from the Trimmer Head
Getting the spool out takes shutting off power first and then releasing the cap that holds the spool inside the housing. The order matters because a trimmer that starts while your hands are in the head can do real damage. The cap’s design also decides how much force you use. Some caps come off with a firm squeeze, while others take a twist that feels stuck the first time. Working slowly here also keeps the spring and any small parts from flying out and getting lost in the grass.
Turn Off and Disconnect the Trimmer
Shut the trimmer off and remove its power source completely before you touch the head. On a battery trimmer, pull the battery pack out. On a corded electric model, unplug it from the extension cord. On a gas trimmer, turn the engine off, let it cool, and pull the boot off the spark plug.
The reason is simple: the trigger is easy to squeeze by accident while you’re holding the shaft at an awkward angle. With the battery out or the plug wire off, the head can’t spin no matter what you bump. Removing the spark plug boot on a gas model also keeps the engine from firing if you rotate the head by hand and it turns the engine over. A cool engine also keeps you from brushing a hot muffler while you work.
Remove the Cap and Lift Out the Spool
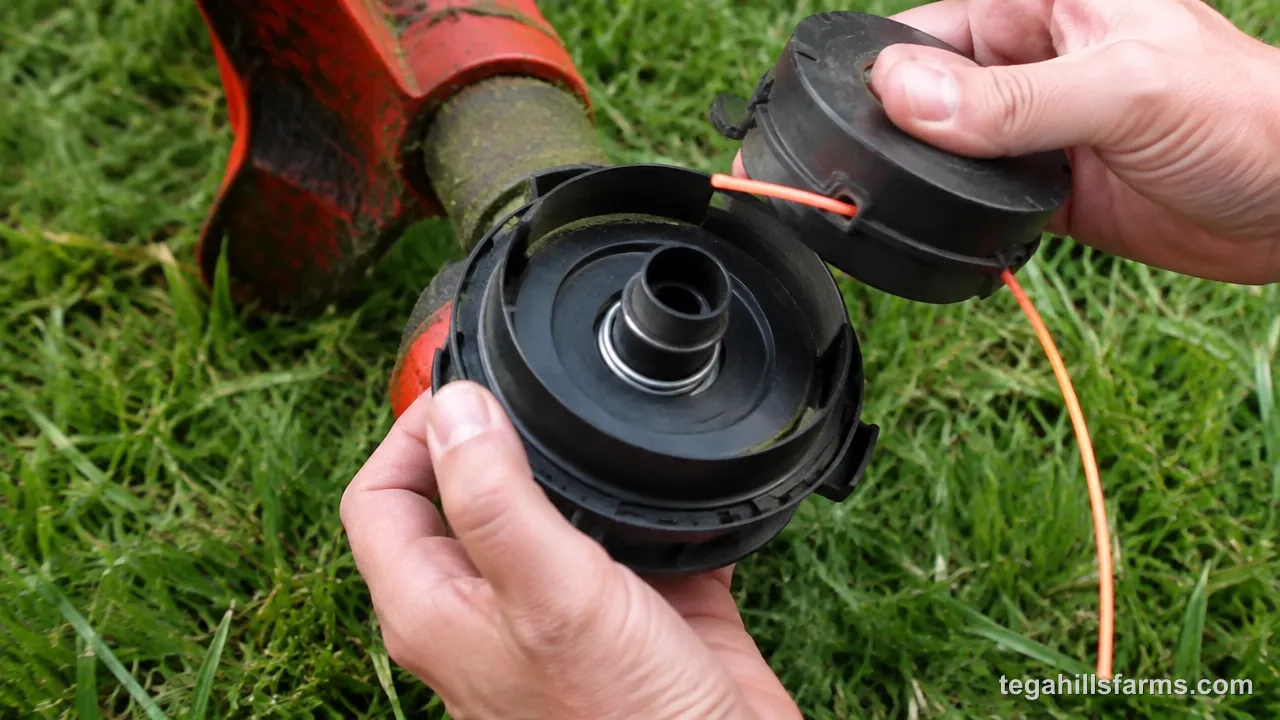
Most caps come off in one of two ways: you press locking tabs on the sides and pull straight off, or you twist the cap counterclockwise and lift it away. Lay the trimmer down with the head facing up so you can see the housing clearly.
On a pull-off cap, squeeze the tabs on opposite sides at the same time and pull the cap straight up. Squeezing only one tab tends to cock the cap and make it stick. On a twist-off cap, hold the head steady and turn the cap or bump knob until it releases. Some models need you to hold the head still with your other hand while you turn.
Once the cap is off, lift out the spool. Watch for a spring underneath it on bump-feed heads. Set the spring aside where it won’t roll away, and note which way it sat so it goes back the same way. Pull off any leftover line, then wipe grass and dirt out of the housing so the new spool seats flat.
How to Wind Trimmer Line onto the Spool
A clean wind comes down to following the arrow on the spool and keeping steady tension from the first wrap to the last. Every feed problem after a restring traces back to this step. Line wound backward fights the direction the head spins. Loose or crossed layers dig into each other and lock the spool so nothing feeds. A careful wind also lets the spool hold its full amount of line, so you restring less often.
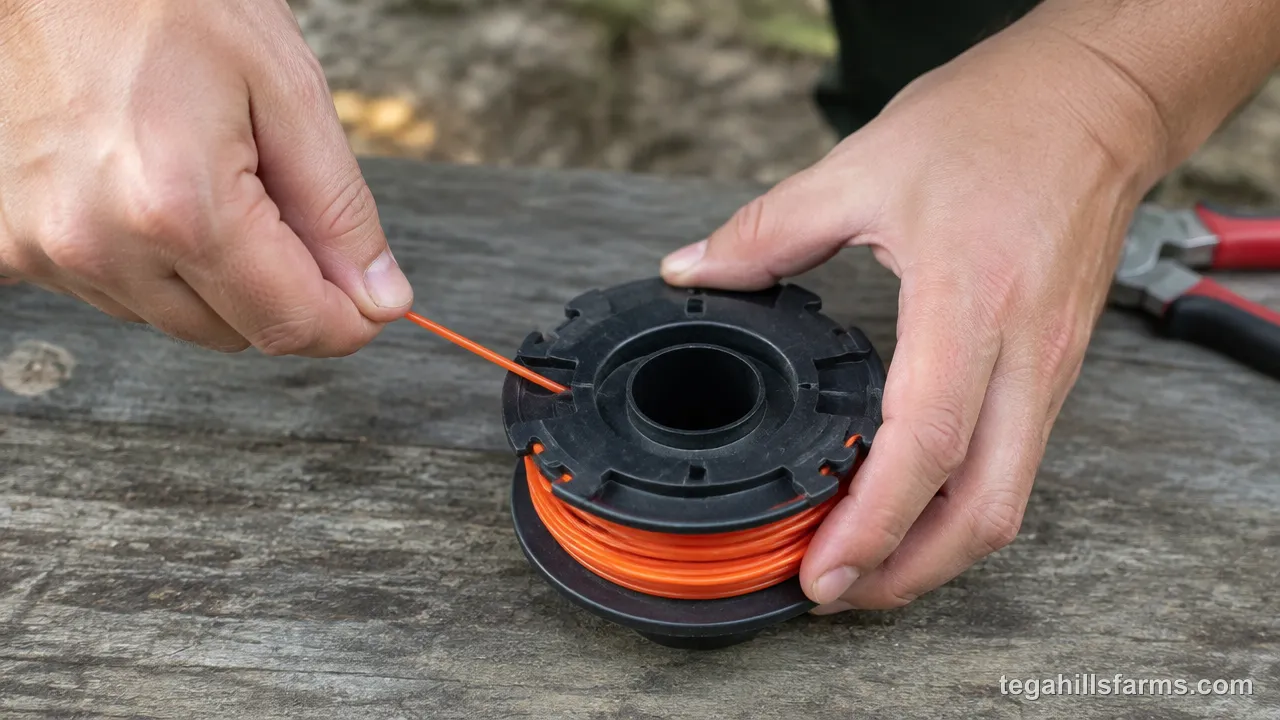
Cut the Line to the Right Length
Cut the line before you start winding, using the length your manual specifies or the amount that fills your spool to just below the flange rims. For a dual-line head, cut two pieces of identical length so both channels empty at the same rate.
Some dual-line spools are designed for one long piece folded in the middle instead of two separate pieces. These have a center notch between the two channels. Check your spool for that notch before you cut, because it changes whether you need one length or two. Cut the line squarely with sharp scissors or a utility knife. A clean, square end slides into the anchor hole easily, while a crushed or angled end catches and frays as you push it through.
Insert the Line into the Anchor Hole
The anchor hole is a small hole or slot near the center hub of the spool, and it holds the starting end of the line so the wind doesn’t slip. On a dual-line spool, you’ll find one anchor point for each channel, or a center notch for a folded piece.
Push the end of the line through the anchor hole until a short tail pokes out the other side. On notched spools, hook the middle of a folded piece into the notch so equal lengths run into each channel. The anchor keeps the first wraps from spinning around the hub as you build tension. Without that grip, the bottom layers stay loose, and loose bottom layers let the top layers sink down and bind later. Give the line a firm tug to make sure it’s held before you start turning the spool.
Wind the Line in the Correct Direction
Wind the line in the direction of the arrow molded onto the spool. If your spool has no arrow, the owner’s manual shows the correct direction. Arrows are usually on the top flange or on the hub, and some spools carry a separate arrow for each channel.
Direction matters because the head spins one way when the trimmer runs. Line wound in the matching direction unwinds smoothly when the head releases it. Line wound backward pulls tighter against the spool instead of paying out, so the head won’t feed even when you bump it. Before you start, hold the spool the same way it sits in the head, with the side that faces the ground pointing down. Flipping the spool over by accident reverses the direction you see, and that’s an easy way to wind it backward without noticing.
Keep the Line Tight and Even
Hold the line with steady tension and lay each wrap snugly beside the one before it, so the layers build up flat across the channel. Don’t cross wraps over each other, and don’t let slack loops form between turns.
Tight, side-by-side wraps unwind one at a time when the head feeds. Crossed or loose wraps let a top strand slip down between lower ones, where centrifugal force wedges it in place. That’s the most common reason a freshly wound spool refuses to feed. On a dual-line spool, keep each piece inside its own channel; line that wanders across the divider tangles with the other side. Stop winding with 6 inches of line left unwound on each end. Press those ends into the holding notches on the spool’s rim, if it has them, so the wind stays tight while you reinstall it.
How to Reinstall the Spool and Cap
Putting the head back together means pulling the line ends out through the exit holes and then locking the cap so the spool can’t shift. The order matters, because once the cap is on, you can’t reach the line ends inside to guide them. Getting the line through the eyelets first keeps it from getting trapped under the spool. A properly seated spool and cap also let the bump mechanism move freely, which is what makes the head feed.
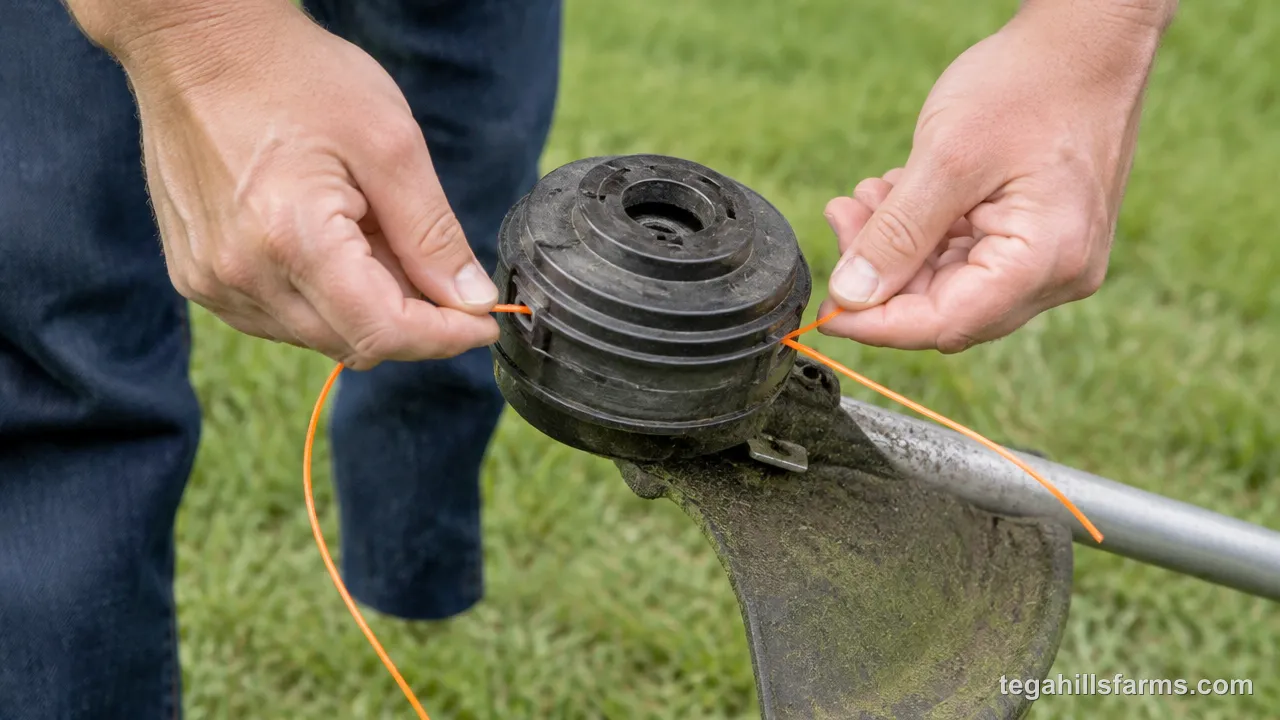
Thread the Line Ends Through the Exit Holes
Pull each loose line end out through the matching exit hole, or eyelet, on the side of the trimmer head housing. On a dual-line head, each end goes through its own eyelet, usually on opposite sides of the housing.
Line the notches on the spool rim up with the eyelets before you thread. That keeps each end on a straight path from the spool to the hole instead of wrapping around the hub. Feed each end through from the inside and pull it outward. Then release the line from the rim notches by drawing it through the eyelet until it slips free. Leave the full unwound length you set aside during winding hanging outside the head for now. You’ll trim it to its working length after the cap is back on.
Seat the Spool and Snap or Twist the Cap Back On
Set the spool back into the housing, push it down firmly, and lock the cap the same way you took it off. If your head has a spring, place it back in its original position before the spool goes in.
As you lower the spool, keep light outward tension on the line ends so they stay in the eyelets. Press the spool down until it sits flat. On a bump-feed head, you’ll feel the spring compress, and the spool should seat without rocking. A spool that sits crooked will jam the feed.
For a snap-on cap, line up the tabs with their slots and push until both sides click. For a twist-lock cap, set it in place and turn it clockwise until it stops. Tug both line ends; they should pull out only when you press the bump knob.
Trim the Line to the Correct Length
Trim it: about 4 to 6 inches of line should hang from the trimmer head after the spool is installed. Cut off the excess with scissors.
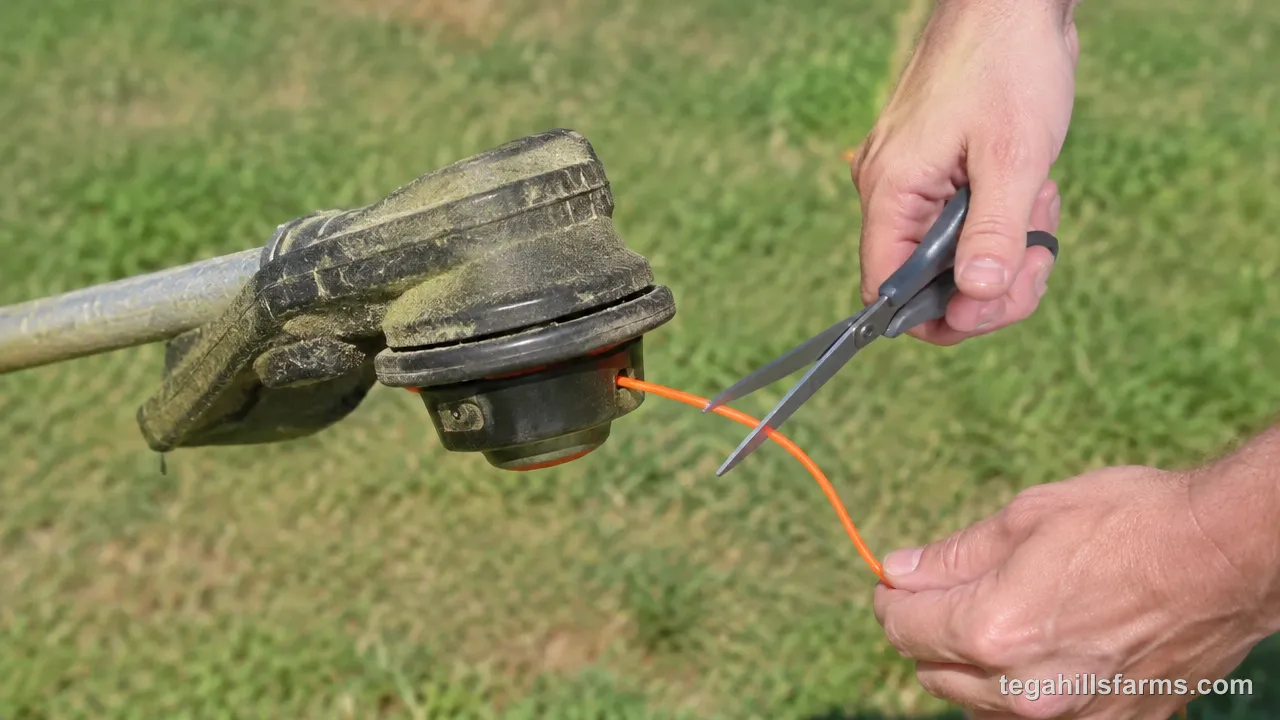
Line longer than that drags on the motor, especially on battery trimmers, because the head has to spin a heavier load at the tip. It also hits the guard and can break. Many trimmers have a cutting blade on the underside of the guard that sets the length automatically the first time you start the trimmer. Even so, trimming the line by hand first gives that blade less to remove. It also avoids a long, whipping strand on the first spin, which is when line most often flies loose.
Brand-Specific Restringing Tips
The general steps work for most heads, but some brands use their own spool and cap designs, and a few let you load line without removing the spool at all. Knowing your brand’s design can save you from forcing a cap that’s meant to stay on. It can also turn a full restring into a job you do right on the trimmer. The model name stamped on the head is the best guide, since a single brand may sell several head styles. Your owner’s manual remains the final word on any detail that differs from the general method.
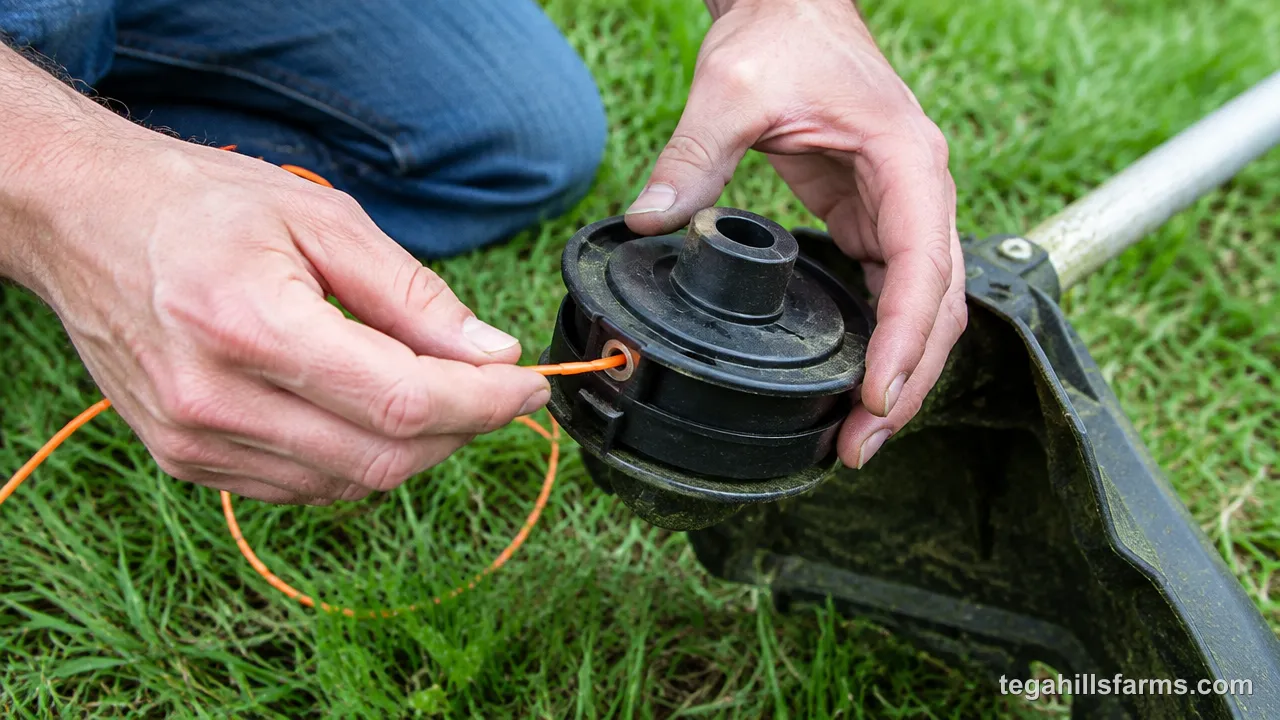
Stihl Trimmer Heads
Many current Stihl AutoCut heads are built for loading line without taking the spool out. On these, you line up the arrows or markings on the cap with the eyelets, push the line straight through the head until equal lengths stick out on both sides, and then turn the cap to wind the line in.
That design means the cap doesn’t need to come off for a routine restring, so prying at it can damage the tabs. Older or different Stihl heads still use a removable spool, and they wind the same way as the general method, following the arrow on the spool. Check the head’s model name before you decide which method applies.
Husqvarna Trimmer Heads
Husqvarna’s T-series bump heads, including the T35, use a tap-and-go design, and many models in that line support threading line straight through the head and winding it with the knob. You line up the markings on the knob with the eyelets, push the line through until both sides are even, and then turn the knob in the direction marked on it.
Husqvarna AutoCut heads on smaller models may use a different system, so match your head’s name to the instructions in the manual. When a Husqvarna head does need to come apart, the spool still winds in the direction of its arrow, and the cap goes back on the same way it came off.
Milwaukee Trimmer Heads
Milwaukee M18 trimmers use a bump-feed head, and restringing follows the general method: remove the battery, release the cap, lift the spool out, and wind new line in the direction of the arrow on the spool.
Because these are battery trimmers, pulling the battery pack is the only disconnect step, and you can skip any spark plug precautions. Line diameter matters on these models just as it does on gas trimmers, since line thicker than the head’s rating adds load and shortens runtime per charge. The correct gauge is listed in the manual for your specific M18 model. Some Milwaukee heads also accept line loaded through the eyelets, so check your manual before you take the cap off.
A spool can look perfect on the bench and still jam within the first few minutes of cutting, because a single strand that slipped under its neighbor during winding only shows up once the head spins at full speed. If you just bump harder or force the cap, a small winding flaw can turn into a cracked spool or a worn bump knob, and you’re back to the hardware store in the middle of the yard work.
What to Do When Line Won’t Feed or Tangles
When line won’t feed after a restring, the cause is almost always inside the spool: crossed or loose layers, line wound against the arrow, or an overfilled spool pressing against the cap. Remove the spool and look before you try anything else.
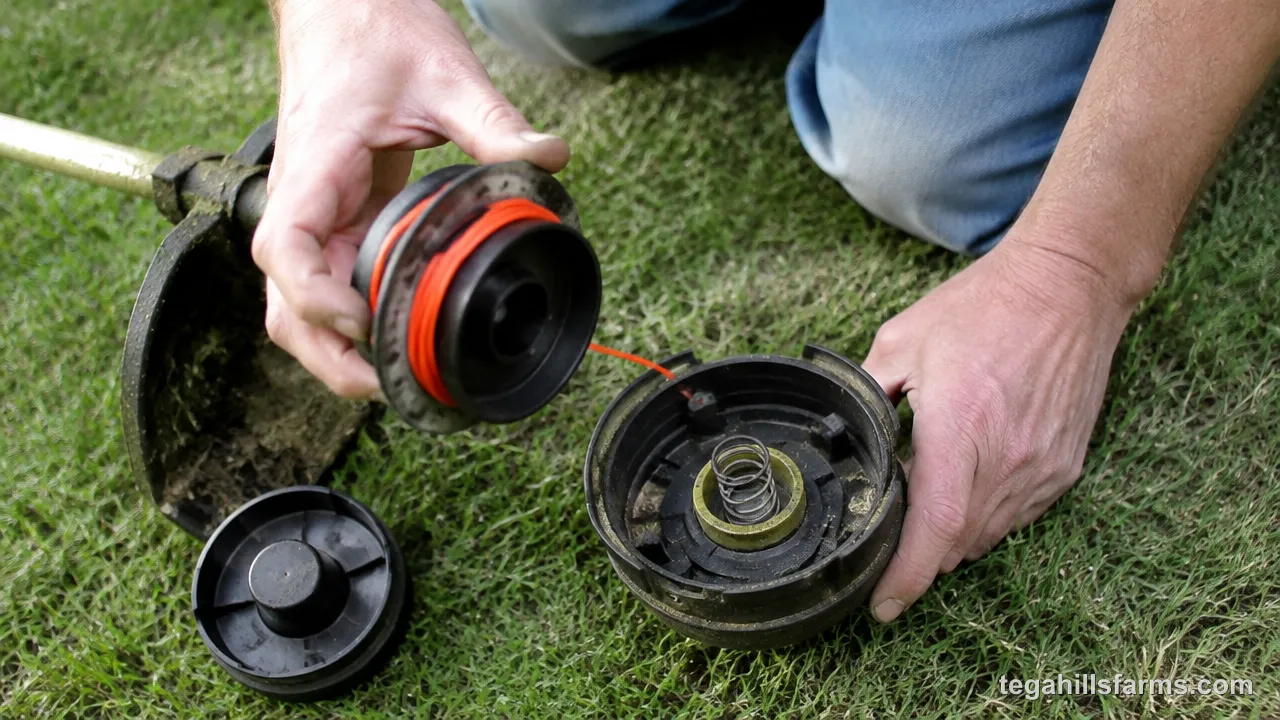
Crossed layers and slack loops show up as strands buried under other wraps. Unwind the spool completely and rewind it with steady tension, laying each wrap beside the last. If the line is wound tightly but still won’t pay out, compare your wind to the arrow; line wound backward needs a full rewind in the right direction. An overfilled spool won’t turn freely inside the housing, so take off a few wraps until the line sits below the flange rims.
Check the spring on bump-feed heads too. A weak, bent, or missing spring keeps the spool from locking and unlocking, so bumping does nothing. Replace a damaged spring rather than stretching it. If the trimmer won’t run at all, rather than just not feeding, that’s a separate problem covered in string trimmer won’t start.
Should You Buy Pre-Wound Spools Instead?
Pre-wound spools make sense if you’d rather swap a spool in a minute than wind line yourself, but winding your own costs less per foot over a season. The tradeoff is time and convenience against ongoing cost.

A replacement spool comes factory-wound with even tension and the right line diameter for that head, so it avoids the most common cause of feed problems. You just pop out the old spool, drop in the new one, and thread the ends. That’s useful in the middle of a job or for anyone who finds winding fiddly.
Bulk line on a roll is cheaper over time, and it lets you choose your own line shape within the head’s gauge rating. Pre-wound spools also tie you to one brand’s spool design. In my view, keeping one or two pre-wound spools on hand for quick swaps and winding the rest from a roll works well for most homeowners.
Which Trimmer Line Shape Works Best?
Round line suits most lawns, while twisted, square, and serrated line cut thicker weeds more aggressively. The best shape depends on what you cut most often.
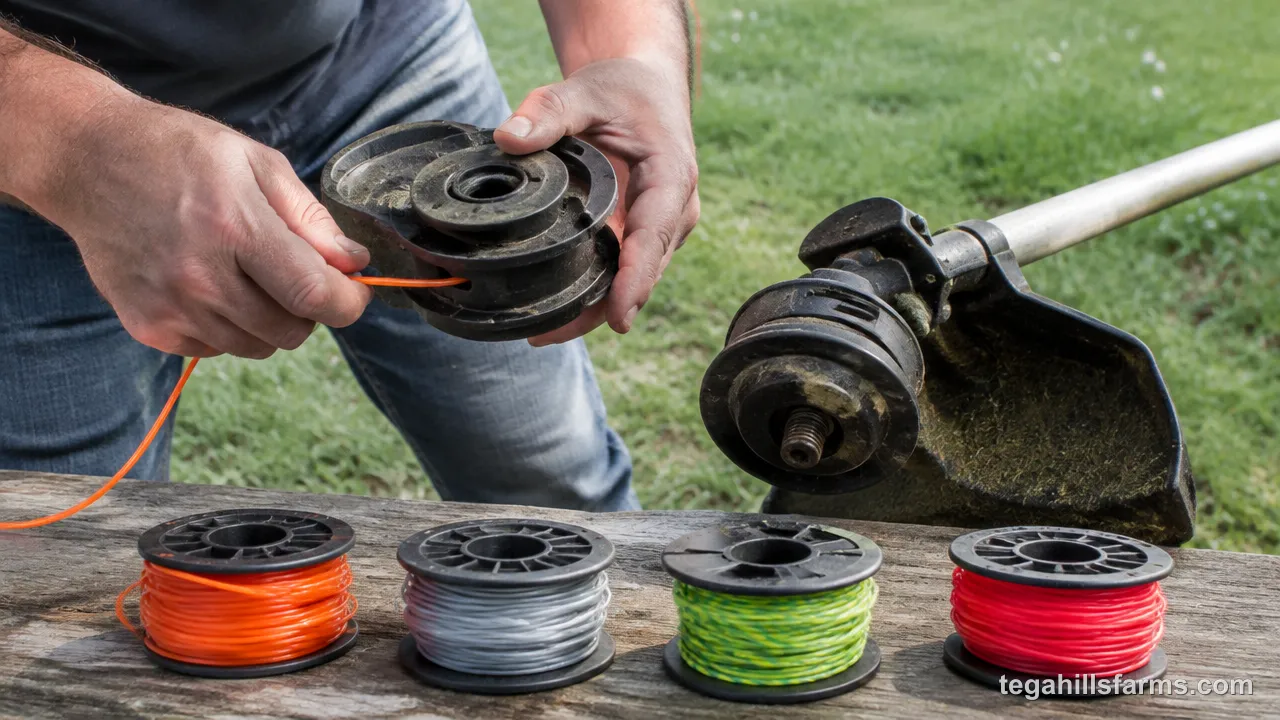
- Round line: the most common shape. It’s durable, feeds smoothly, and holds up well against fences and pavement edges, which makes it a good fit for regular grass edging. Its cut is more of a tear than a slice, so it works harder on tough weeds.
- Twisted line: the spiral profile cuts more cleanly than round line and often runs quieter, because the twist moves through the air with less drag. It’s a solid all-around choice for mixed grass and weeds.
- Square line: the sharp corners slice through thick grass and stems more easily than round line. The tradeoff is faster wear against hard surfaces.
- Serrated line: the toothed edges saw through heavy weeds and light brush. It wears quickly on concrete edges, so it’s best saved for overgrown areas.
Whatever shape you pick, stay within the diameter your head is rated for.
Frequently Asked Questions
Which direction do I wind trimmer line?
Wind it in the direction of the arrow on the spool. If the spool has no arrow, check the owner’s manual, which shows the correct direction for your head. Hold the spool the way it sits in the head while you wind, because flipping it over makes the arrow easy to misread and the line will then refuse to feed.
Why does my trimmer line keep breaking?
Frequent breaks usually come from line that’s too thin for your work, old line that has dried out and turned brittle, or cutting too close to fences and concrete. Use the diameter your head is rated for and store spare line out of direct sun. Keeping the tip of the line, rather than the whole head, against the cutting area also cuts down on breakage.
Can I use a thicker line than my trimmer recommends?
Using line thicker than the head’s rating isn’t a good idea. Oversized line can jam in the exit holes, fail to feed, and strain the motor. On a battery trimmer, the extra load also shortens runtime per charge. If you need to cut heavier growth, a line shape built for thick weeds within your rated gauge is the safer option.
What if the trimmer head cap won’t come off?
A stuck cap is usually packed with dirt and grass or locked by a twist you haven’t found yet. Brush debris away from the tabs, then squeeze both tabs evenly or try turning the cap counterclockwise. Some heads, like many Stihl AutoCut models, aren’t meant to be opened for routine restringing, so check your manual before forcing it.
How often should I restring my weed eater?
Restring it whenever the line runs too short to feed, which depends on how much trimming you do and what you cut. Edging along concrete and fences wears line much faster than cutting open grass. Learning how to use a string trimmer with the line tip doing the cutting helps each spool last longer between restrings.


Write Your Review
No reviews yet. Be the first to share your experience!