

Cleaning a lawn mower comes down to three jobs done with the spark plug wire off and the engine cool. First, scrape and rinse packed clippings from the deck. Next, clean the blades, either in place or off the mower. Last, clear grass and grime from the engine’s cooling fins, air filter and carburetor area without soaking any of them.
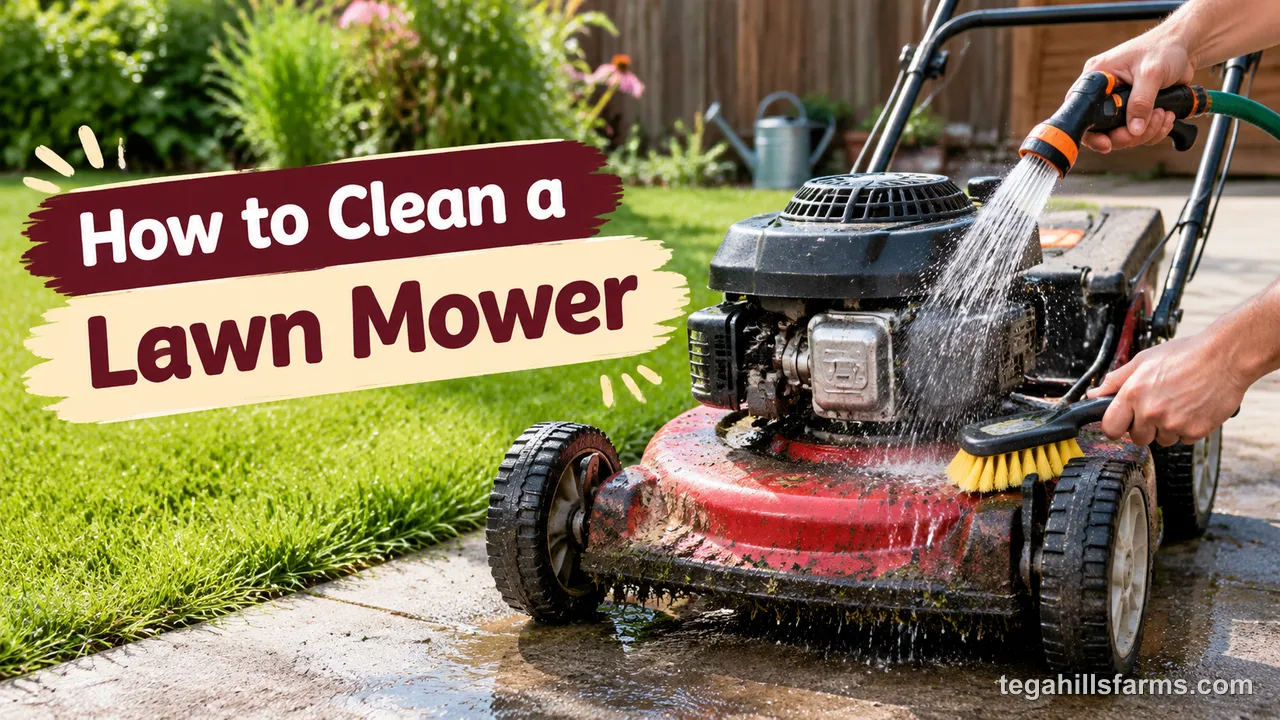
The method depends on the machine you own. A deck with a washing port can be rinsed from above while the engine runs. A walk-behind without one has to be tipped onto the correct side. A riding mower can’t be tipped at all, and a battery mower needs its electronics kept dry, so its cleaning works differently from a gas machine’s.
Most of the damage people do while cleaning comes from water and fuel ending up in the wrong place. Water sprayed straight into the air intake, oil that runs into the cylinder when the mower is tipped the wrong way, and gas dripping onto a hot muffler cause far more trouble than dirt ever does. Knowing which parts can get wet and which way the mower tilts protects the engine more than any cleaner you buy.
Can You Spray a Lawn Mower With a Hose?
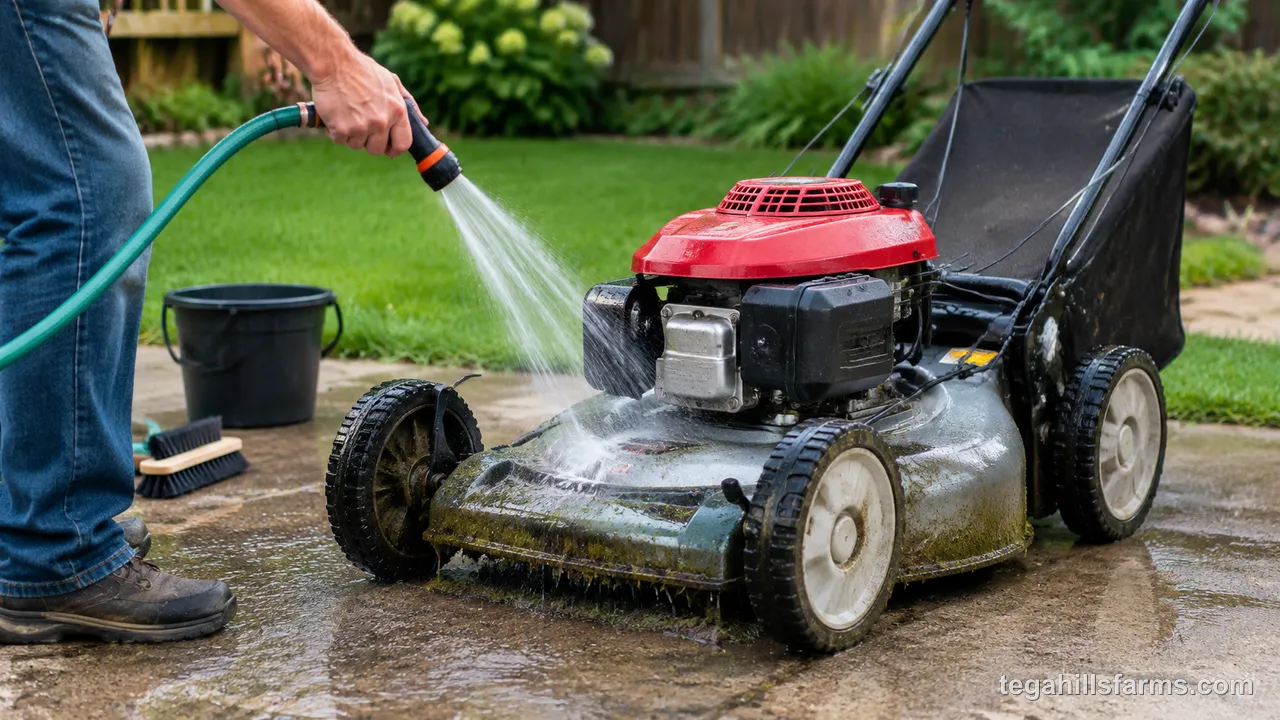
A garden hose is fine for the deck and the outer shell, but the air filter, carburetor, spark plug and any wiring should stay dry, and a hot engine should never be sprayed. The deck is bare or painted steel built to take wet grass, so plain water won’t hurt it. The engine’s air intake leads straight to the carburetor and cylinder, and water drawn in there can keep the mower from starting.
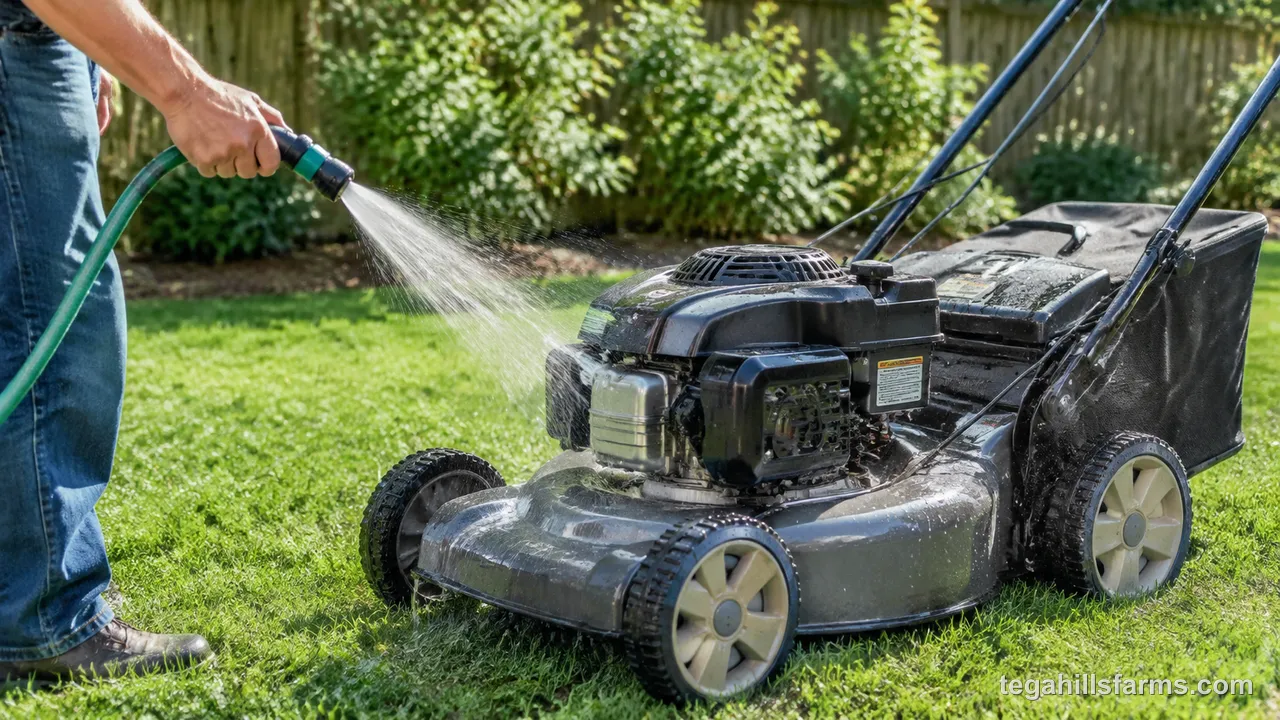
Here is how the parts split:
- Safe to wet: the deck underside, deck top, wheels, handle and plastic covers.
- Lightly wetted with a gentle spray or a damp rag: the engine shroud and the area around the cooling fins.
- Keep dry: the air filter and its housing, the carburetor, the spark plug and its boot, the ignition wiring, and any switches or electrical connectors.
A hot engine and cold water don’t mix because the sudden temperature change can warp or crack metal parts, and spray hitting a hot muffler turns to steam that can burn your hands. Let the engine cool completely first. If you are still deciding which machine to buy, how to choose a lawn mower explains how each type changes the upkeep you sign up for.
What Do You Need Before You Start Cleaning a Lawn Mower?
Good prep means disabling the engine and gathering the right scraping tools before any water reaches the mower, because a mower that can’t fire can’t hurt you or ignite spilled fuel. The tools matter almost as much. A metal scraper used carelessly gouges paint and invites rust. A pressure nozzle aimed at the wrong spot pushes water past seals that a gentle stream would leave alone.
Tools and Cleaning Supplies
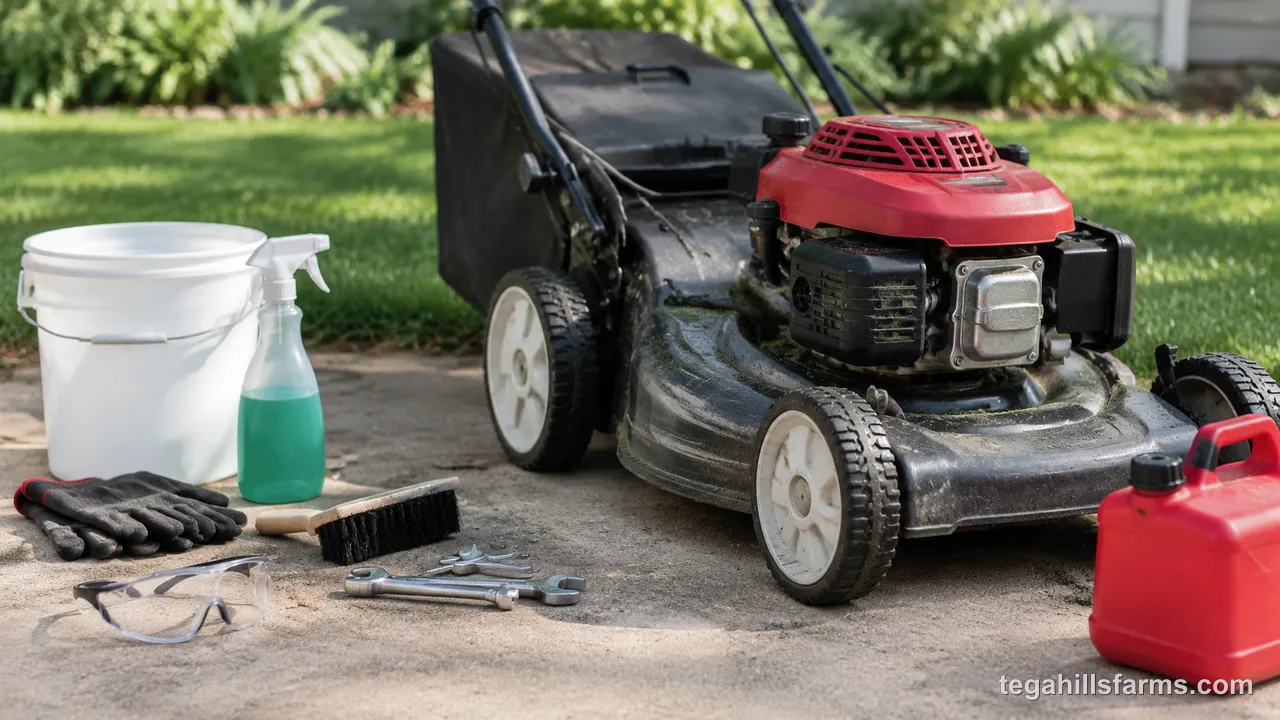
You need a small kit, and most of it is already in a typical garage:
- A garden hose with an adjustable spray nozzle.
- A putty knife or plastic scraper for caked clippings.
- A stiff nylon brush for the deck and the cooling fins.
- Rags, work gloves and safety glasses.
- An engine degreaser for oily surfaces.
Simple Green All-Purpose Cleaner works well on the deck and engine housing because it is water-based and lifts grass stains and light grease without leaving a slick film. Dilute it according to the label for the job. Heavy grease takes a stronger mix than a dusty shroud does.
A penetrating spray lubricant such as WD-40 helps after cleaning, not during. It loosens a stubborn blade bolt and leaves a thin moisture barrier on bare steel. Keep it away from the air filter, the drive belts and pulleys, and the spark plug boot. On a filter it traps dust, and on a belt it causes slipping.
Safety Prep: Spark Plug, Cool-Down and Fuel
Pull the boot off the spark plug before your hands go anywhere near the blade. On a gas mower, turning the blade by hand also turns the crankshaft, and with the plug connected that can be enough to fire the engine. Tuck the boot away from the plug so it can’t flop back into contact.
Let the engine cool until the muffler and cylinder are cool to the touch. A hot muffler burns skin through a glove, and water on hot metal can crack parts or flash into steam.
Fuel level matters because you will tip the mower. A full tank pushes gas out through the cap vent and into the carburetor and air filter once the machine leans over, and that gas can drip onto the engine. Clean the mower when the tank is nearly empty, or run it dry first. The controls and pre-start checks in how to use a lawn mower help here too, since the same habits that keep mowing safe also keep cleaning safe.
How Do You Tilt a Lawn Mower Without Spilling Fuel and Oil?
Tip most walk-behind mowers onto their right side with the spark plug pointing skyward so the air filter and carburetor sit above the oil and fuel. On a four-stroke engine, never angle the spark plug toward the ground.
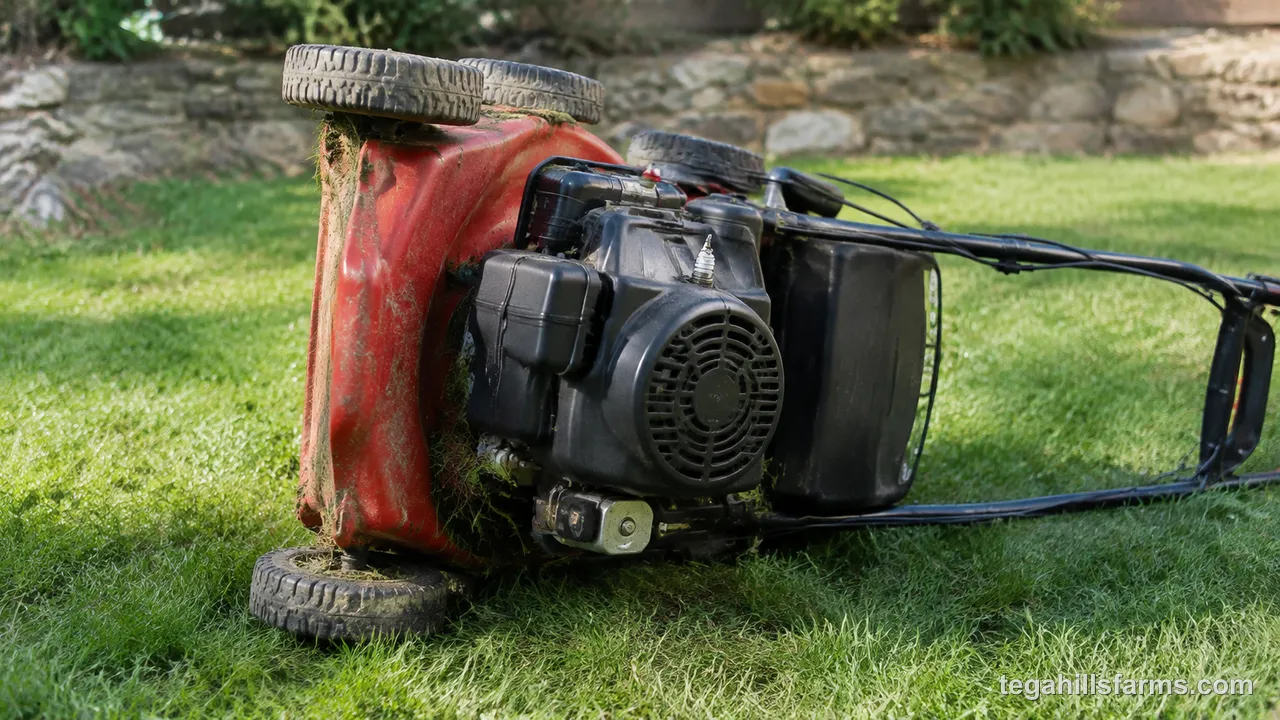
Gravity explains the rule. Oil sits in the crankcase and gas sits in the tank and carburetor bowl. Tip the engine the wrong way and oil can run through the crankcase breather into the air filter or seep past the piston into the cylinder. Gas can drain out of the carburetor into the filter. A mower tipped wrong usually shows it on the next start: thick white smoke, a hard start, or an air filter soaked with oil that has to be cleaned or replaced.
Some engines are laid out differently, so check the owner’s manual if it gives a tilt direction. That direction overrides the general rule.
If the tank is full, run the engine until it is nearly empty or drain the fuel into an approved gas can before tipping. A heavy self-propelled mower or one with a rear bag can be awkward to hold on its side. Get a second person to steady it, or skip tilting and use the washing port if the deck has one.
How Do You Clean the Mower Deck Step by Step?
Packed clippings under the deck are the main cause of rust and poor cut quality, so the deck deserves the most scrubbing time of any part. Wet grass that builds up under the deck holds moisture against the steel and disrupts the airflow that lifts grass blades up to the blade. How you get at the underside depends on whether your deck has a built-in hose fitting.
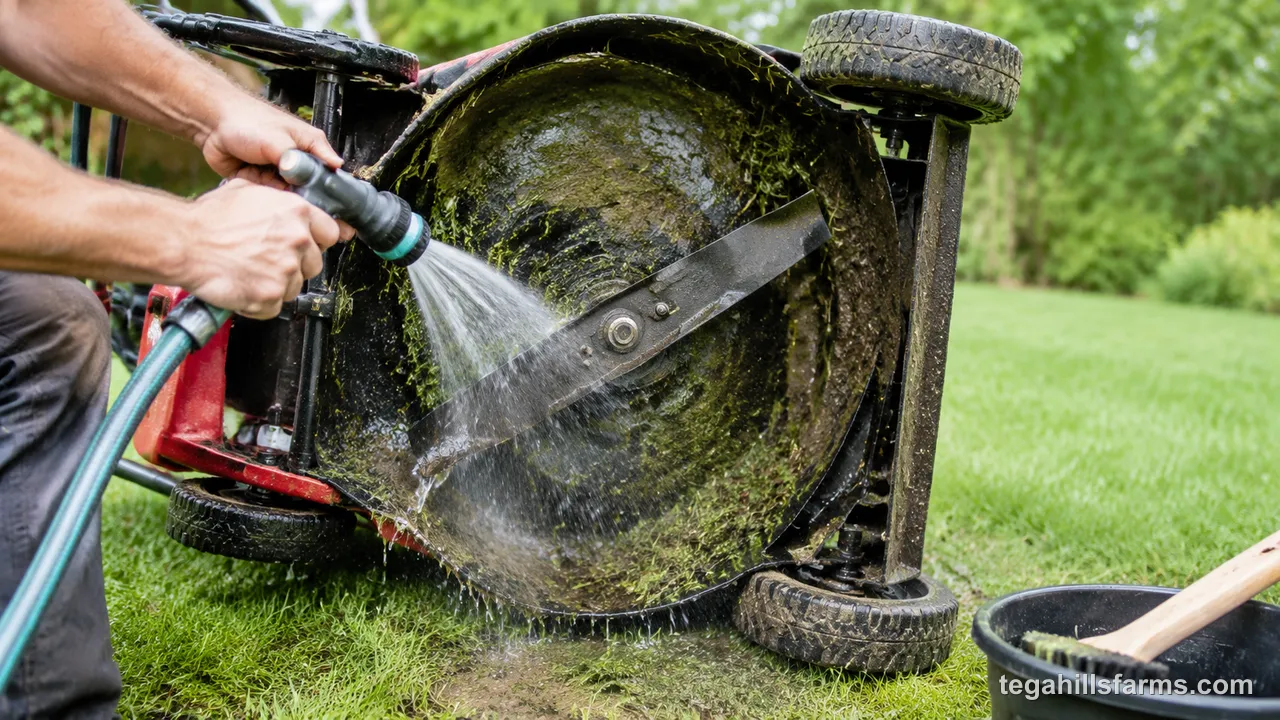
Cleaning the Deck With a Washing Port
A washing port is a hose fitting on top of the deck that sprays water into the cutting chamber. With the engine running, the spinning blade throws that water around the whole underside, so you can clean it without tipping the mower.
Set up in this order. Park the mower on a flat surface, remove the grass bag, and close the discharge chute or fit the mulch plug if the manual calls for it. Set the deck to its lowest height setting so the chamber sits close to the ground and keeps the spray inside. Connect the hose to the port, turn the water on, then start the engine and let it run briefly. Shut the engine off before you turn the water off and disconnect the hose.
Before starting, make sure the hose is routed away from the wheels and that no one is standing near the discharge side. Washing ports are common on many self-propelled walk-behinds and on riding mower decks. The owner’s manual confirms whether yours has one and how the maker wants it used.
Cleaning the Deck by Tilting the Mower
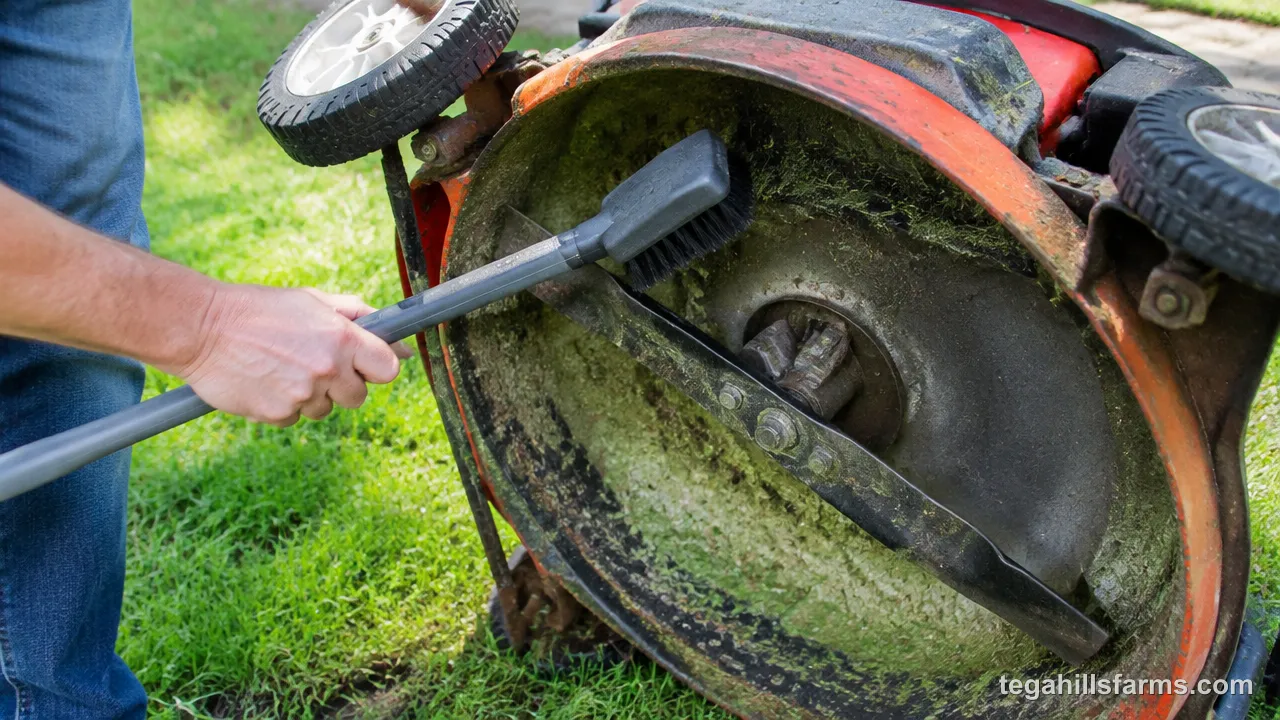
Mowers without a washing port get cleaned by hand. Tip the mower onto the correct side so the underside faces you, then scrape before you rinse. Caked clippings come off more cleanly with a putty knife than with water. Work from the outer edge of the deck toward the discharge opening, and push the scraper along the surface instead of digging into the paint.
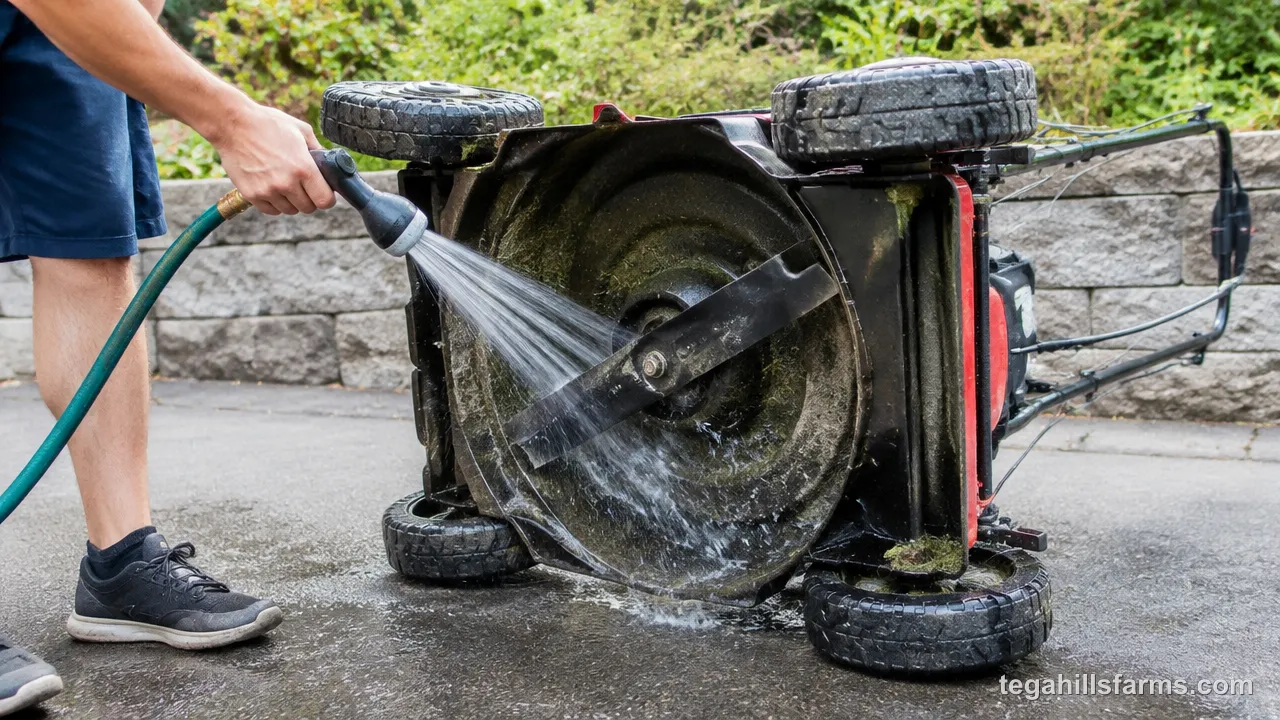
Once the heavy layer is gone, rinse the underside with a moderate spray and scrub with a stiff brush, adding diluted cleaner where grass stains remain. Aim the water so it runs off the low edge of the deck and onto the ground. Spraying up toward the blade spindle sends debris and water toward the engine side and the crankshaft seal.
Let the deck drain and wipe off what’s left before setting the mower back on its wheels. Leave the deck to air-dry fully before the mower goes back into storage, because trapped moisture under a parked mower starts rust faster than anything else.
How to Keep Clippings From Sticking Afterward
Clippings stick when they are wet and when the surface under them is rough. Damp grass packs into a paste, and once rust or scratches give it something to grip, each mowing adds a layer. Mowing when the grass is dry and scraping the deck while clippings are still fresh slow that cycle. If you mulch, the clippings stay in the chamber longer than when bagging, which is one reason mulching vs bagging affects how often the deck needs attention.
A light coat on a clean, dry deck makes clippings slide off. Silicone spray, a deck coating sold for mowers, or a thin film of a penetrating lubricant all work. Keep any of them off the drive belts and pulleys, where they cause slipping, and wipe overspray from the blade so it isn’t flung onto the lawn.
Which Way Should You Clean Lawn Mower Blades?
Cleaning blades in place suits routine upkeep between mowings, while taking them off is worth the extra work for a full seasonal clean and inspection. The in-place method is fast and keeps the blade’s balance and orientation untouched. Removal costs more time and adds a reinstallation step, but it is the only way to reach the hub area and check the blade properly.
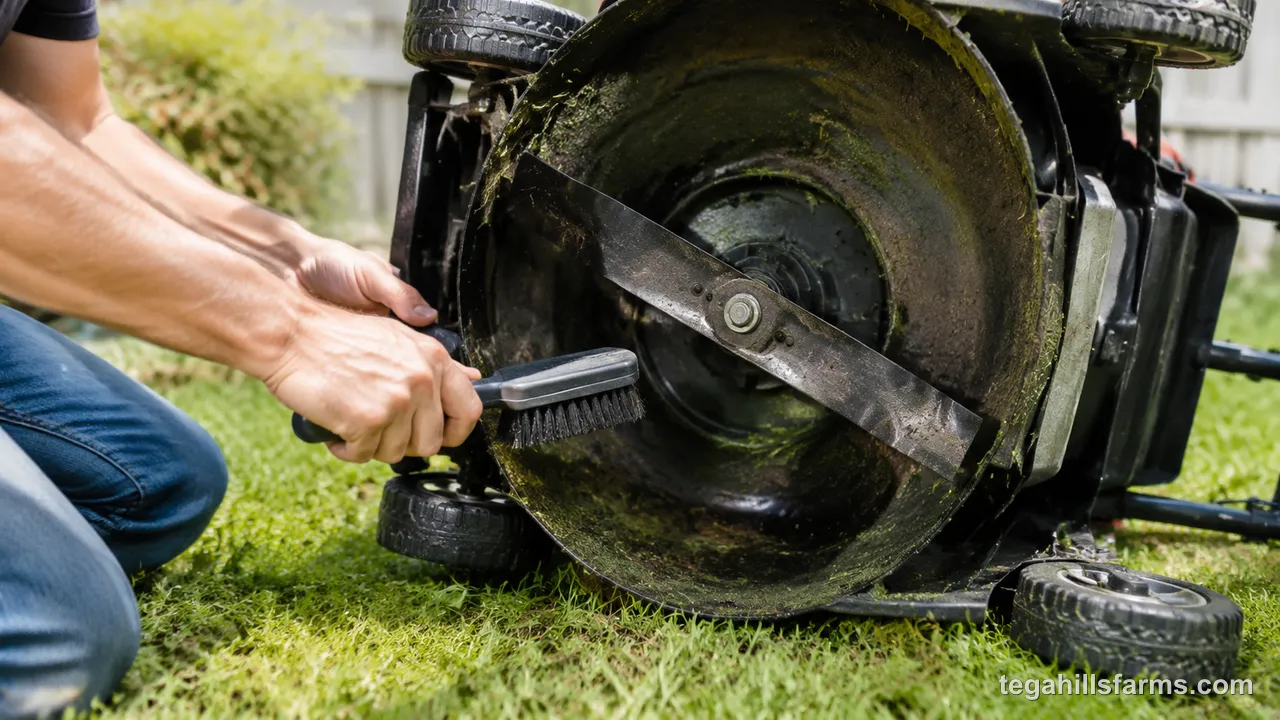
Cleaning Blades Without Removing Them
With the spark plug boot off and the mower tilted correctly, you can clean most of the blade where it sits. Wear heavy gloves, and wedge a block of wood between the blade and the deck so it can’t swing while you work.
Scrape the caked grass off the underside of the blade with a putty knife, then wipe it down with a rag. Rotate the blade to reach both ends, re-wedging it each time. A damp rag with diluted cleaner takes off sap and stains that scraping leaves behind.
This method can’t reach the top of the blade near the spindle hub or the area around the blade bolt, and it won’t reveal a slight bend or a hairline crack. That’s acceptable between mowings, since the goal is to keep grass from building up on the cutting surface. It takes a few minutes and needs no tools beyond a scraper and a rag.
Removing the Blades for a Thorough Clean
Taking the blade off makes sense at the start or end of the season, after the mower hits a rock or root, or when the mower starts to vibrate. Block the blade with a piece of wood and loosen the blade bolt with a wrench. Before the blade comes off, mark which side faces the ground, because a blade reinstalled upside down won’t cut.
With the blade off, you can clean the bolt, the blade adapter and the underside around the spindle, where grass and dirt pack in tightly. Check the blade for bends and cracks by laying it on a flat surface. A bent or cracked blade gets replaced, never straightened, because it can break at speed.
Look at the cutting edges too. Rounded, nicked or flattened edges tear grass, and that is the time to sharpen. How to sharpen lawn mower blades covers filing and balancing. Reinstall the blade with the marked side down and tighten the bolt to the torque listed in the manual.
How Do You Clean a Lawn Mower Engine?
A small engine needs clear airflow and clean fuel to start reliably and run without overheating, and grass and dust work against both. The engine is also the most delicate part of the job. Water in the wrong place stops it from running, so the work leans on brushes, compressed air and degreaser more than on the hose.
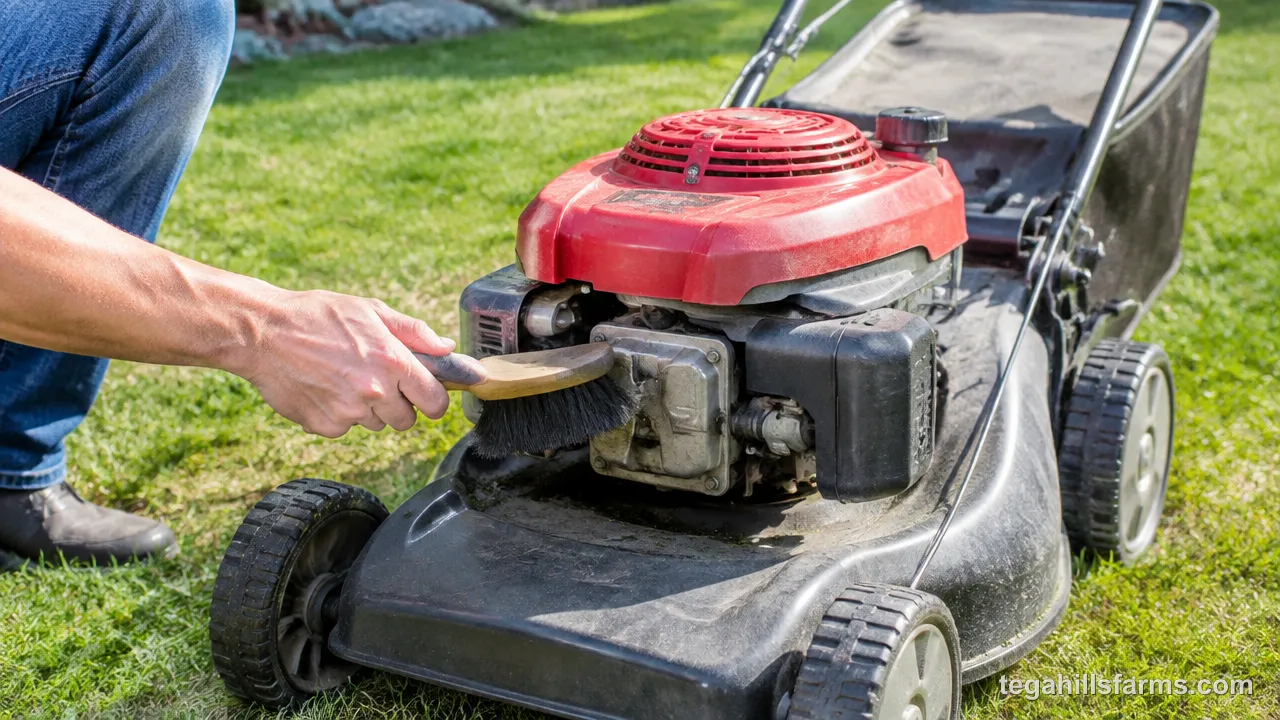
Cooling Fins, Flywheel Screen and Blower Housing
Most mower engines, including Briggs & Stratton models, are air-cooled. The flywheel on top of the engine has fins that pull air in through a screen, and the blower housing, the metal or plastic shroud over the engine, channels that air across the cooling fins on the cylinder.
Grass and dust packed into that path block the airflow. The engine then runs hotter than designed, which thins the oil, wears parts faster and can lead to hard starting or seizing. A mower that loses power on hot days or after long mowing sessions often has clogged fins.
With the engine off and cool, brush debris off the flywheel screen and the outside of the blower housing. For a thorough clean, remove the blower housing, which is usually held on by a few bolts, and brush the cylinder fins. Compressed air helps, but blow debris outward and away from the carburetor, not deeper into the engine.
Degreasing the Engine Without Soaking It
Degreaser loosens the oily grime that brushing leaves behind, but it has to be applied to a cool engine. Work outdoors or in a well-ventilated space, and cover the air filter housing, the spark plug and any exposed wiring with plastic bags secured with tape.
Spray the degreaser generously on greasy, dirt-crusted surfaces and let it sit for 15 minutes. That time lets it break down the oil so it wipes off instead of smearing. Scrub stubborn spots with a brush, then wipe the engine down with rags.
Rinse with a gentle spray or a wet rag instead of a strong jet. Water under pressure gets forced past gaskets and into the air intake, the carburetor and electrical connectors, while a light rinse washes the degreaser off the surface and nothing more. Remove the covers, wipe up any water that pooled near the plug or filter housing, and let the engine dry before starting it.
Paper and Foam Air Filters: Clean or Replace?
A paper filter gets tapped clean, never washed, while a foam filter can be washed and reused. Paper traps dust in its pleats. Tapping it gently against a hard surface knocks out loose debris, but water or solvent breaks down the paper. Replace a paper filter that is torn, oil-soaked, or so packed that light no longer shows through when you hold it up.
Foam filters wash in warm, soapy water. Rinse, squeeze rather than wring, and let the foam dry fully. If the manual says to oil the foam, apply a light coat of engine oil and squeeze out the excess. Some engines use both: a foam precleaner over a paper element.
A clogged filter starves the engine of air, so it runs rich, smokes, loses power and burns more fuel. Check the filter whenever you clean the engine, and clean or replace it at least once a year, more often if you mow in dusty conditions.
When and How to Clean the Carburetor
The carburetor mixes fuel with air in the right proportion before it enters the cylinder. When its small passages gum up, the engine is hard to start, surges, stalls at idle, or runs only with the choke on. The usual cause is gas left sitting in the mower for months, which leaves varnish behind as it evaporates.
Basic cleaning starts with the fuel shut off or drained and the air filter removed. Spray carburetor cleaner into the carburetor throat and over the linkage. If symptoms continue, removing the float bowl at the bottom lets you clean the bowl and the main jet with cleaner.
A carburetor that still runs poorly after that, or one that needs full disassembly and new gaskets, is often better left to a repair shop. The internal parts are small and easy to misplace. Fuel stabilizer added to the tank before storage keeps gas from breaking down and gumming the passages in the first place.
How Often Should You Clean a Lawn Mower?
Clean the deck about once a month during peak mowing season, the engine at the start and end of each season, and the air filter at least once a year. Those intervals cover typical residential use, and most homeowners can tie them to the calendar.
The engine has a second option. If you mow a lot, a thorough cleaning of the cooling fins, blower housing and flywheel area every 25 hours of use replaces the seasonal schedule. Tall or wet grass shortens every interval, since damp clippings pack under the deck and onto the engine faster than dry ones.
The deck gets one thorough cleaning at the very end of the mowing season, before the mower is put away for winter, whatever the monthly routine looked like. The faster your grass grows, the more often you mow, and how often to mow the lawn ties that rhythm to grass type and season, which tells you how quickly buildup will come back.
A layer of wet clippings stuck under the deck holds moisture against bare steel for days after every mowing, and paint chipped by stones gives that moisture a place to start. By the time rust shows on the top of the deck or the engine starts running hot on a summer afternoon, the damage underneath has been building for weeks and a hose won’t fix it.
What Happens If You Skip Cleaning Your Mower?
A neglected mower rusts through its deck, overheats and cuts poorly. Each problem starts small enough to miss. Caked clippings hold moisture against the steel and rust spreads beneath them, first as flaking under the grass layer and later as thin spots or holes near the deck edge and discharge opening.
Clogged cooling fins and a dirty air filter work on the engine. Blocked airflow raises running temperature, and a starved intake makes the engine run rich. The result is hard starting, black smoke, power that fades in thick grass, and parts that wear out early.
Dirty, dull blades tear grass instead of slicing it, and the ragged tips turn brown a few days after mowing. A lawn that looks gray or frayed right after a cut usually points to the blade, not the grass.
Some signs mean the mower needs more than a wash. Rust that flakes away to show holes, a blade that vibrates after cleaning, an oil-soaked filter, or an engine that still won’t start once it’s clean and dry all point to repairs or replacement parts.
How Do You Clean Electric, Battery and Riding Mowers?
The walk-behind gas method assumes a mower you can tip onto its side and an engine that tolerates some water. Battery and corded mowers have electronics that need to stay dry, and riding mowers are too heavy to tip, so both need a different approach.
Electric and Battery Mowers: Keep Water Off the Electronics
Take the battery out or unplug the extension cord before anything else. With no power source attached, the motor can’t start while your hands are near the blade, which does the same job as pulling a spark plug boot on a gas mower.
The motor housing, cooling vents, battery compartment, switches and cord connection stay dry. Water that gets into the motor or battery contacts can cause corrosion or a short. For most of the body, a damp cloth and a soft brush replace the hose. Clean the deck underside by scraping and wiping, with the mower tilted the way the manual shows.
Water resistance varies from model to model, and some manufacturers allow a light rinse of the deck while others rule out any hose use. The owner’s manual has the answer for your mower. Easier cleanup is one of the practical differences people weigh when comparing gas vs battery lawn mowers, since there’s no oil, fuel or air filter to deal with.
Riding Mowers: Deck Washing and Engine Access
A riding mower can’t be tipped, so the deck gets cleaned another way. Many riding mower decks have a washing port that works like the walk-behind version: hose connected, deck lowered, blades engaged briefly. Without a port, raise the front with ramps or a mower lift to reach the underside, or remove the deck for a deep cleaning at the end of the season.
Before working under the mower, set the parking brake, shut off the engine, remove the key and disconnect the spark plug wires. Never tip a riding mower onto its side or back to get at the deck.
The engine is cleaned in place with the same care as a walk-behind engine. Brush the cooling screen and fins, check the air filter, and keep water away from the air intake, the carburetor and the electrical connections. Owner’s manuals from makers such as Cub Cadet, Toro and Gravely show whether your deck has a wash port and how it comes off.
How Do You Prevent Rust After Cleaning a Mower?
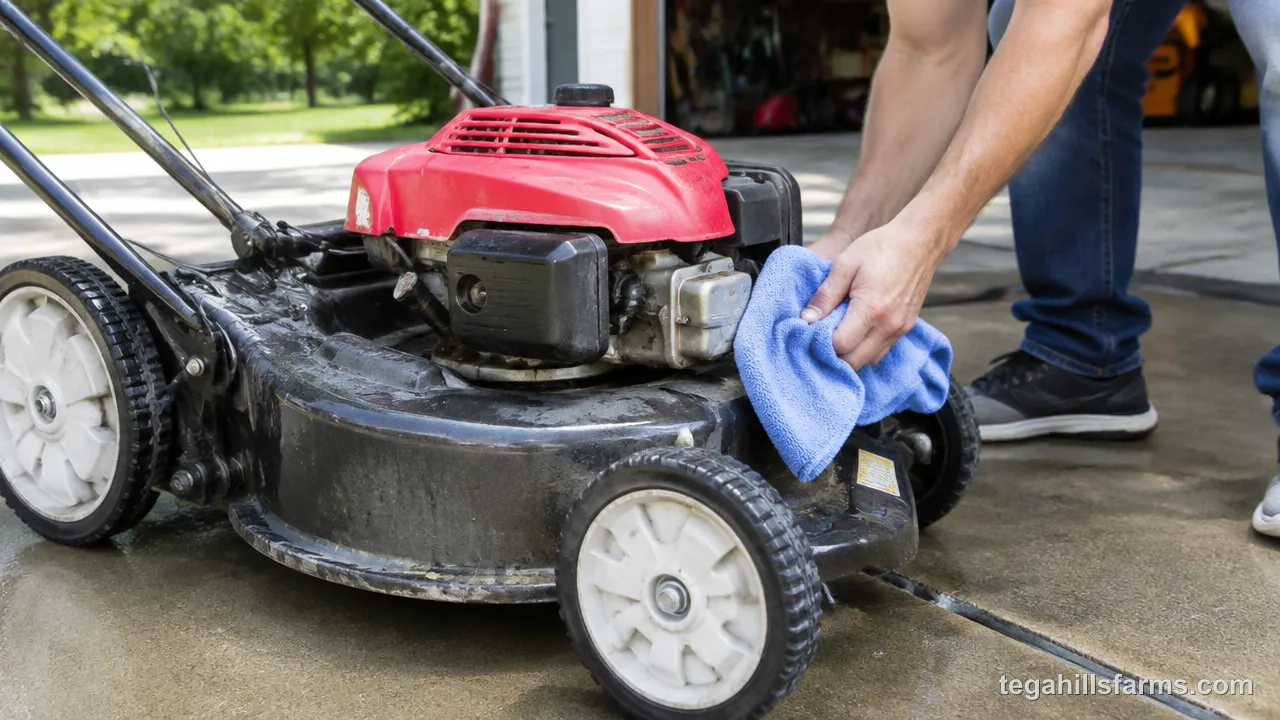
Rust prevention starts with drying the mower completely before it goes into the shed or garage. A clean mower put away wet rusts faster than a dirty one stored dry, because water trapped under the deck has no airflow to evaporate it. Let the mower sit in the sun or a breezy spot, and wipe down the deck underside and any seams where water collects.
Once it’s dry, protect bare metal. Touch up chipped paint on the deck with spray paint made for metal. Then apply a light coat of a penetrating lubricant or silicone spray to bare steel, keeping it off belts and the air filter. That film keeps humid air off the metal through the off-season.
Fuel needs attention before long storage. Add fuel stabilizer and run the engine briefly so treated gas reaches the carburetor, or run the tank dry, whichever the manual recommends. Untreated gas left sitting for months leaves varnish in the carburetor, the same problem that leads to hard starting in spring. The full end-of-season routine, including oil, battery care and where to keep the machine, is in how to store a lawn mower.
Lawn Mower Cleaning FAQ
Is it safe to use a pressure washer on a lawn mower?
A pressure washer is safe on the deck underside if you use a wide fan tip and keep your distance. Keep it well away from the engine, wheel bearings, seals and any electrical parts, because high pressure drives water past them. For most homeowners, a garden hose with a scraper does the job without that risk.
Can WD-40 replace a degreaser for cleaning the engine?
No. A penetrating spray lubricant loosens grime and displaces moisture, but it doesn’t cut heavy grease the way a degreaser does, and the film it leaves attracts dust on a warm engine. Use degreaser to clean, then a light coat of lubricant on bare metal parts of the deck to slow rust.
How long should a mower engine cool before washing?
Wait until the engine has cooled to the surrounding air temperature, with the muffler and cylinder cool to the touch. How long that takes depends on how long the mower ran and how hot the day is. Washing or degreasing earlier risks burns, steam and cracked or warped parts from the sudden temperature change.
Can you clean a snow blower the same way as a lawn mower?
Mostly, yes. The same rules apply: spark plug disconnected, engine cool, no direct spray at the air intake or carburetor, and a degreaser for oily surfaces. The auger housing replaces the deck as the main area to scrape and dry, and fuel needs stabilizer before summer storage. Check the snow blower’s manual for model-specific steps.
Does the spark plug need attention during a cleaning?
The plug wire should come off first for safety, and with the boot off it’s a good time to look at the plug. Heavy carbon, oily deposits or a worn electrode point to a plug that should be cleaned or replaced. Set the gap to the manual’s spec before reinstalling, and keep the plug dry throughout.










Write Your Review
No reviews yet. Be the first to share your experience!