

To sharpen a lawn mower blade, cut the power, take the blade off, clamp it in a vise, and grind only the beveled top edge at its original angle. Then check the balance and bolt it back on with the cutting edge facing the right way. A hand file, a drill attachment, an angle grinder and a bench grinder all do the grinding. They differ in how fast they remove steel and how much control they leave you.
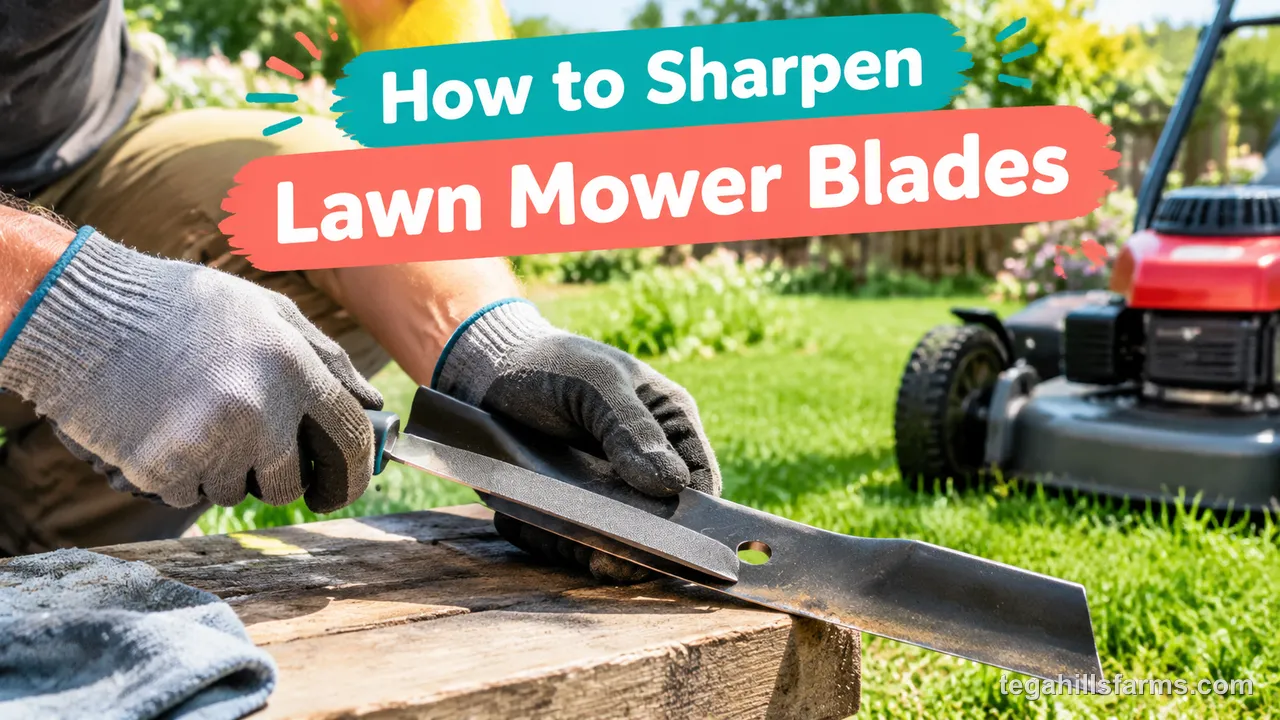
Which tool you pick depends on your skill, how quickly you want the job done, how much heat risk you accept, and how many blades you sharpen in a year. A homeowner with one push mower needs something different from someone keeping a riding mower, a backup push mower and a trimmer in working order.
Most ruined blades come from a few mistakes. Steel gets overheated until it turns soft, a blade goes back on unbalanced and shakes the deck, or a mower fires up while someone’s hand is under it. Each of those is easy to avoid once you know where it comes from.
How Do You Know When a Mower Blade Needs Sharpening or Replacing?
A blade that leaves torn, browning grass tips needs a fresh edge. One with cracks, bends or worn-thin steel has to be replaced. One that still cuts cleanly can be left alone until the next check. Two things settle which of those you’re facing: what the lawn shows after a mow, and what the blade looks like once it’s off the mower. When the blade is past saving and the mower itself is getting old, the guide on how to choose a lawn mower covers what to match to your yard.
What Does a Dull Mower Blade Do to Your Lawn?
A dull blade tears grass instead of slicing it. The tips come out frayed and ragged, then turn brown or grayish a day or two after mowing. From a distance the lawn looks faded even when it’s well watered. You may also see an uneven cut, with stragglers standing up between passes or light streaks where the blade folded grass over instead of cutting it.
The tearing matters because a shredded tip is a bigger wound than a clean cut. The plant loses more moisture through it and takes longer to seal it, and that open tissue is an easy entry point for fungal disease. The damage is worst on grass kept low, because a short plant has less leaf left to recover with. That makes it worth knowing how short to cut grass for your turf type before the next pass.
The engine notices too. A gas mower labors and bogs in thick grass because a blunt edge takes more force to push through each blade of grass.
To confirm it, disconnect the spark plug wire or pull the battery, tip the mower, and look at the edge. Nicks, a rolled lip of metal, or a rounded edge that reflects light along its length all mean the blade needs work.
Should You Sharpen the Blade or Replace It?
Sharpening fixes a dull edge and small nicks. Cracks, bends, missing chunks, deep gouges or a blade worn noticeably thin mean replacement. Any damage that changes the blade’s shape or strength is past what a file or grinder can fix.
A bent or cracked blade is a safety issue as well as a cutting one. It spins at high speed, so a bend throws it out of balance, and a crack can grow until a piece breaks off and gets thrown from under the deck. Hitting a stump, rock or buried pipe is the usual cause. After a hard strike like that, inspect the blade before you sharpen anything.
Repeated sharpening has a cost of its own. Every session removes steel, so the cutting edge creeps back toward the lifted wing of the blade and the body gets thinner. If one end loses more metal than the other, the blade also drifts out of balance. Lay the old blade next to a new one with the same part number. When the edge has worn back visibly or you can’t get it level without heavy grinding, buy the new blade.
For a typical suburban lawn, sharpening at the start of the season and again around midsummer keeps the edge clean. Sandy soil, rocky ground, sticks and heavy mowing all wear an edge faster. The schedule also depends on how often to mow the lawn: a mower that runs every few days through a wet spring loses its edge sooner than one used lightly.
How Do You Remove a Mower Blade Safely?
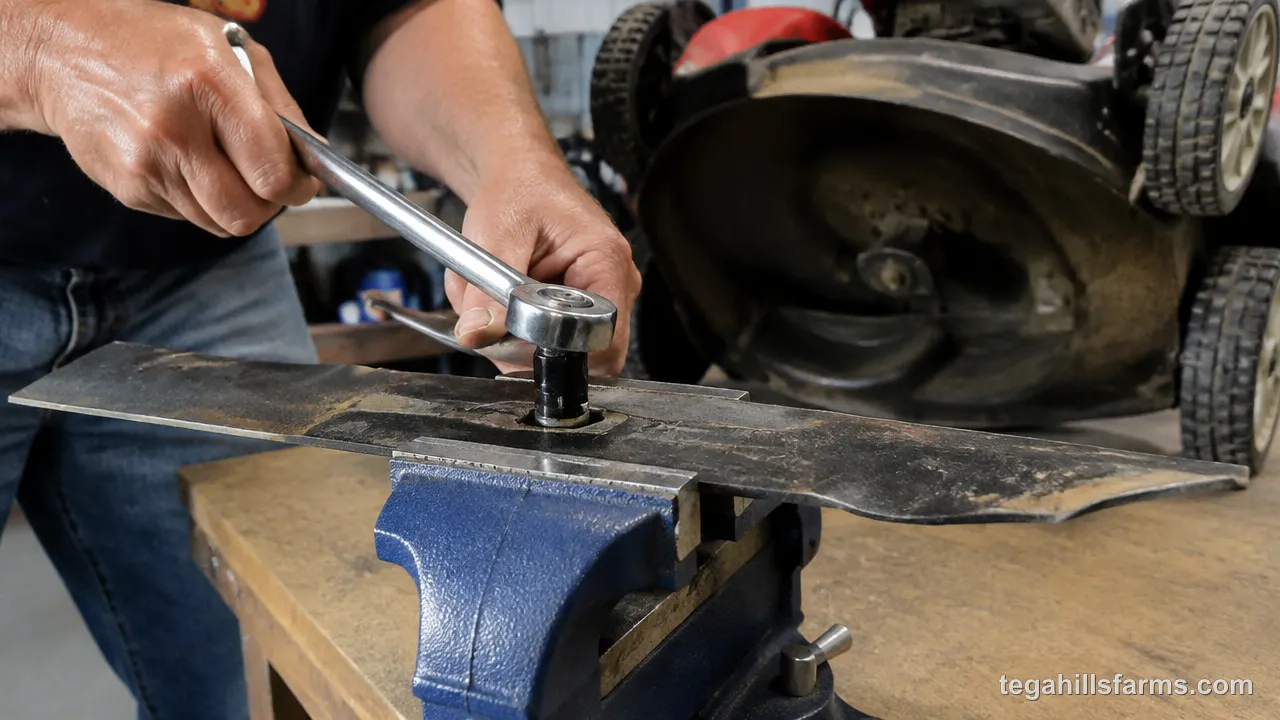
Cutting off the power source and tilting the deck the right way come first, because a blade that cannot spin is the only one that’s safe to put a wrench on. Taking the blade off is also the most reliable way to get a good edge. Clamped in a vise, it holds still, you can work at a comfortable angle, and you can check balance before it goes back on. Each step that follows exists to keep the engine or motor from turning over while your hands are near the blade.
What Tools and Protection Do You Need Before You Start?
You need tools to get the blade off, something to hold it while you work, a way to check balance, and protection for your hands and eyes. Gloves matter even on a dull blade. The edge still carries nicks and burrs, the steel is heavy, and a socket wrench that slips off a tight bolt sends your knuckles straight into it.
For removal and reinstalling:
- A socket wrench sized to the blade bolt
- Penetrating oil such as WD-40 for a stuck bolt, left to soak for about 10 minutes
- A wood block to keep the blade from turning while you loosen the bolt
- A marker or spray paint to mark the underside so the blade goes back the right way
- A torque wrench to tighten the bolt to spec
- A vise or clamp to hold the blade steady
For safety and balance:
- Work gloves and eye protection
- A blade balancer, or a nail in the wall
For sharpening, pick one:
- A hand file: slow, cheap and impossible to overheat the steel with
- A drill sharpening attachment: faster, but with less control
- An angle grinder with a flap disc: fast, suited to damaged edges
- A bench grinder or belt sander: the quickest, and only worth it if you sharpen often
How Do You Take the Blade Off a Gas or Battery Mower?
Start by making the mower impossible to start. On a gas mower, pull the spark plug wire off and tuck it away from the plug so it can’t flop back into contact. On a cordless mower, remove the battery and the safety key. Turning a blade by hand can rotate the crankshaft enough to fire a gas engine, so this step is not optional.
Tilt a gas mower with the carburetor and air filter side facing up. Tipped the other way, oil runs into the air filter and fuel can flood the carburetor. You end up with a soaked filter, a smoky start and sometimes a mower that won’t start at all. Your owner’s manual shows the correct side if the layout isn’t obvious.
If the bolt won’t budge, spray it with penetrating oil and wait about 10 minutes. Wedge a wood block between the blade and the deck so the blade can’t spin. Most blade bolts loosen counterclockwise, but check your manual, because some decks use a reverse thread. Leaning on a reverse-thread bolt the wrong way only drives it tighter.
Before the blade comes free, mark its underside with paint or a marker so you know which face points down when you reinstall it. Then scrape the caked grass off the blade and the inside of the deck. Packed clippings hold moisture against the steel, and the full routine for how to clean a lawn mower covers the rest of the machine.
Can You Sharpen a Mower Blade Without Removing It?
Yes, it’s possible but generally not recommended, and Troy-Bilt advises against it. Working under a tilted deck forces you into an awkward angle, so the bevel comes out uneven from one end of the blade to the other. A grinder throws sparks and metal dust near the fuel tank, carburetor and engine. The blade can rotate under the pressure of the file. And with the blade bolted on, you have no way to check balance, which is often where the vibration in an old mower comes from.
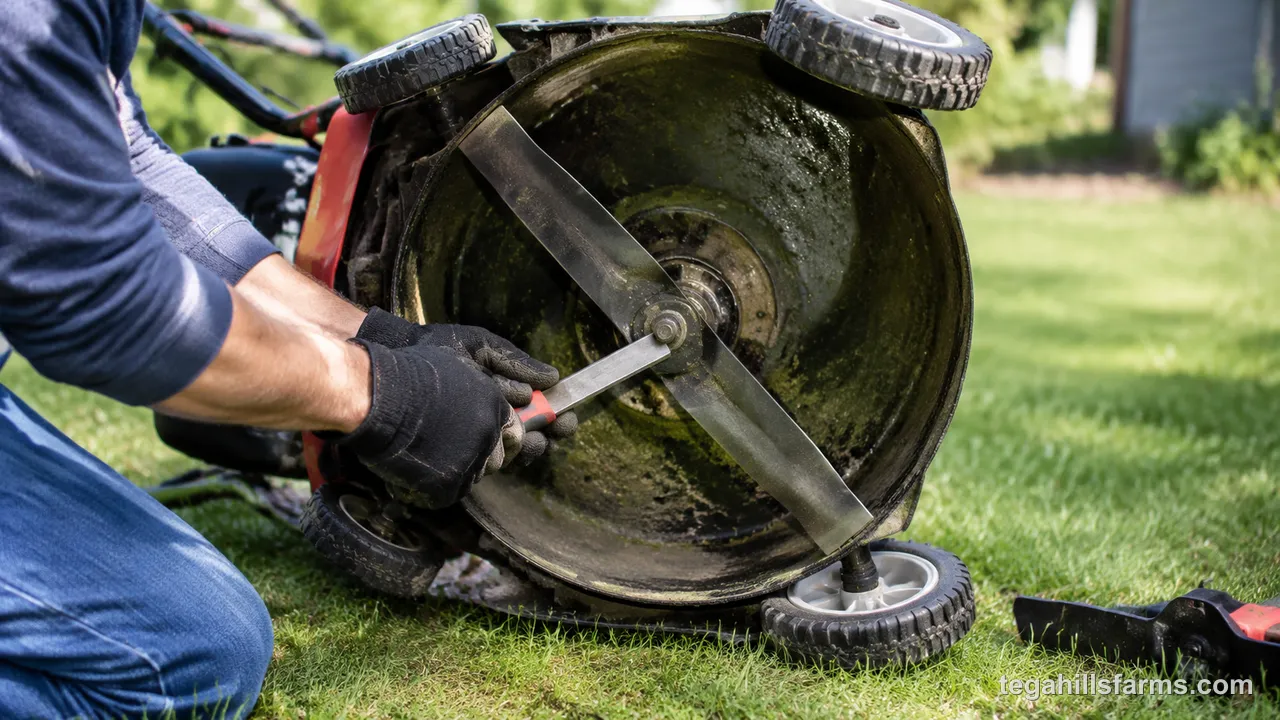
There is one case where it’s acceptable: a quick touch-up with a hand file on a mower that is fully disabled, with the spark plug wire off or the battery out. If the edge is only slightly dull and has no nicks, a few strokes along the existing bevel will get you through a mow. A file throws no sparks and can’t overheat the steel, which is why it’s the only tool that belongs under a deck.
Anything beyond that calls for removal. Once you’ve disconnected the power and tilted the deck, unbolting the blade adds only a few minutes. In exchange you get a clamped blade, a consistent angle and a balance check. I’d take the blade off every time the edge needs real work, because the cut you get afterward is better.
Which Method Works Best: File, Drill, Angle Grinder or Bench Grinder?
A hand file is the right tool for most homeowners with one push mower. Power tools only pay off when speed matters more than control, the edge is badly damaged, or you sharpen several blades a season. The choice comes down to how much skill you bring, how fast you want to finish, and how much risk of overheating the steel you’ll accept. A faster tool takes off more metal per pass, which saves time on a chewed-up edge and costs you precision on a lightly dulled one.
How Do You Sharpen a Mower Blade With a Hand File?
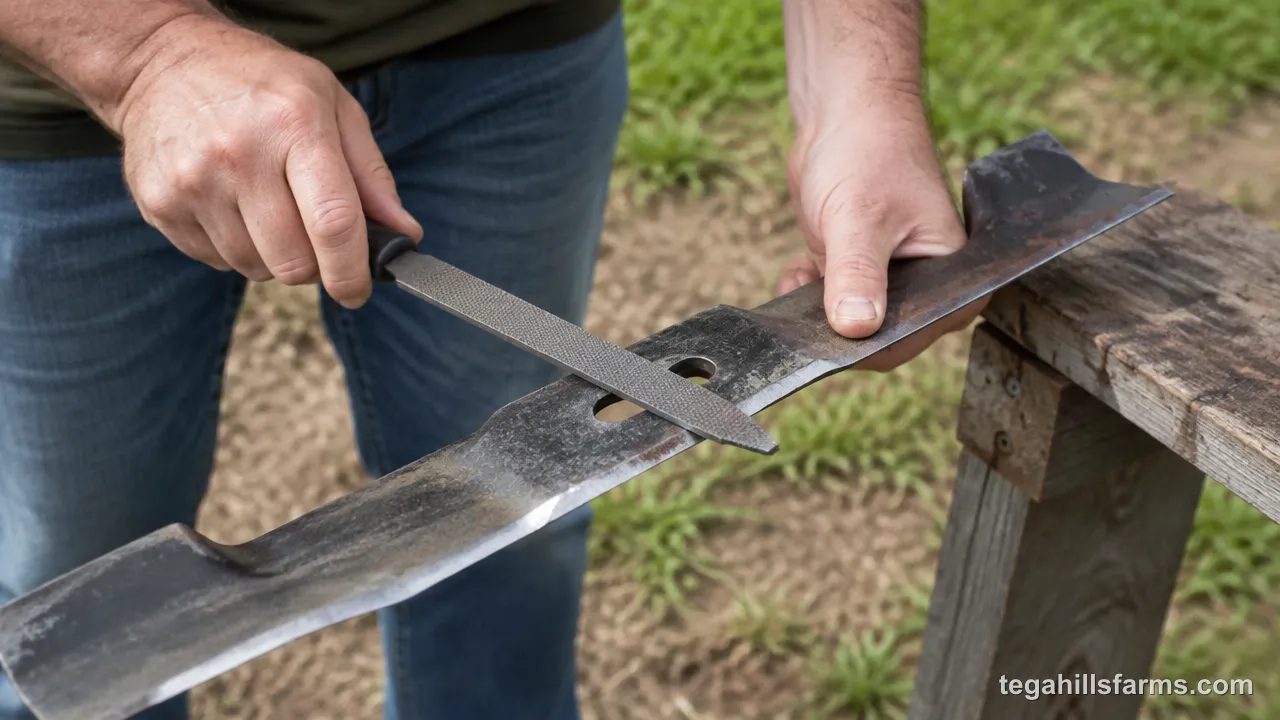
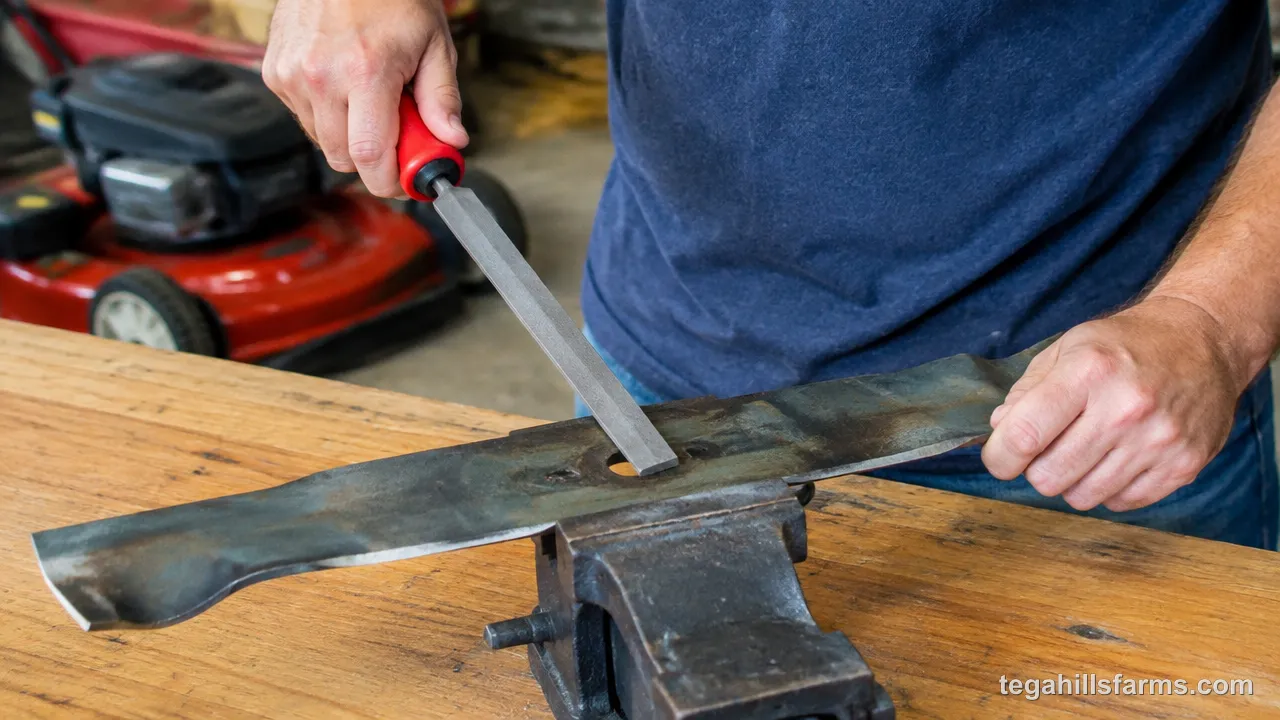
Clamp the blade in a vise with the beveled edge facing up, then push a 10-inch mill bastard file along the existing bevel, working in one direction only. A mill bastard file has single-cut teeth that remove steel steadily without gouging. At that length, each stroke covers the whole cutting edge.
Push the file from the inside of the edge toward the tip and lift it off on the return. A file only cuts on the push stroke, and dragging it backward dulls its teeth. Keep the file flat against the factory bevel so you’re refreshing the angle rather than inventing a new one. Count your strokes on one end and give the other end the same number, so both sides lose about the same amount of steel and the blade stays closer to balanced.
A file can’t generate enough heat to soften the steel, so you never risk ruining the temper. The cost is time. A badly nicked blade takes real effort by hand, while a lightly dulled push-mower blade sharpens up in a short session.
The edge is done when a bright, even band of fresh metal runs the full length of the cutting edge with no dull or rounded spots left. If a thin burr curls over to the underside, one light pass with the file held flat against the underside lifts it off without changing the bevel.
How Does a Drill Sharpening Attachment Work?
A drill sharpening attachment is an abrasive stone, usually set in a guide, that chucks into a corded or cordless drill. The stone spins against the blade edge and removes steel much faster than a file, since it’s cutting continuously instead of one push stroke at a time.
That speed comes with less control. The stone takes metal off quickly, so a wobbly hand or a mismatched angle cuts a new bevel or leaves a wavy edge. Clamp the blade in a vise and line the guide or stone up with the factory bevel before you pull the trigger. A steady hand matters more here than with a file.
The attachment works best for refreshing an edge that has dulled lightly over a season. Deep nicks need more metal removed than the small stone handles well, and grinding them out with it takes long enough that heat builds up. The stone also wears down with use, so expect to replace it.
Keep heat down by making light, repeated passes and pausing between them instead of holding the stone against the edge. Done that way, a drill attachment is a sensible step up from a file for someone who wants a faster job without buying a grinder.
How Do You Use an Angle Grinder on a Mower Blade?
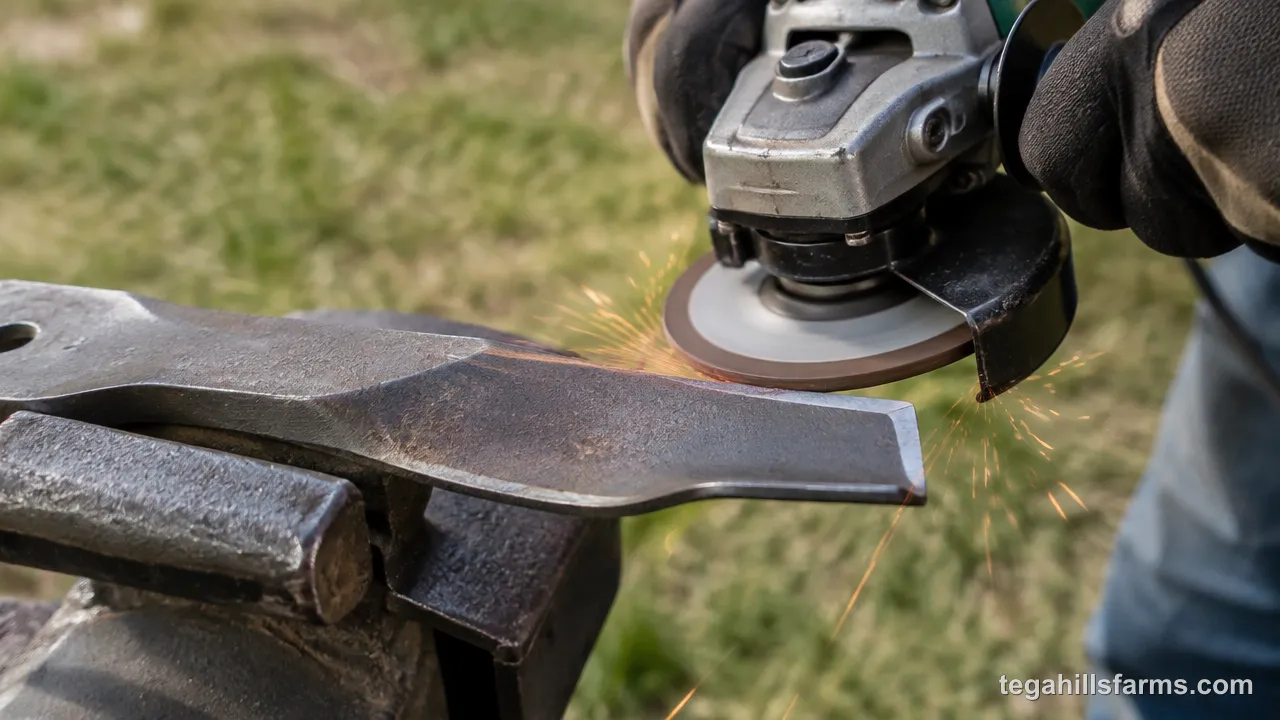
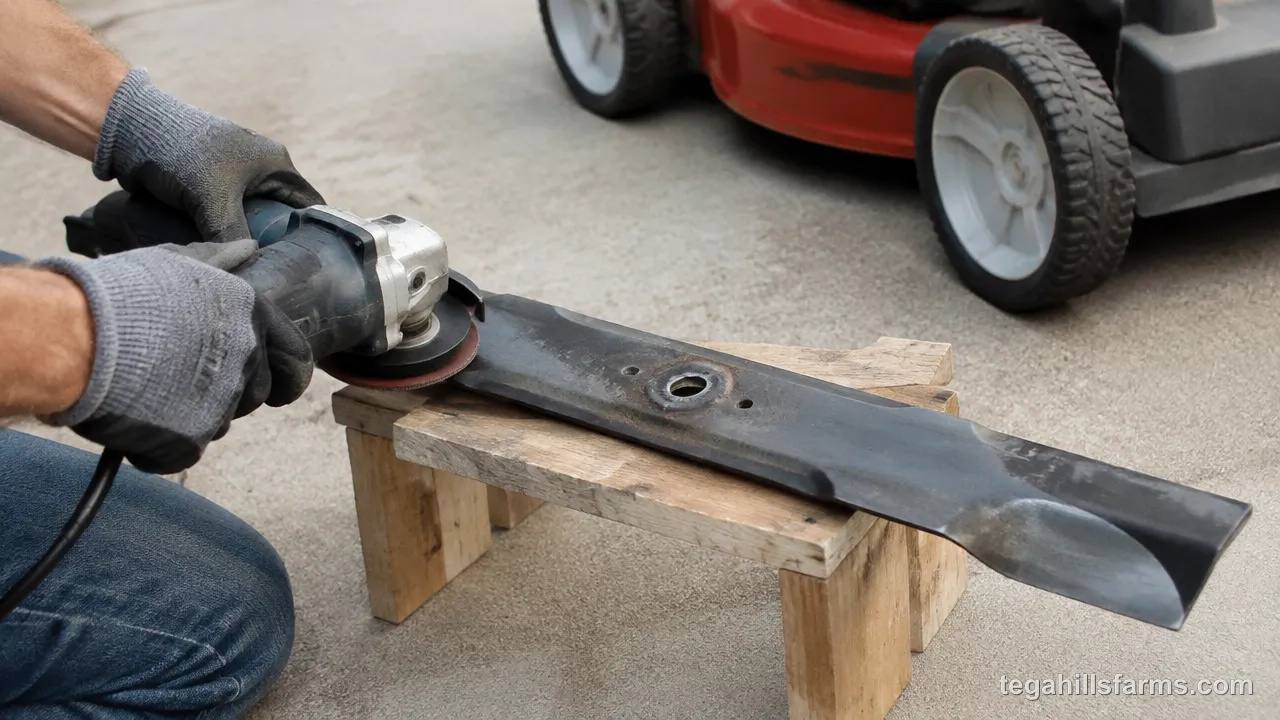
Fit the angle grinder with a 60-grit or 80-grit flap disc, clamp the blade firmly in a vise, and take short, light passes along the bevel. A flap disc is made of overlapping abrasive flaps that grind more smoothly and with less gouging than a solid grinding wheel, which makes it the easier disc to control on a thin edge.
Keep the disc moving along the edge instead of holding it in one spot. An angle grinder removes steel fast, so a pause of a second or two concentrates heat in one place, softens the steel, and cuts a dip into the edge. The same speed makes it easy to take off far more metal than the blade can spare, or to leave one end thinner than the other.
Where the grinder earns its place is repairing damage. A blade with deep nicks from rocks or a heavily worn, rounded edge would take a long session with a file, and the grinder squares it up in a few passes. For a lightly dulled blade, it’s more tool than the job needs.
Wear eye protection and gloves. Aim the spark stream away from your body, away from the mower and away from fuel cans. Before you start, clear sawdust, rags and dry leaves from the floor, because grinder sparks stay hot long enough to start a smolder.
When Does a Bench Grinder or Belt Sander Make Sense?
A bench grinder or belt sander makes sense if you sharpen several blades a season or already own the tool. Both work in reverse from a file. The wheel or belt stays fixed, and you move the blade against it, which makes quick work of a stack of blades.
On a bench grinder, set the tool rest within 1/8 inch (3 mm) of the wheel. That rest supports the blade at a steady angle. A wider gap lets the blade tip down and catch between the rest and the wheel, which can yank it out of your hands. On a belt sander, use a 60-grit or 80-grit aluminum oxide or zirconia belt. Both abrasives cut steel well and hold up to grinding.
Use a light touch, and keep a bucket of water within reach so you can quench the blade every few passes. Stationary tools remove metal faster than anything else on this list, so heat builds quickly and a lopsided edge shows up with very little warning.
That speed is the whole case for them and the whole risk. For one push mower sharpened twice a year, a bench grinder is overkill. For a household running a riding mower and a backup push mower, it turns sharpening into a short job.
What Do You Need to Get Right While Grinding?
Matching the factory geometry and keeping the steel cool decide whether a blade comes out cutting clean or ruined, and those rules don’t change between a file and a grinder. A power tool only makes it faster to get them right or wrong. A blade ground at the wrong angle or overheated keeps that damage no matter how sharp it looks when you finish.
Which Side of the Blade Do You Sharpen, and at What Angle?
Sharpen only the beveled cutting edge on the top side of the blade, the side that faces the deck when the blade is mounted. Never grind the flat underside. The bevel is what forms the edge, and taking metal off the bottom changes the blade’s geometry and how it meets the grass.
Most rotary mower blades leave the factory with a bevel between 30 and 45 degrees, and 30 degrees is the most common. You don’t need to measure it. The existing edge is your guide, and the job is to remove a thin layer of steel while matching the angle that’s already there. Coloring the bevel with a marker shows you exactly where the file or disc is touching. If the ink comes off only at the very edge or only at the back of the bevel, adjust your angle until it comes off evenly.
Resist the urge to go razor sharp. A mower blade cuts by speed, not by a fine edge, so it only needs to be about as sharp as a dull knife. A razor edge is thin, so it chips or rolls the first time it hits a root, a stick or a pebble, and you’re back to a ragged cut within a few mows. A moderately sharp edge has more steel behind it, so it holds up to that abuse and stays useful much longer.
How Do You Avoid Overheating and Ruining the Steel?
Overheating draws the temper out of the blade steel. The edge turns soft, dulls quickly and won’t hold the sharpness you just put on it. The warning sign is color: steel that turns straw yellow or blue at the edge has gotten too hot.
Power tools cause this almost every time it happens. A grinder or sander concentrates friction at one point of a thin edge, and that spot heats far faster than the thicker body of the blade can pull heat away. The fix is to make light passes, keep the tool moving, and stop often to let the blade cool. With an angle grinder, bench grinder or belt sander, dunk the blade in a bucket of water every few passes. If the steel is too hot to touch, it’s past the point where you should have quenched it. A hand file is the safest option because it simply can’t produce that much heat.
A blade that has already blued still cuts. The softened steel just loses its edge sooner, so expect more frequent touch-ups. Replacement makes sense when the discoloration covers a large stretch of the edge, the edge folds or chips soon after sharpening, or you’d have to grind past the blued zone and remove so much metal that the blade ends up thin and unbalanced.
How Do You Balance and Reinstall the Blade?
A level blade bolted on with the cutting edge leading is what turns a fresh edge into a clean cut. A blade that’s out of balance shakes the whole mower, and one mounted upside down can’t cut or lift grass at all. Both problems come from a few minutes skipped at the end of the job, and both cost more to fix than the sharpening saved.
How Do You Check and Fix an Unbalanced Blade?
Hang the blade through its center hole on something thin and level and watch whether one end drops. A nail driven into a wall stud works. So does a screwdriver shaft held level in a vise, or a cone-style blade balancer that seats the center hole on a point. A balanced blade sits level or settles slowly. An unbalanced one swings its heavy end down right away.
To fix it, grind a little metal off the heavy end, working on the end of the blade rather than taking it all from the cutting edge. Grinding only the edge to fix balance thins the edge on one side and changes how that end cuts. Take off a small amount, rehang the blade, and repeat until it sits level. Several small passes are better than one big one, because overshooting just makes the other end heavy.
Balance matters because the blade spins at high speed. A small weight difference turns into a constant shake that the mower absorbs through the spindle on a riding deck or the crankshaft on most push mowers. Over time that vibration wears the bearings, loosens bolts across the deck and handle, and makes the mower louder and harder to control.
How Do You Reinstall the Blade the Right Way?
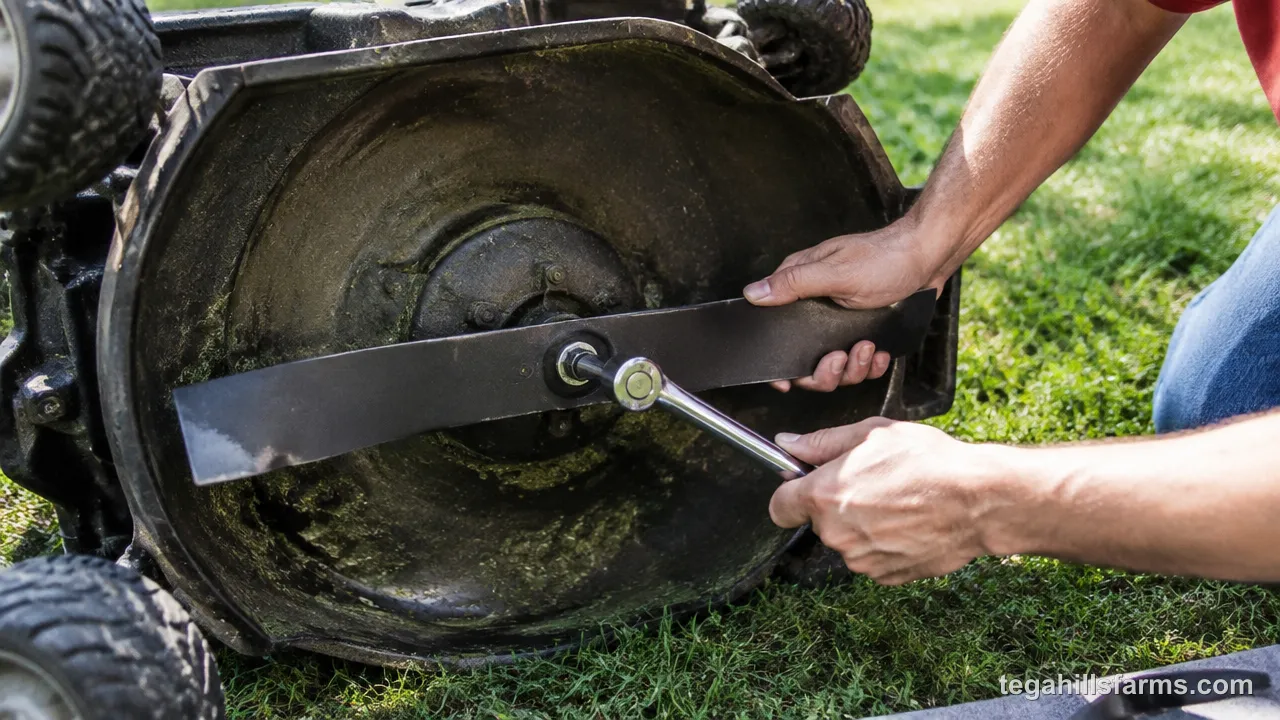
Line up the paint mark you made during removal so the marked underside faces the ground again. That puts the sharpened edge leading in the direction of rotation. An upside-down blade spins with its dull back edge forward, so it beats the grass flat instead of cutting it.
Put the washers, adapter and any spacers back in their original order. On many mowers the adapter locates the blade on the shaft, and a part left out or reversed lets the blade sit crooked or shift. Tighten the bolt with a torque wrench to the spec in your owner’s manual. A loose blade can slip on the adapter or, in the worst case, work free while spinning. An overtightened bolt strips threads, stretches the bolt or cracks the adapter, and you’ll only find out the next time it won’t come off.
Twin-blade riding decks need one more check. Their blades overlap, and on many models the tips have to meet within 1/8 inch of each other. Turn the blades slowly by hand to confirm the tips clear each other at the spec in your manual. If the gap has grown past it after repeated sharpening, it’s time for new blades.
Finally, reconnect the spark plug wire or put the battery back in, start the mower on open ground, and listen for vibration before cutting. If you’re getting reacquainted with the machine, how to use a lawn mower covers the start-up and the first pass.
Is It Worth Sharpening Blades Yourself or Paying a Shop?
Paying a shop makes sense with one mower and no tools, since sharpening typically runs $5 to $20. Doing it yourself pays off once you own several machines or the tools are already in your garage. Most hardware stores and small-engine shops, including many Ace Hardware and True Value locations, sharpen blades as a counter service.
The shop price is only part of the cost. You have to remove the blade, drive it in, and often wait a few days during the mowing season while it’s in the queue. Doing it at home means buying a vise, a file or grinder, a balancer and a torque wrench if you don’t already own them. That outlay is easy to justify across several mowers and years of upkeep, and hard to justify for one blade a year.
A spare blade changes the math either way. With a second blade on hand, you can swap it on in minutes, keep mowing, and sharpen the dull one whenever it suits you, whether at your bench or at the shop without waiting.
Hire it out if you have one mower, no vise or grinder, or doubts about getting the balance right. Do it yourself if you keep several machines, already do your own oil changes and plug swaps, and have the tools on the shelf. That’s the route I’d take, because the work fits into the same routine.
When you use a shop, ask whether balancing is part of the service. A shop that sharpens without balancing hands you a sharp blade that still shakes the deck. Hang the returned blade on a nail before you bolt it on.
Twin-blade riding decks put two blades side by side with overlapping paths, so a small difference in how each one was sharpened shows up as a strip of taller grass right where they meet. A blade that lost more steel than its partner also weighs less, so the deck vibrates even when each blade passed a balance check on its own, and the result is a streaky lawn and spindle bearings that wear out early.
How Does Sharpening Change for Riding Mowers, Mulching Blades and Battery Mowers?
The file or grinder work stays the same across these three cases. What changes is what you check before and after. Blade size, blade shape, deck layout and the power source each add a step that a standard push-mower blade doesn’t need.
What Is Different About Sharpening Riding Mower Blades?
Riding mower blades are longer and heavier, so balance matters more. The extra length means a small weight difference at the tip creates a bigger shake at speed, and that shake goes straight into the spindle bearings and the deck.
Before removing anything, mark each blade and note which spindle it came from. Most twin-blade and triple-blade decks use identical blades, but returning each one to its own position keeps wear patterns matched and makes the paint marks easier to follow when you reinstall.
Sharpen every blade on the deck to the same standard. Use the same tool, the same angle and the same stroke count, and balance each one individually. If one blade is much sharper than its neighbor, the two cut grass to different heights, which leaves a visible ridge where their paths overlap.
When the blades go back on, rotate them by hand and check the tip-to-tip clearance against your manual’s spec. Blades sharpened back too far, or mounted in the wrong positions, can leave a gap wide enough to miss a strip of grass. In the worst case, overlapping tips come close enough to strike each other while spinning.
How Do You Sharpen a Mulching Blade?
A mulching blade has a curved profile and a longer cutting surface that wraps further along the blade than on a standard blade. Its main cutting edge is sharpened the same way: clamped in a vise, worked only on the top-side bevel, and matched to the factory angle.
The curves and any raised or baffled sections are different. Leave them alone. Their shape moves air and keeps clippings circulating under the deck so the blade can cut them several times before they drop into the lawn as fine mulch. Grinding those areas changes the airflow, and the blade then leaves clumps on the grass instead of fine clippings.
Do check the curved sections for wear while the blade is off. Sand and grit erode the curves over time, and a curve worn thin or eaten away near the wing means the blade no longer mulches well even if the main edge is sharp. That wear can’t be ground back into shape, so a blade with it should be replaced. Balance a mulching blade the same way as any other, taking the correcting metal from the end rather than the curves.
Do Battery and Electric Mower Blades Need the Same Care?
Yes, the blade itself gets the same treatment. Battery and corded mowers use the same kind of steel blade, and you sharpen, balance and reinstall it exactly as you would on a gas mower. The difference is in shutting off power. Remove the battery and the safety key from a cordless mower, or unplug a corded mower at the outlet, before your hands go anywhere near the deck. An electric motor reaches full speed instantly, so there’s no pull-start delay to warn you.
Blade condition matters more on a battery mower than most owners expect. A dull blade forces the motor to work harder to push through grass, which draws more current from the pack. That shortens runtime per charge, so a mower that used to finish the yard on one battery may start dying partway through. A sharp blade is the cheapest way to get that runtime back.
Balance matters for the same reason it does on a gas engine. An unbalanced blade vibrates the motor shaft and its bearings, which wears them early on a motor that’s sealed and usually costly to service.
Which Sharpening Mistakes Leave a Blade Worse Than Before?
The mistakes that do the most damage are grinding the blade too thin or too sharp, changing its angle, grinding it unevenly, mounting it the wrong way, and setting the bolt wrong. Each one can leave the blade in worse shape than the dull blade you started with.
- Too thin or too sharp: a razor-thin edge chips on pebbles and rolls on roots, so it goes dull faster than a moderately sharp one. A body ground too thin can bend on impact.
- Changing the original angle: a steeper bevel weakens the edge, and a flatter one cuts poorly. Either way the blade wears unevenly from that point on.
- Uneven grinding: removing more steel from one end throws the blade out of balance, and the vibration wears spindle and crankshaft bearings.
- Upside down or backward: the blade leads with its back edge and the lift wing faces the wrong way, so it can’t cut or lift grass and tends to scalp the lawn in uneven spots.
- Bolt too loose or too tight: a loose bolt lets the blade shift or come off, and an overtightened one strips threads or cracks the adapter.
Care between sharpenings decides how long the edge lasts. Wipe the blade clean after mowing, give it a light coat of oil before long storage, and keep the mower somewhere dry. Rust pits the edge and eats into the steel. The same habits that cover how to store a lawn mower over winter keep a fresh edge from rusting before spring.
Mower Blade Sharpening FAQ
How often should you sharpen a mower blade in one season?
For a typical lawn, sharpen once at the start of the season and again around midsummer. Sandy soil, rocky ground, sticks and frequent mowing wear the edge faster, so check it whenever the grass tips start looking torn or brown a day after you mow.
How many times can a mower blade be sharpened before it needs replacing?
There’s no fixed count. Replace the blade when the edge has worn back toward the wing, the steel is noticeably thinner than a new blade’s, or you can’t get it to balance without heavy grinding. Cracks, bends or missing chunks mean replacement right away.
What does a shop charge to sharpen a mower blade?
Most hardware stores and small-engine shops charge a modest fee per blade. Before you hand one over, ask whether balancing is included. A sharp blade that hasn’t been balanced still shakes the deck, so hang the returned blade on a nail to confirm it sits level.
Is a blade with blued or straw-colored steel still usable?
Yes, but the overheated section has lost hardness, so it dulls sooner and needs more frequent touch-ups. If the discoloration covers a large stretch of the edge, or the edge chips or folds soon after sharpening, replace the blade rather than keep grinding it.
Can you sharpen a mower blade with just a hand file in a pinch?
Yes. A hand file works on any steel mower blade and can’t overheat it. Clamp the blade, push the file along the existing bevel in one direction, and give both ends the same number of strokes. It’s slower than a grinder, but the result is just as clean.







Write Your Review
No reviews yet. Be the first to share your experience!