

Installing a rain barrel comes down to four jobs done in order. First, set the barrel on a level, raised base beside a downspout. Next, route roof water into it with either a cut downspout and elbow or a diverter. Then fit a spigot near the bottom, and finally run an overflow hose that carries extra water away from your house. With a hacksaw, a level and a few fittings, the whole job fits comfortably into an afternoon.
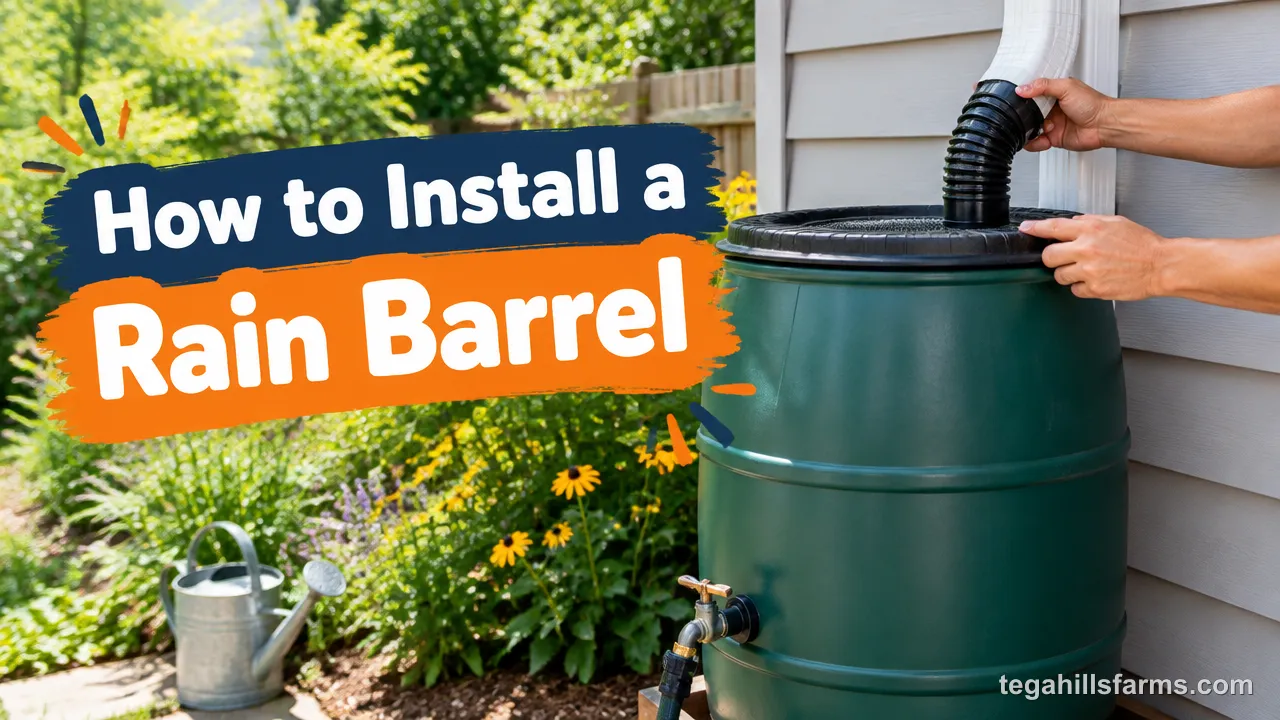
A few choices shape the rest of the setup: where the barrel sits, how high you raise it, and whether your downspout feeds it directly or only until it’s full. Each one affects how easily water reaches your vegetable beds, how much pressure you get at the hose, and where storm water goes once the barrel can’t hold any more.
The real risks are practical ones. A barrel can lean and tip once it fills, overflow can soak the soil against your foundation, mosquitoes can breed in open water, and a frozen barrel can crack over winter. Each of these traces back to an installation detail that is easy to get right the first time and tedious to fix later.
What Do You Need Before Installing a Rain Barrel?
You’ll need a barrel with a spigot and overflow port, a diverter kit or downspout elbow, a hacksaw, a level, and a sturdy base of bricks, cinder blocks or 4×4 timbers.
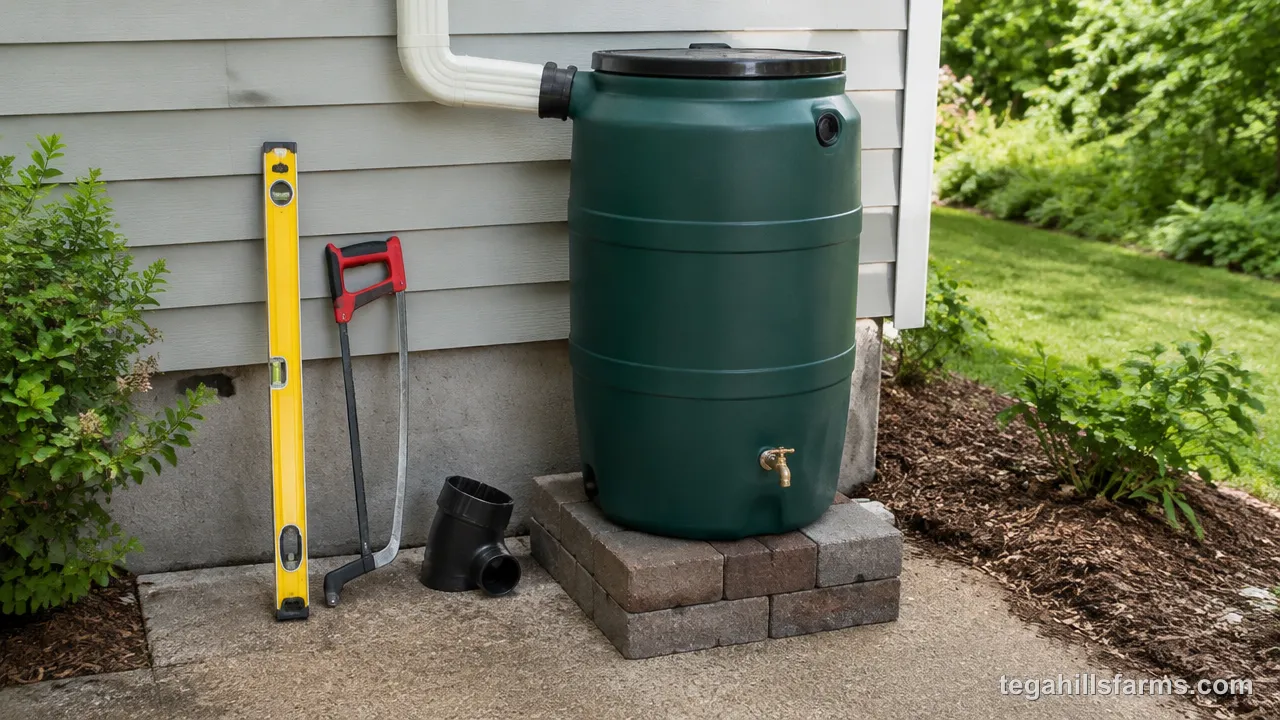
A tape measure, a drill, thread tape and a length of hose for the overflow round out the kit. Before you buy any fittings, measure the width and shape of your downspout, because diverters and elbows are sized to match it. A part that doesn’t fit forces a second trip to the store with your downspout already cut open.
That short prep step heads off the three problems that trip up most first installs:
- A soft or uneven base lets a full barrel tip.
- An overflow with nowhere planned to go leaves water pooling by the foundation.
- Fittings bought without measuring don’t fit the downspout.
Check what your downspout is made of while you’re out there, since that decides how you’ll fasten the new piece. Aluminum downspouts join with sheet-metal screws. Vinyl and PVC downspouts take PVC cement.
If you haven’t picked your barrel yet, it helps to read up on how to choose a rain barrel so the size, spigot and inlet match the setup you’re about to build.
Where Should You Put the Rain Barrel and What Should It Sit On?
The downspout, the slope of the ground and the distance to your beds decide placement together, and the base decides whether a full barrel stays upright.
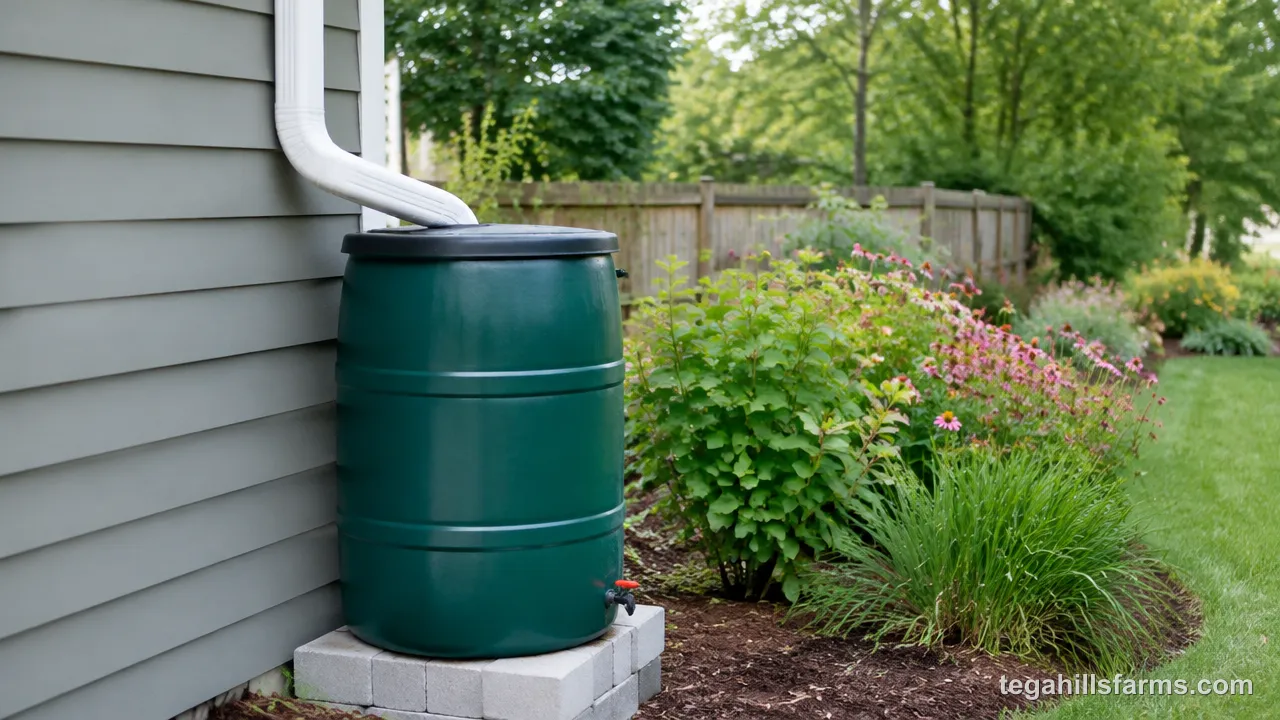
These two decisions come before any cutting, because the downspout cut is measured from the barrel standing on its finished base. A full barrel can weigh hundreds of pounds, so a spot that looks fine while the barrel is empty can sink or lean after the first good storm. Capacity changes how much weight the ground has to carry, so it’s worth knowing what size rain barrel you need before you settle on a corner of the house.
How Do You Pick the Best Spot Near the Downspout?
The best spot is a downspout close to your garden beds, with firm, level ground beneath it and enough room for the barrel plus space to reach the spigot. A barrel near the beds saves you from hauling watering cans across the yard. It also keeps a soaker hose short, which matters because gravity gives you very little pressure to push water through a long run.
Look at how the ground slopes before anything else. It should fall away from the foundation, so that drips from the spigot and the occasional overflow drain toward the yard instead of soaking the soil against your house. Soft, freshly dug or mulched soil is a poor choice. A full barrel presses down hard and slowly, and loose ground compresses unevenly under one side.
Check the spot with a level laid on a straight board across the ground, in two directions. Do the same again once the base is built. Even a slight tilt grows worse as the barrel fills. A barrel that tips can fall onto a child, a pet or your seedlings, so a flat, stable surface is a safety matter as much as a tidiness one.
How High Should You Raise the Barrel, and What Do You Put Under It?
Bricks, cinder blocks or 4×4 timbers make a sturdy base. Raising the barrel on them gives you gravity pressure at the spigot, which is the only pressure a rain barrel has. As a rule of thumb, about 2 feet of height gives roughly 1 pound of water pressure. Even 4 to 6 inches of lift helps, because it makes room for a watering can under the spigot and lets a garden hose drain downhill toward your beds instead of sitting level with the barrel.
Build the base wider than the barrel’s footprint and check it for level before the barrel goes on. With a full barrel weighing hundreds of pounds, any rock or gap in the base becomes a pivot point. Cinder blocks laid flat on tamped gravel or on pavers hold their shape far better than blocks set on bare soil.
Height comes with a trade-off. A taller stand improves flow to a soaker hose, but it also raises the barrel’s center of gravity. On a narrow base, that makes a heavy, top-loaded barrel easier to tip. For most vegetable gardens, I’d rather have a modest, broad stand that never moves than a tall one that needs propping up.
How Do You Connect the Barrel to the Downspout?
Roof water reaches the barrel through either a cut downspout fitted with an elbow or a diverter. The difference is where the water goes once the barrel is full.
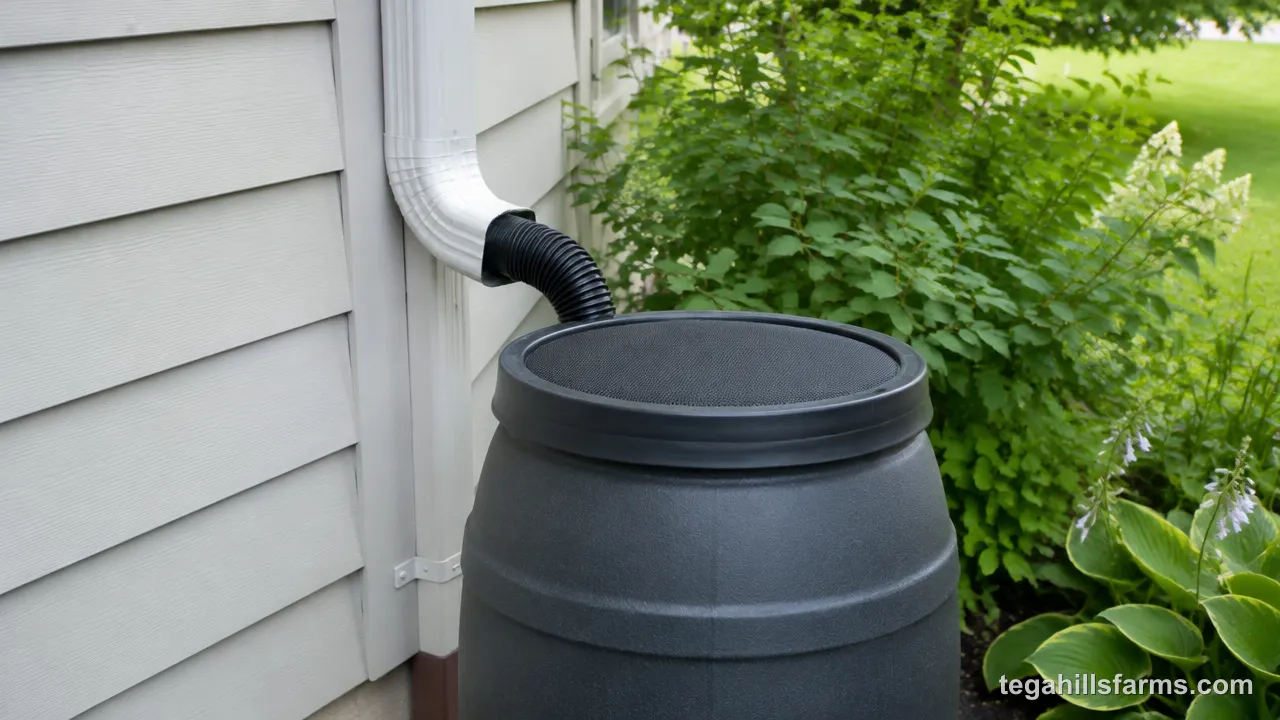
That difference matters most during heavy storms, when a roof sheds far more water than one barrel holds. With a direct cut, every drop heads for the barrel, so its overflow carries the full load. A diverter hands the surplus back to the downspout. Understanding how rain barrels work makes it easier to judge which approach suits your roof, your soil and how much attention you want to give the barrel after each storm.
How Do You Cut the Downspout and Fit an Elbow?
Mark the downspout so the elbow’s outlet will land over the barrel’s inlet, cut it with a hacksaw, then fit the elbow so it points down into the barrel. The easiest way to find the right height is to set the barrel on its finished base, hold the elbow in place, and mark the cut slightly above the point where the elbow will clear the lid.
Before you cut, make sure the section above is held firmly by its wall straps. The upper downspout will no longer rest on the piece below, and a loose section can sag away from the gutter. Cut straight across with steady strokes, then smooth the rough edge with a file so it doesn’t snag the elbow or slice your hand.
How you fasten the elbow depends on the downspout material:
- Aluminum downspouts: slide the elbow over the cut end and secure it with sheet-metal screws.
- Vinyl or PVC downspouts: join the elbow with PVC cement.
Check that water from the elbow drops into the inlet screen rather than splashing on the rim. Splashing wastes water and wears away the soil around the base.
The catch with this method is that all of the downspout’s water now goes to the barrel. Once the barrel is full, everything spills out through the overflow, so an overflow hose leading away from the house is essential with a direct cut.
How Does a Diverter Install, and When Is It the Better Choice?
A diverter replaces a short section of the downspout. It sends water through a hose into the barrel until the barrel is full, then lets the rest continue down the downspout as usual. A typical installation removes about a 9-inch section, with the lower cut about 2 inches above the top of the barrel. Diverter bodies differ, though, so check your kit’s instructions before marking.
Cut out the section with a hacksaw, fit the diverter body between the two ends, and fasten it the same way you would an elbow for your downspout material. Then run the short connecting hose from the diverter to the barrel’s inlet port. Because the diverter sits a little above the barrel, gravity carries water down the hose.
The diverter is the better choice for beginners who worry about overflow, and for anyone who wants to keep the downspout working as it always has. Once the barrel fills, water backs up in the hose and the diverter sends the surplus down the downspout to wherever your downspout already drains.
Compared with an elbow, a diverter needs a bit more hardware and a slightly more careful cut. In return, overflow largely takes care of itself, and you have far fewer chances of soaking the soil by your foundation during a long storm.
Can You Use a Rain Barrel Without a Downspout?
Yes. A rain barrel doesn’t strictly need a downspout. A rain chain hung from a gutter outlet or a roof edge can guide water down into the barrel, and a barrel can also sit right under a roofline or at the open end of a gutter. These setups suit garden sheds, greenhouses and porches where there’s no downspout to cut into.
They do have limits. Water falling freely from a roof edge splashes a lot, so some of it lands around the barrel instead of in it, and the splashing loosens the soil at the base. The catchment is usually smaller too, because only the stretch of roof directly above drains toward the barrel, so it fills more slowly. You’ll need a wide opening at the top to catch that scattered water, covered with a screen to keep out leaves and mosquitoes.
A gutter-fed setup collects more reliably. The gutter gathers runoff from a whole section of roof and funnels it to one point, which gives you a steadier fill and less waste during a light rain.
How Do You Set Up the Spigot and Overflow?
A spigot near the bottom lets you draw water for your plants, and an overflow port near the top sends excess water somewhere safe.
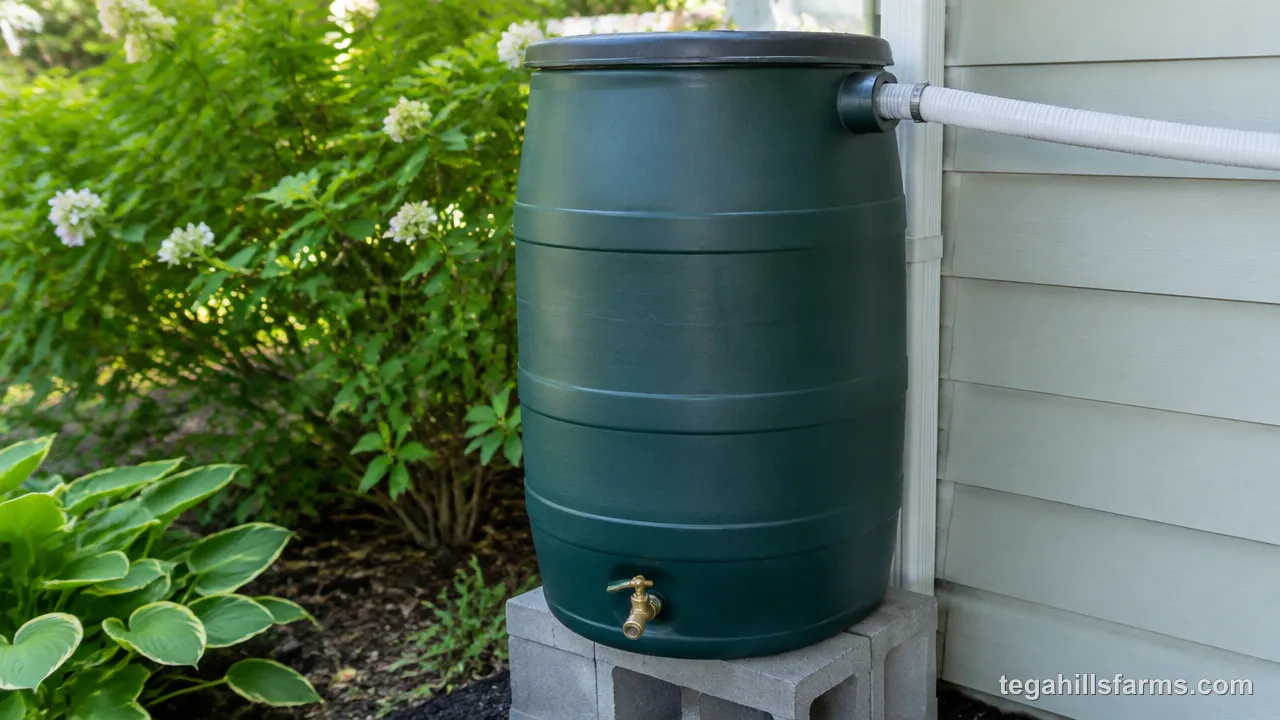
Both need to be fitted and tested before the first rain, because a leaking spigot or an overflow with nowhere to go becomes much harder to fix once the barrel is full and heavy. Before that first fill, it’s also worth checking whether it is illegal to collect rainwater where you live, since local rules on storing roof runoff vary from place to place.
How Do You Attach the Spigot or Hose to the Barrel?
The spigot goes near the bottom of the barrel so the water drains out well. It’s sealed with a rubber washer on each side of the barrel wall and a nut tightened on the inside. Wrap the spigot threads with thread tape, or add a thin bead of sealant around the washers, before you tighten everything down. A dry fitting may hold for a while and then weep slowly once the full weight of water presses against it.
Set the height according to how you’ll water. If you mostly fill a watering can, the spigot has to sit high enough above the base for the can to fit underneath. If you’ll run a garden hose or a soaker hose to your beds, place the spigot lower so more of the barrel drains through the hose before the flow stops.
Some barrels have a second, lower port for a hose connection. That fitting is much easier to install with the barrel laid on its side, because you can reach inside to hold the nut while you tighten the spigot from outside.
Whatever you choose, your stand height decides what fits under the spigot. Raise the barrel enough for your watering can before you lock in the spigot position.
How Do You Handle Overflow So Water Stays Away From Your Foundation?
When a full barrel keeps receiving water during a storm, the surplus leaves through the overflow port, which usually sits about 3 to 4 inches from the top of the barrel. Attach at least 6 feet of 3/4-inch hose to that port and lead it well away from the house. The ideal destination is a garden bed, a lawn or a slope that carries water off on its own.
Overflow left to spill out next to the barrel soaks the soil against your foundation, which is exactly what your gutters were installed to prevent. Over time, that saturated soil can push water toward a basement or crawl space and wash away the ground under the barrel’s base.
Your connection method changes the route. With a diverter, most surplus water goes back down the downspout, so the barrel’s own overflow handles less. With a second barrel, the first barrel’s overflow fills the next one, and only the last barrel needs a hose leading away from the house.
Walk the overflow hose from end to end once it’s laid out. It should run downhill the whole way, with no kinks or low spots where water can sit and stall.
Can You Build a DIY Barrel or Link Several Barrels Together?
Both projects rely on an inlet at the top, a spigot near the bottom and an overflow near the rim, the same three openings any store-bought barrel has.
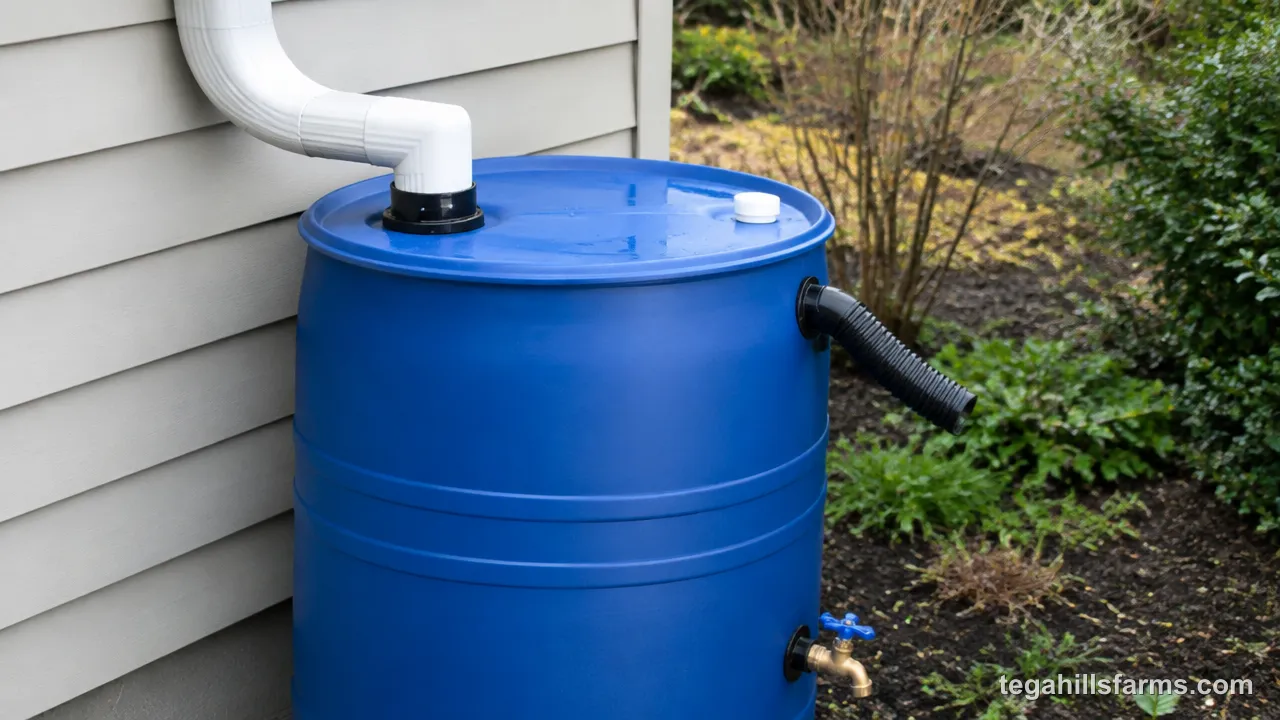
A homemade barrel recreates those openings in a plain drum. Linked barrels connect them so water passes from one barrel to the next. Either way, the same principles from the basic install apply: a level base, a screened inlet, and an overflow with a safe route away from the house.
How Do You Make a Rain Barrel From a Food-Grade Drum?
A homemade rain barrel starts with a food-grade plastic drum, commonly a 55-gallon one. You’ll cut an inlet in the top, drill a spigot hole near the bottom and an overflow hole near the top, then seal each fitting.
On a closed-top drum, cut an 8-inch inlet in the lid with a jigsaw. Lay a 36-by-36-inch piece of fiberglass or aluminum window screen over the whole top and hold it down with the lid ring or a bungee cord. A screw-top drum needs only a smaller square of screen, about 2 feet by 2 feet, over its opening.
Drill a 1-inch hole about 6 inches up from the bottom for the spigot, and another 1-inch hole about 4 inches below the top for the overflow, using a 1-inch hole saw for both. Seal each fitting with washers and thread tape.
Food-grade matters because this water ends up in the soil around tomatoes, lettuce and herbs. A drum made for food holds water without leaching the residues a chemical drum can leave behind. Ask what the drum held before, and skip any drum that stored oil, solvents or anything you wouldn’t want near your vegetables.
The screen keeps leaves, roof grit and egg-laying mosquitoes out of the water you’ll be pouring onto your beds.
How Do You Connect Two or More Rain Barrels?
Barrels link with a short hose or pipe running between fittings on neighboring barrels. Each barrel keeps its own spigot, so you can draw water from whichever one is closest to the bed you’re watering. The first barrel receives water from the downspout, and once it’s full, its overflow feeds the next barrel in line.
Where you place the connection changes how the barrels fill:
- Linked near the top: the first barrel fills completely before water spills over into the second. This keeps the first barrel full for quick watering-can trips.
- Linked near the bottom: the barrels fill and drain together, because water levels itself between them through the low connection. You can draw from any spigot and all the barrels drop at the same rate.
The barrels need to sit at the same level for either setup to work properly, especially with a bottom link. If one base sits lower, water collects in that barrel and can spill from it while the others are still only partly full. That makes level bases even more important than with a single barrel.
The last barrel in the chain still needs its own overflow hose leading safely away from the house, because the whole row eventually fills during a long, steady rain.
How Do You Maintain the Barrel Through the Seasons?
A tight screen, regular cleaning and a winter drain keep an installed barrel clean and in one piece year after year.
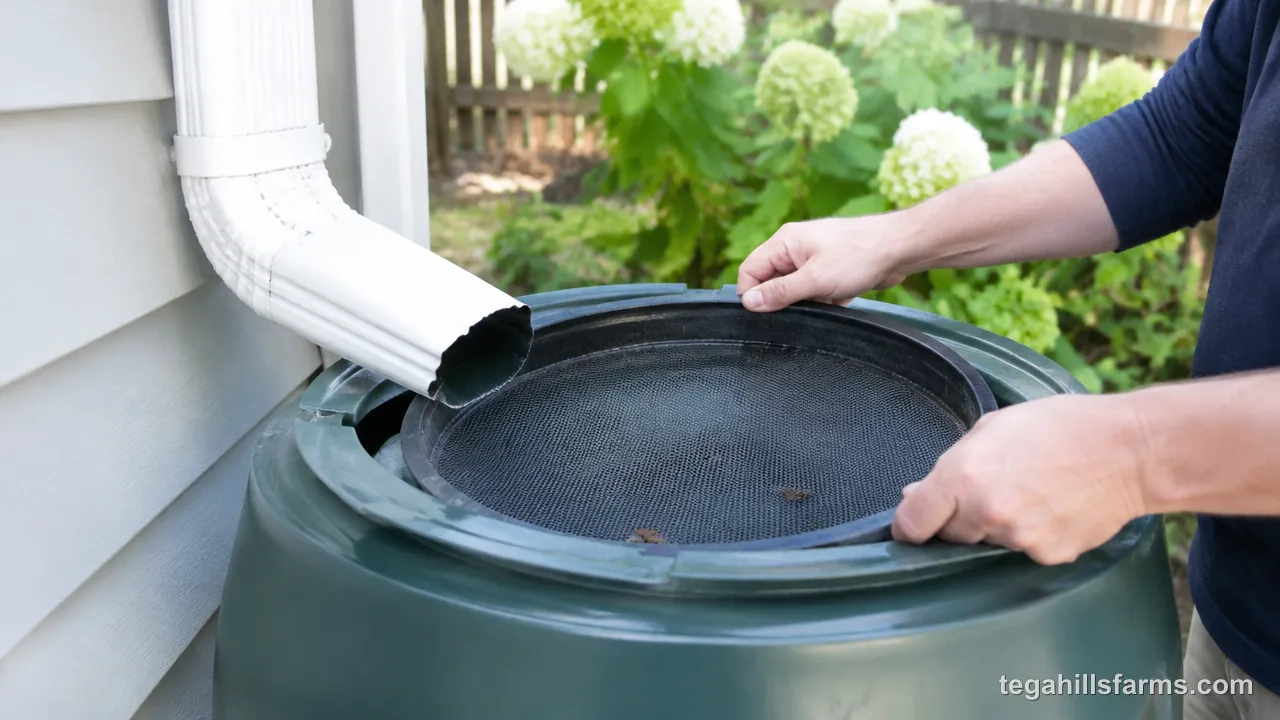
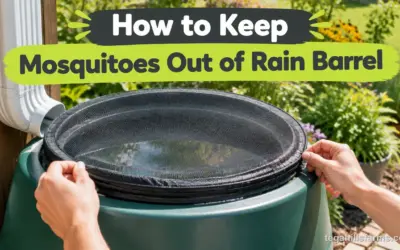
Even a carefully installed barrel collects roof debris and fine sediment, and in cold weather it faces the risk of freezing solid. Standing water also draws egg-laying mosquitoes as soon as the weather warms, so it pays to learn how to keep mosquitoes out of rain barrel water before summer arrives.
How Do You Keep the Water Clean and Mosquito-Free?
Keep the inlet screened and sealed, clear leaves out of the gutters and off the screen, and drain and rinse the barrel now and then to wash out the sediment that settles at the bottom. A torn or loose screen is the most common way mosquitoes and debris get in, so check it whenever you clean the gutters.
The first water off a roof in each storm carries the most dirt, including grit from shingles, pollen and bird droppings. That’s the idea behind a first-flush diverter, which sends that initial runoff away before the cleaner water fills the barrel. If you grow a lot of leafy greens, that first flush is worth keeping out, because those leaves are what you eat.
For the same reason, rain barrel water is better poured onto the soil around your plants than sprayed over edible leaves. A soaker hose or a watering can aimed at the root zone keeps it where your crops need it.
If the water turns cloudy, starts to smell or shows insect activity, adding about ¼ cup of chlorine bleach to the barrel will clear it. After that, I’d empty and rinse the barrel rather than pour that treated water on the garden.
How Do You Winterize a Rain Barrel in a Freezing Climate?
Water expands as it freezes, and that expansion can crack the barrel or split the spigot. Gardeners in colder USDA zones should drain the barrel before a hard freeze sets in. A good signal is a forecast that stays below 32°F for several days in a row: empty the barrel completely and leave the spigot open so any remaining water can escape instead of freezing in the valve.
Disconnect the barrel from the downspout and return the downspout to its normal path. If you cut it for an elbow, refit the cut-off section or attach a downspout extension. If you use a diverter, switch it to bypass so winter rain and snowmelt flow down the downspout as before.
Store the empty barrel upside down so it can’t collect water, or cover the top tightly. A garage or shed is even better if you have space, since it keeps the plastic out of winter sun and wind.
In spring, set the barrel back on its base. Check the base for level first, because freeze-thaw cycles can heave soil and shift blocks over the winter. Then reconnect the barrel, seal the spigot, and it’s ready for spring rain and your first plantings.
A barrel that stood perfectly straight on installation day can start leaning after a few storms, because the soil under one side of the base packs down under the weight of a full load of water. That slow tilt pulls on the spigot and overflow fittings until they start to drip, and a barrel left leaning long enough will eventually tip over into your bed or across the path.
What Installation Mistakes Cause Problems Later?
Most problems trace back to five installation mistakes, and each one shows early signs you can catch before it causes damage. A sound installation stays level when full, catches the downspout’s water cleanly, sends overflow well away from the house, and stays dry around the spigot. A failing one shows the opposite in small ways first:
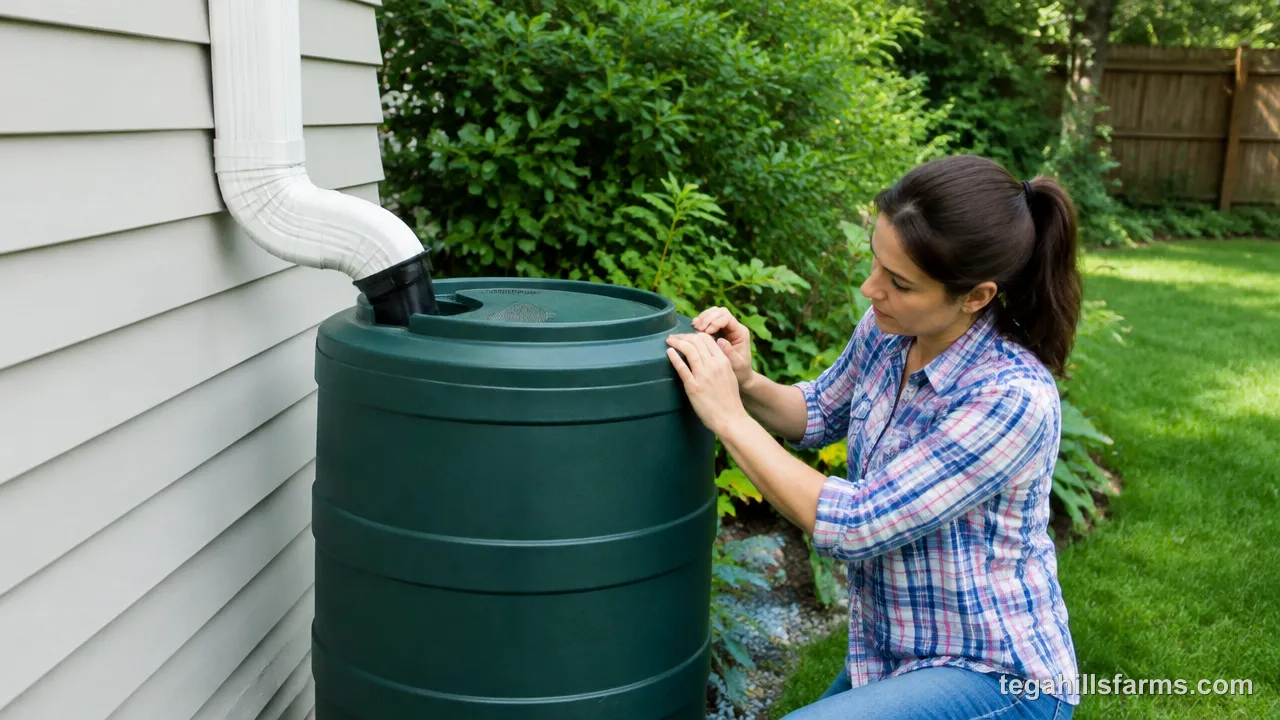
- Base not level or too narrow: the barrel leans a little more after each storm. Drain it, rebuild the base wider on tamped gravel, and check it in two directions with a level.
- Downspout cut at the wrong height: water splashes on the lid or misses the inlet entirely. Shorten the cut or add a flexible downspout extension to guide water into the screen.
- Overflow emptying beside the foundation: the soil at the corner of the house stays soggy, or mulch washes away. Add hose so the overflow reaches a bed or a slope.
- Missing or torn screen: you’ll see wriggling larvae or leaf litter inside. Replace the screen and secure it tightly.
- Unsealed spigot: a dark ring of damp ground or a steady drip forms under the barrel. Drain the barrel, rewrap the threads with tape, and tighten the nut.
Rain Barrel Installation FAQ
Can you bury a rain barrel underground?
A standard rain barrel isn’t built to be buried. Soil pressure can crush its sides, and you’d need a pump to get the water back out. Underground storage calls for a cistern designed to carry that load. For a home garden, an above-ground barrel on a raised base is far easier to fill, drain and clean.
Can you connect a rain barrel to a garden hose?
Yes. A barrel with a threaded spigot takes a standard garden hose or soaker hose. Gravity provides the only pressure, so the flow is gentle, and raising the barrel improves it. A soaker hose laid across a bed suits that low pressure well, because it delivers water slowly and directly to the root zone.
How long does it take a beginner to install a rain barrel?
An afternoon is realistic for a first installation. Building and leveling the base usually takes the longest, since it’s worth checking several times. Cutting the downspout and fitting an elbow or diverter goes quickly once the barrel is in position, and sealing the spigot and laying out the overflow hose finishes the job.
Does a rain barrel work on a flat patio?
Yes. A patio is firmer than soil, so it resists the settling that tilts barrels on soft ground. Check that the patio drains away from the house, set the barrel on a raised base so you have room under the spigot, and run the overflow hose off the patio toward a bed or lawn.
Where can you buy rain barrel parts?
Hardware stores and home centers carry diverter kits, downspout elbows, spigots, bulkhead fittings, thread tape and garden hose. Garden centers often stock complete rain barrels and first-flush diverters. Bring your downspout measurements with you, because elbows and diverters are sized to match specific downspout shapes and widths.
How much does a rain barrel cost?
The cost depends on capacity, material, and whether you buy a finished barrel or build one from a food-grade drum. A homemade barrel mostly costs the fittings and screen. A breakdown of how much a rain barrel costs shows the typical range for each type, which helps you weigh building one against buying.
Write Your Review
No reviews yet. Be the first to share your experience!