

You can restore a garden blade at home in four steps. Clean it back to bare steel, file or hone the existing bevel in one direction, remove the burr from the opposite side, and seal the fresh metal with a thin coat of oil. That last step keeps rust from returning before the next job.
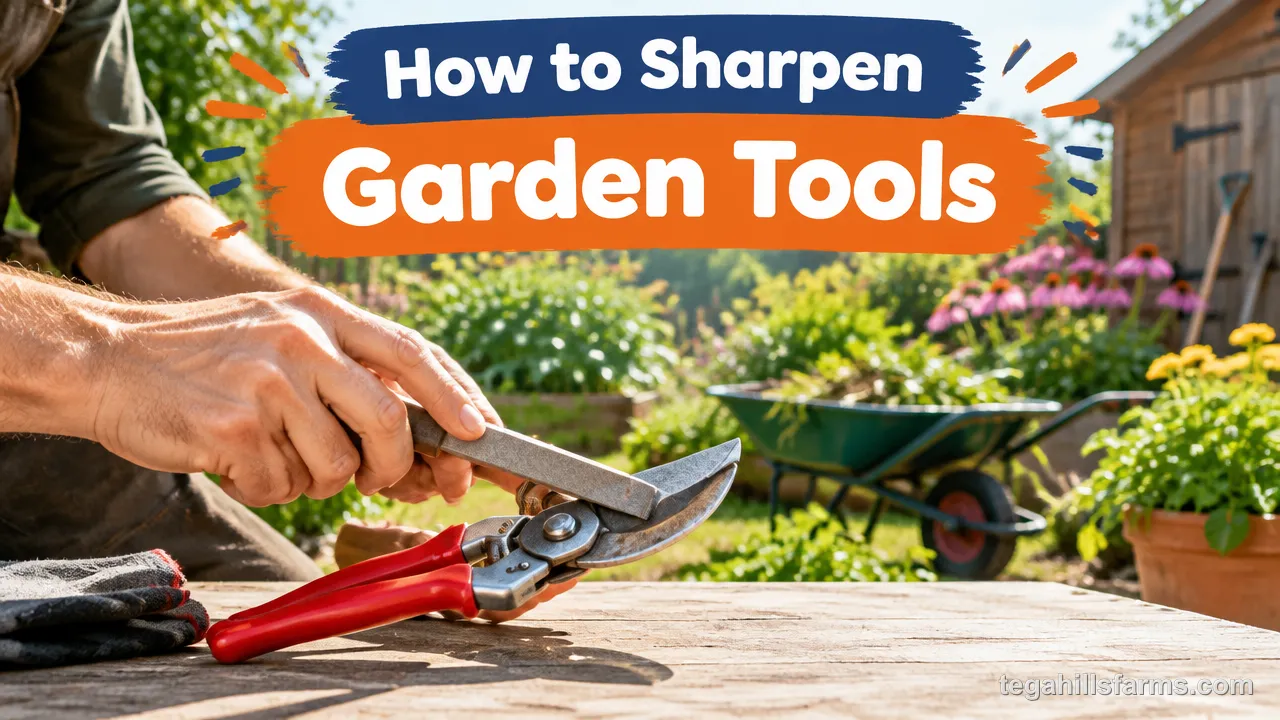
The abrasive depends on the blade. A flat mill file suits the wide edges of shovels and hoes. A whetstone or diamond sharpener suits the finer edges of pruners and knives. Across every tool, holding the right angle matters more than which abrasive you choose.
The real risk at home is taking off too much steel or changing the angle the maker ground into the blade. Hand tools remove metal slowly. If you follow the factory bevel and stop as soon as the edge is clean, the blade comes back keener without losing years of life.
Why Does a Sharp Garden Tool Matter?
A keen edge slices plant tissue cleanly instead of crushing it, so the cut seals over faster and leaves less open wound for disease and fungus to enter.
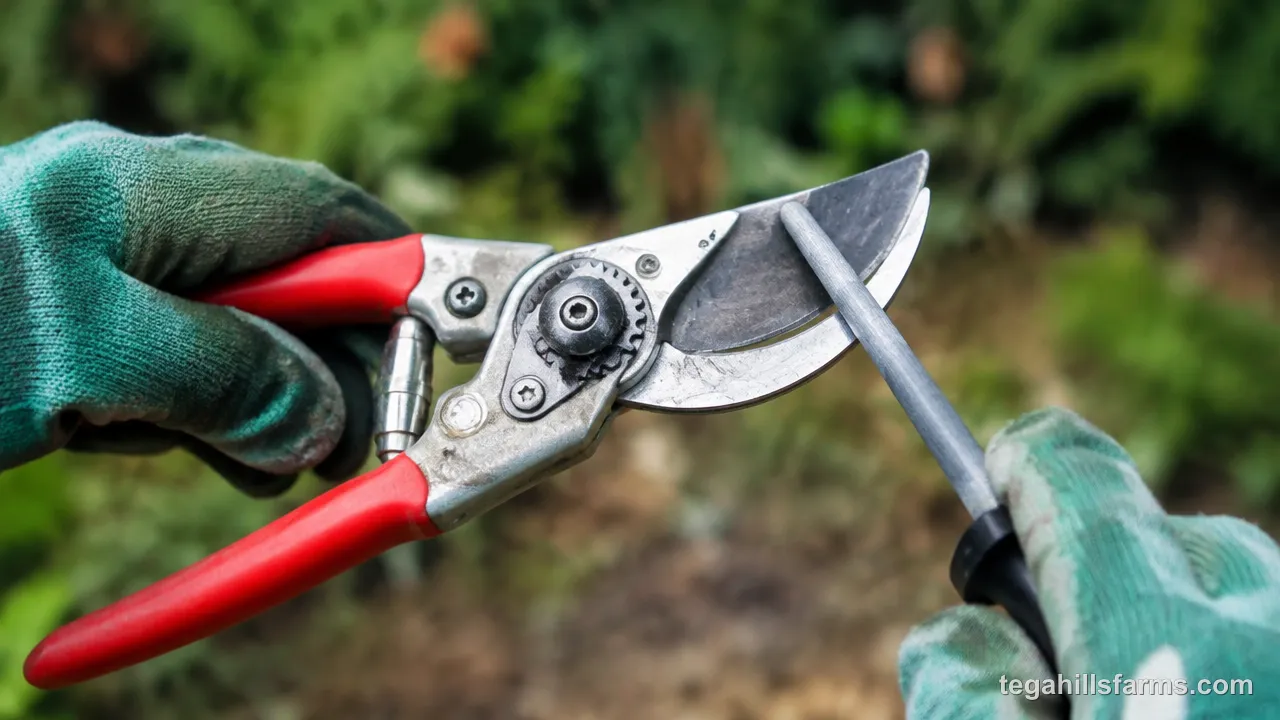
A blunt blade presses on the stem until the tissue gives way. That pressure ruptures cells on both sides of the cut and leaves torn bark and frayed fibers. A ragged wound takes longer to callus over. Until it does, the exposed tissue gives fungal spores and bacteria an easy way into the plant. On shrubs you prune every year, those slow-healing wounds add up and weaken growth around each cut.
A dull tool also shows itself in your hand. Stems come out crushed or split instead of flat. You squeeze harder to finish each cut, and that force travels through your palm and wrist. Over an hour of pruning, the extra effort turns into sore joints. The blade can also slide sideways off a branch rather than biting into it. That slip is when knuckles meet thorns or the edge of the other blade.
The paper test gives you a quick answer before you start work. Hold a sheet of printer paper by one corner and draw the blade through it. A sharp edge slices a clean line, while a dull one snags, folds or tears the sheet.
How well an edge holds up between sharpenings also depends on the tool you bought in the first place. If you are still deciding which blades are worth keeping sharp, the guide on how to choose garden tools explains what separates a long-lasting tool from one that dulls quickly.
How Do You Prepare a Tool Before Sharpening?
A secured, clean blade is what makes sharpening both safe and accurate. A file only shapes steel correctly when the tool cannot shift under the stroke and the surface holds no grime or rust. Most uneven edges and nicked fingers trace back to rushing this stage. A blade that moves changes the angle from one stroke to the next. A dirty blade hides the edge you are trying to read. Ten minutes of setup decides whether the sharpening that follows takes a few careful passes or a frustrating half hour of correcting mistakes.
What Safety Steps and Setup Do You Need?
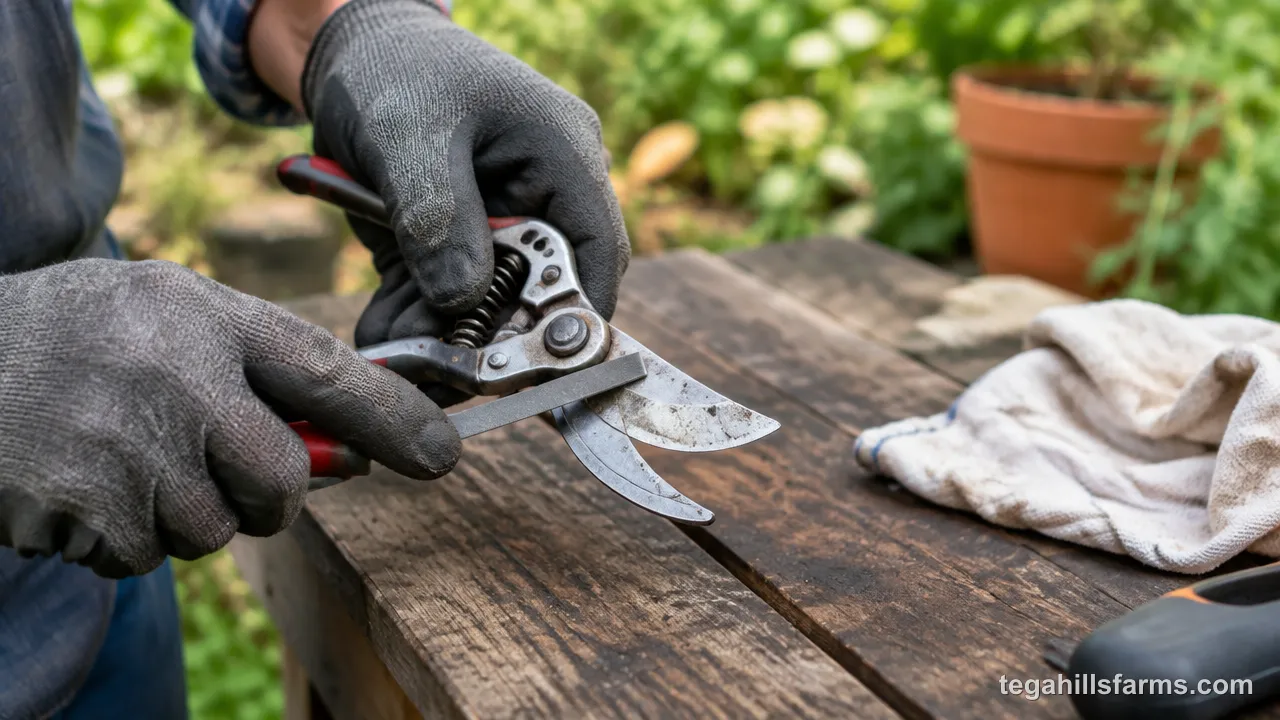
Wear safety glasses and gloves, clamp the tool firmly, and stroke the file away from your body. Glasses keep steel filings and grit out of your eyes. Leather or cut-resistant gloves protect the hand that steadies the blade, because a file that catches can skate off the edge and onto your fingers.
A bench vise holds the tool so neither hand has to grip near the edge. Clamp the blade with the bevel facing up and as little steel sticking out of the jaws as the job allows. A short overhang keeps the blade from flexing or chattering. Pad the jaws with scrap wood or a folded rag so they don’t dent a handle or scratch a finished blade. Without a vise, a C-clamp holding the tool to the edge of a sturdy bench works the same way.
A loose tool shifts slightly with every stroke. Each shift changes the angle of the file against the bevel, so the edge ends up rounded or faceted instead of one even face.
Many bypass pruners come apart at the pivot bolt. With the bolt out, each blade lies flat in the vise and you can reach the full length of the bevel. Take a photo of the bolt, washer and spring order before you undo anything. Pruners and loppers with riveted pivots cannot be taken apart. Sharpen those assembled, with the blades held fully open.
How Do You Clean Off Sap, Soil and Rust First?
The goal is bare, dry steel, because an abrasive works on metal, not on the grime sitting on top of it. Start by scrubbing off soil with a stiff brush and water, then dry the blade completely.
Sticky sap is harder to shift than soil. It builds up near the pivot of pruners and loppers and along the inside face of the blades. Rubbing alcohol on a rag softens the sap and lifts it off. The same wipe also disinfects the blade, which matters if you have been cutting diseased wood. Bacteria and fungal spores ride on the steel from one plant to the next. A clean wipe between plants breaks that chain.
For light surface rust, steel wool or a wire brush takes the orange film down to gray metal in a few minutes. Heavily rusted blades respond better to a soak in white vinegar for several hours or overnight. The mild acid loosens thick scale so a brush can remove it. Rinse the blade afterward and dry it right away. Vinegar left on bare steel keeps etching the surface, and wet steel starts to rust again quickly.
Skipping rust removal costs you twice. Rust flakes pack into the teeth of a file and stop it from cutting cleanly. Scale along the edge also hides nicks and flat spots, so you can’t see where the true edge begins until you have already filed past it.
Which Sharpening Tool Should You Use?
A flat mill file handles shovels and hoes, and a diamond sharpener or whetstone takes care of pruners and knives. The remaining options suit narrower jobs or more experienced hands.
Each option has a clear strength and a drawback:
| Sharpening tool | Works well on | Drawback |
|---|---|---|
| Flat mill file | Shovels, spades, hoes, heavy lopper edges | Too coarse for a fine pruner or knife edge |
| Round or half-round file | Curved and notched areas, pruner hook edges | Slow on wide, straight edges |
| Whetstone or water stone | Garden knives, pruner blades | Needs water and a steady freehand angle |
| Diamond sharpener | Pruners, loppers, knives, hard steel | Coarse side removes steel quickly |
| Handheld pruner sharpener | Quick touch-ups on pruners | Fixed angle may not match every bevel |
| Sharpening steel | Realigning a knife edge between sharpenings | Straightens the edge but removes little metal |
| Bench grinder | Reshaping badly worn shovel or axe edges | Overheats and softens the steel easily |
For files, an 8- to 10-inch length gives a long, controlled stroke without being awkward to handle near small blades. That length applies to both flat mill files and round or half-round files.
A handheld sharpener with a single carbide or ceramic edge takes five or six strokes on each edge to freshen a pruner. That makes it useful in the garden mid-job, but it only maintains an edge. It can’t repair one.
A bench grinder needs the most skill. Its wheel produces enough heat to draw the temper from the steel. Blue or straw-colored marks on the edge show where that has happened, and the softened metal will no longer hold a keen edge.
You can also sharpen without a file. A whetstone, a diamond sharpener or a handheld sharpener all work on pruners. Fine sandpaper wrapped around a flat wooden block will touch up a lightly dulled blade.
For a starter kit, I would gather a flat mill file, a two-sided diamond sharpener, fine sandpaper, a wire brush and a small bottle of oil. For a first attempt, the diamond sharpener is the gentlest option, because its fine side removes metal slowly enough to correct a wrong angle.
How often you reach for any of these depends on the steel in the blade, which is why blade hardness is one of the points on what to look for in garden tools.
What Bevel Angle Should Each Garden Tool Have?
The angled face that narrows steel down to a cutting edge decides how keen and how tough that edge is. Matching the factory angle keeps both qualities in balance.
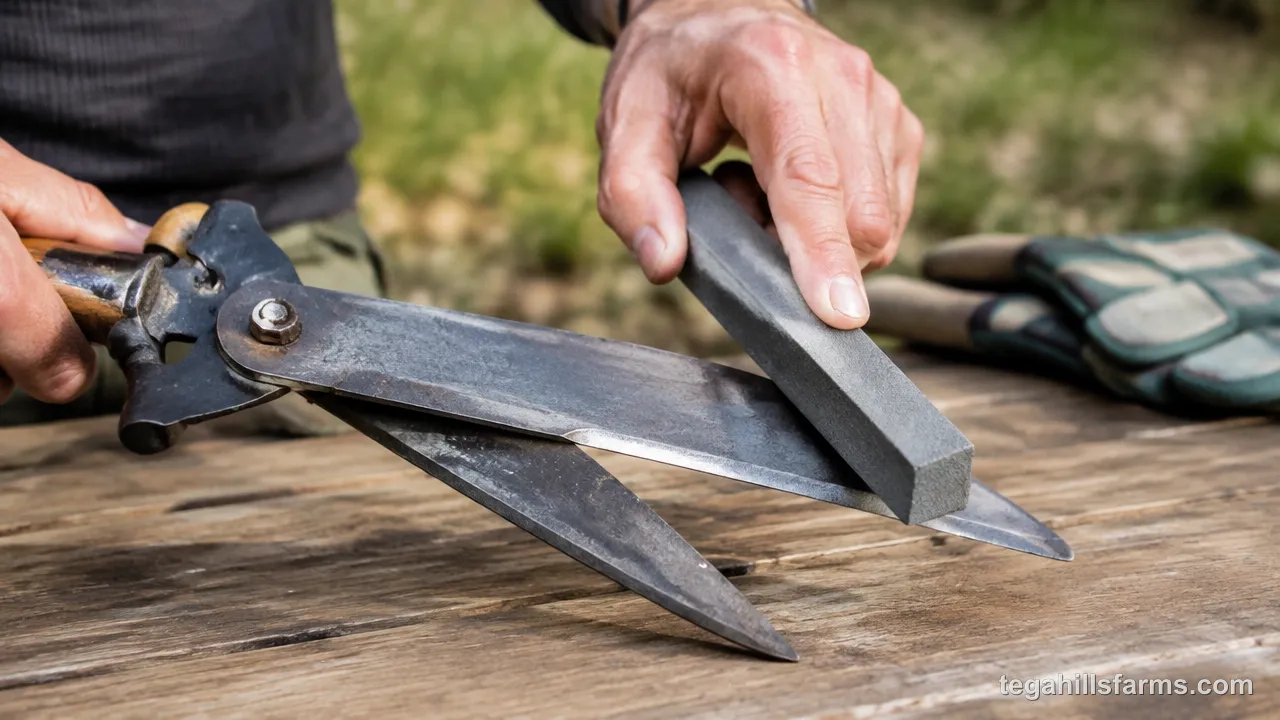
The angle sets how much steel supports the very edge. A narrower angle gives a thinner, keener edge, but thin steel chips or rolls over when it strikes stones, roots or hard soil, and it wears down fast. A wider angle leaves more metal behind the edge, so it resists damage, but it needs more force to push through a stem or into the ground. The manufacturer chose the angle for the work the tool does. Changing it trades away one quality for the other.
Pruner, lopper and shear blades are the simplest case: follow the bevel that is already there. Those angles are ground to slice green and woody stems. Reshaping them by hand rarely improves the cut.
Shovels work well at about 45°. A keener angle looks sharper at first, but the edge dulls quickly once it meets gravel and roots.
Hoes vary more with the job, from 20° to 45°:
- 45° suits heavy chopping and cultivation in hard ground.
- 30° to 35° is a good all-purpose angle for most hoes.
- 20° to 30° suits fine weeding, where the blade slices just under the soil surface.
Read the existing angle before your first stroke. Color the bevel with a permanent marker, then make one light pass with the file or stone. If the ink disappears evenly across the whole face, you are holding the right angle. If the file removes ink only at the edge or only at the heel of the bevel, tilt it until the whole face clears together.
How Do You Sharpen Each Type of Garden Tool?
The shape and construction of the blade decides the method, because the abrasive has to follow the edge the maker ground rather than impose a new one. A cutting blade that closes against a second blade must keep its flat side perfectly flat. A wide digging edge has to stay even across its full width. A knife-style edge depends on a steady freehand angle. The rhythm stays the same for every tool: set the blade in position, work the bevel in one direction, remove the burr and finish the surface. What changes from tool to tool is how you hold the abrasive and which face you leave alone.
How Do You Sharpen Pruners, Loppers and Hedge Shears?
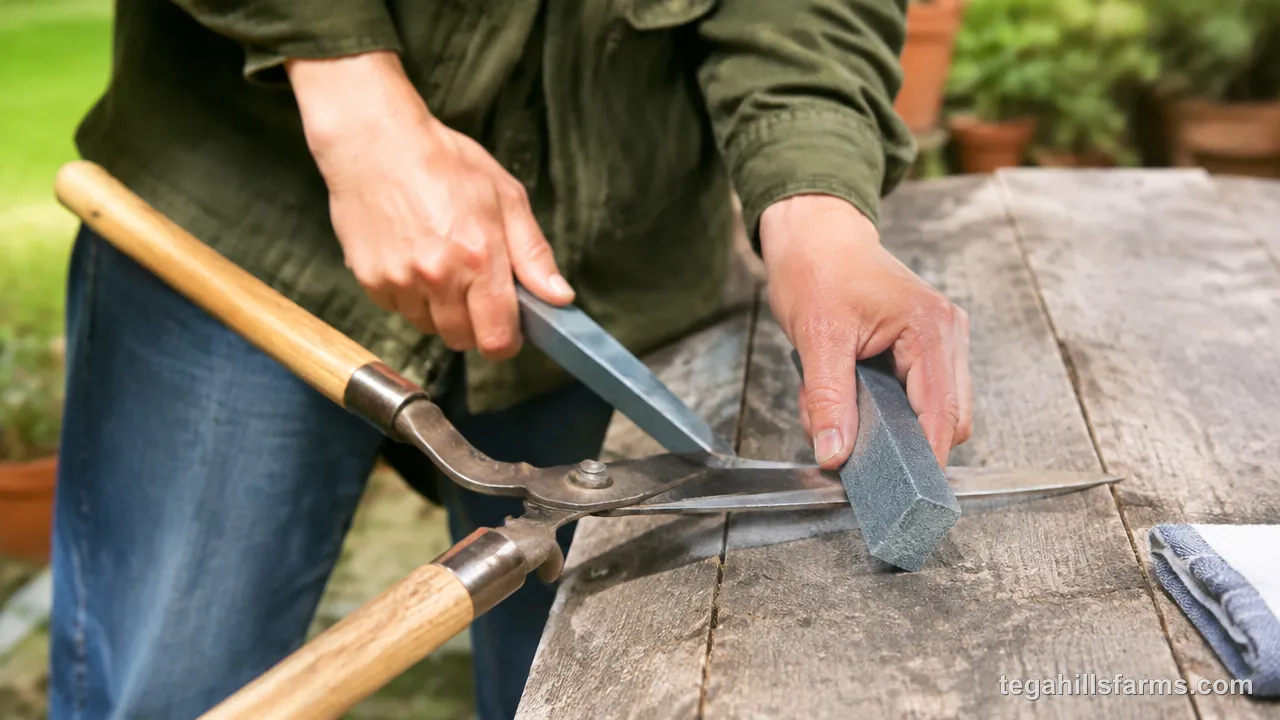
On bypass pruners and loppers, you sharpen only the beveled side of the cutting blade and leave the flat back alone. Bypass blades pass each other like scissors. The cutting blade’s flat back slides tight against the hook, the blunt lower blade. If you file that back, it rounds over and opens a gap where stems get pinched instead of cut.
Clamp the cutting blade with the bevel facing up. Push the file or diamond sharpener across the bevel in one direction, away from your body, working from the pivot end out to the tip. Lift the file on the return stroke. Dragging it backward dulls the file and roughens the edge. A few smooth passes that follow the existing angle are usually enough.
When the bevel is done, lay fine abrasive flat on the back of the blade and make a single light pass to knock off the burr. Keep that pass completely flat.
The hook needs only light cleanup. Smooth any nicks on its edge with a fine round or half-round file held at 90° to its inner face.
Anvil pruners work differently. A single blade closes onto a flat anvil and is usually beveled on both sides, so you sharpen both bevels equally to keep the edge centered. The anvil only needs cleaning. If it is dented or grooved, replace it rather than file it.
Hedge shears have long, beveled blades that you file along their full length, following the angle. Wavy or serrated edges need a round file or a professional.
To reassemble, clean the pivot, add a drop of oil and tighten the nut. The blades should close without a gap and still open freely.
How Do You Sharpen Shovels and Hoes?
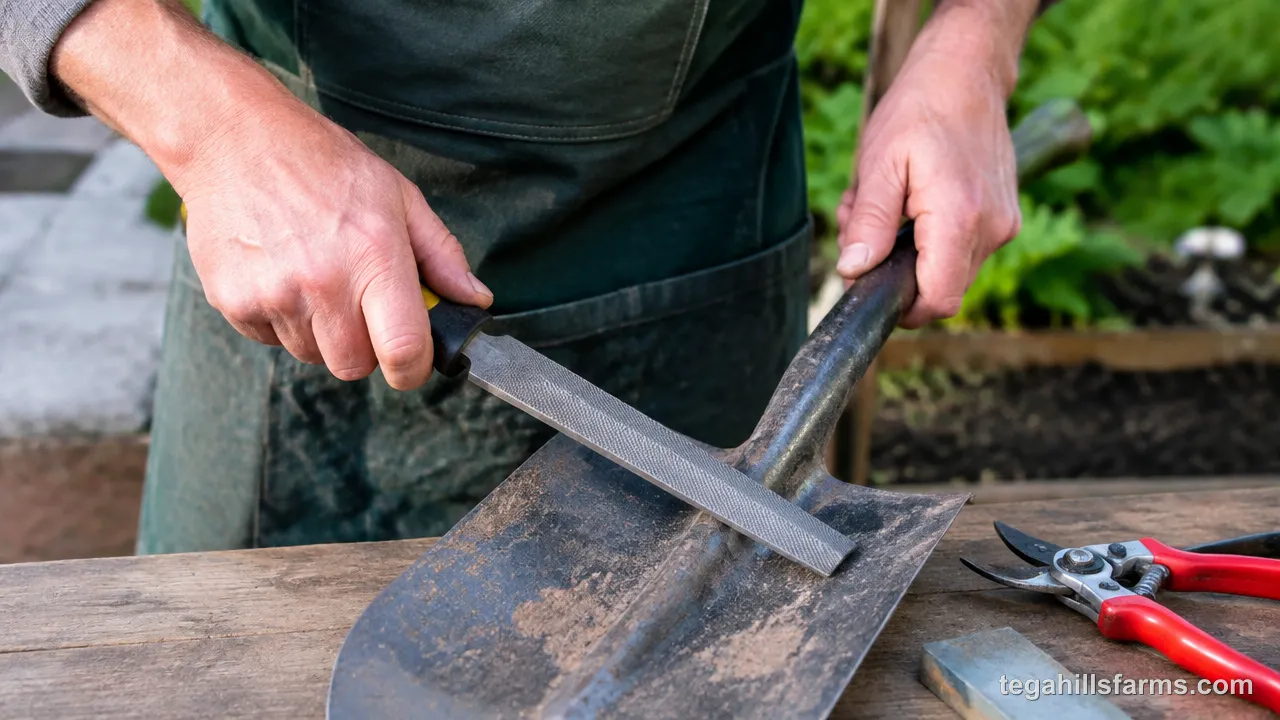
Clamp the shovel with its edge up and the face side toward you. That is the inside of the scoop. File the bevel from that side only, at the shovel’s working angle. A single bevel keeps enough steel at the edge to survive rocks and roots. The flat back gives the burr somewhere to form so you can remove it cleanly. Filing both sides thins the edge from two directions, and it dulls faster in the ground.
A mill file cuts on the push stroke. Start with the file on the bevel near the inside of the blade and push it diagonally toward the edge, then lift it on the return. Overlap your strokes as you work from one corner of the edge to the other. Count the passes at each spot so every section gets the same treatment.
A hoe takes the same stroke, but the edge depends on how you use it. A hoe that chops into hard, compacted soil needs a heavier edge with more metal behind it, because a thin edge folds over on impact. A hoe that slices weeds at the surface benefits from a finer edge, which cuts roots with less push and drags less soil along.
Check for an even edge before you unclamp the tool. Sight down the edge under good light. Dull or flat spots reflect light as bright lines, while a sharpened edge shows almost no reflection. File only the bright sections. Then remove the burr from the back with fine sandpaper.
How Do You Sharpen Garden Knives and Other Blades?
A garden knife or hori-hori-style blade sharpens much like a kitchen knife, on a whetstone with a steady angle. Soak a water stone until it stops releasing bubbles, or add a few drops of honing oil to an oil stone. Start on the coarse side. Draw the blade across the stone edge-first, keeping the angle the same from heel to tip. Work one side until you can feel a slight burr along the full length, then switch to the other side.
Finish with two or three sweeps on the fine side of the stone, alternating sides with each sweep. That step refines the scratches left by the coarse grit into a smoother edge that cuts more cleanly and stays sharp longer. Many hori-hori blades have one serrated edge. Touch up the serrations individually with a tapered round file or a sharpening rod, because a flat stone only flattens their tips.
Other blades come up less often. An axe takes a file or a round sharpening puck, and its slightly curved edge profile should stay curved to keep the head from sticking in wood. Grass shears follow the same method as hedge shears.
Blades that are badly chipped, bent, or riveted so they cannot be clamped safely are better left to a professional sharpening service.
How Do You Finish and Store Tools to Keep Them Rust-Free?
Deburring the edge and sealing bare steel with oil complete the job, because freshly filed metal has lost its protective film and starts to rust quickly in damp air. A clean finish also gives the edge its full keenness, so the sharpening work lasts through the season instead of a single weekend. Good storage habits protect your hands as much as the tools. An edge that stays sharp means less squeezing and pushing through every cut, a point our garden tools for arthritis guide covers alongside grip and handle shape. The finishing stage takes only a few minutes per tool, yet it decides how long the new edge survives.
How Do You Remove the Burr and Test the Edge?
A burr is a thin curl of metal that the file pushes over to the opposite side of the edge. It makes a blade feel sharp for a moment. On the first real cut, though, the curl folds over and tears plant tissue instead of slicing it.
To find it, draw your fingertip gently across the back of the blade from the spine toward the edge, never along the edge. You will feel a slight catch where the burr hangs off.
Remove it with 300-grit sandpaper laid flat against the back of the blade, or with the fine side of a stone. A few light sweeps are enough, with no tilt, so the flat back stays flat. On a double-beveled edge, alternate light strokes on each side until the catch disappears.
Then test the edge. Slice a hanging sheet of paper, or cut a green stem about as thick as the tool normally handles. A finished edge leaves a flat, smooth face on the stem with no strands of bark trailing from it.
The blade needs another pass if:
- the paper snags or folds at one spot along the edge
- a thin bright line still shows when you sight down the edge under light
- the stem comes out pinched or split on one side
How Do You Oil and Store Tools After Sharpening?
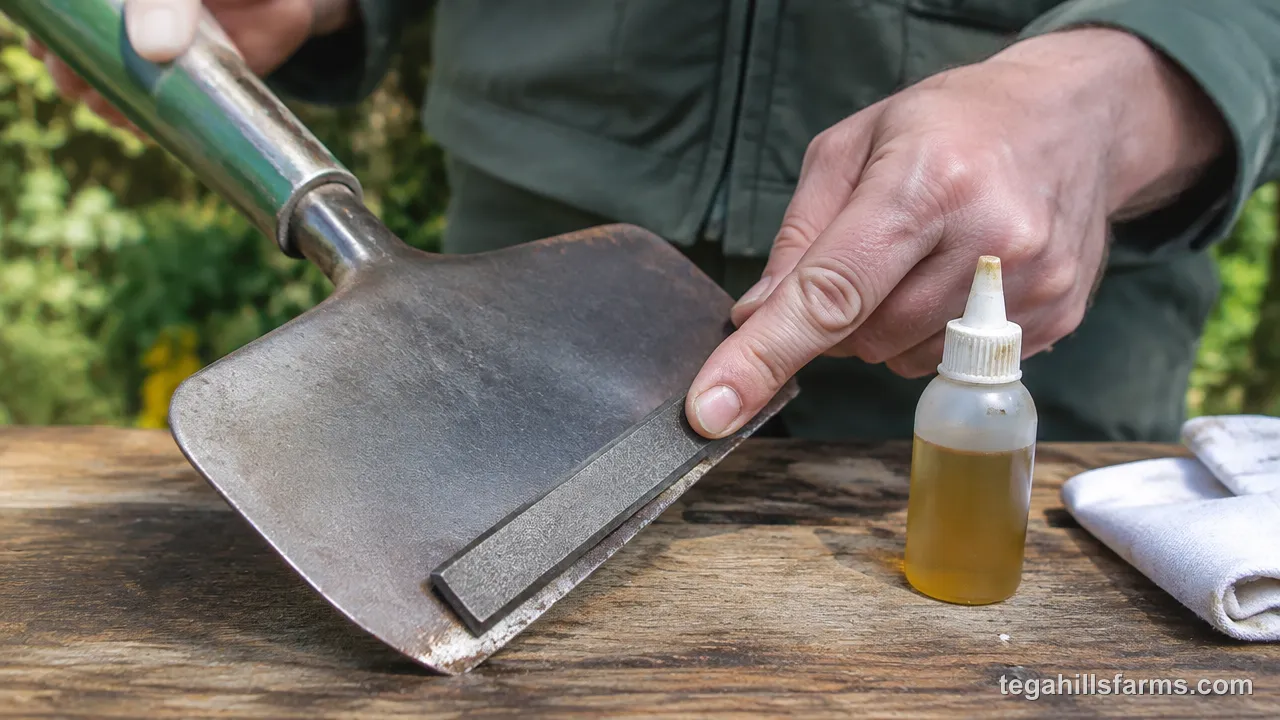
Wipe every blade dry, then apply a thin film of oil to the blade and the pivot. Light machine oil works well. Camellia oil is a plant-based option that suits blades used around vegetables and herbs. Work the pivot open and closed a few times so the oil reaches the bearing surfaces, then wipe away the excess. The thin film keeps moisture off bare steel without leaving a coating you can feel.
Heavy oil does more harm than good. A thick coat stays tacky and picks up dust and fine grit. Grit in the pivot wears the moving surfaces and grinds against the edge each time the blades close.
Store tools somewhere dry, hanging on a wall or resting on shelves rather than standing on a concrete floor. Concrete holds moisture and passes it into anything left on it, so a shovel that sits there over a damp week will rust along the bottom edge first.
The daily habit that keeps rust away is simple: wipe the blades clean and dry after each use, before soil and sap have time to sit on the steel.
At the end of the season, give every tool a full cleaning, a light sharpening and a fresh coat of oil before winter storage. Rust that starts in a cold garage over winter is far harder to remove in spring than the few minutes this takes in fall.
A pruner blade with a chip deep enough to catch a fingernail, or a shovel bent where it struck a buried rock, has lost more steel than a hand file can restore. Filing harder on that kind of damage thins the blade unevenly around the flaw, and the tool ends up weaker than it was before you started.
When Is It Better to Use a Professional Sharpening Service?
A professional service is the better choice when the blade is damaged rather than dull.
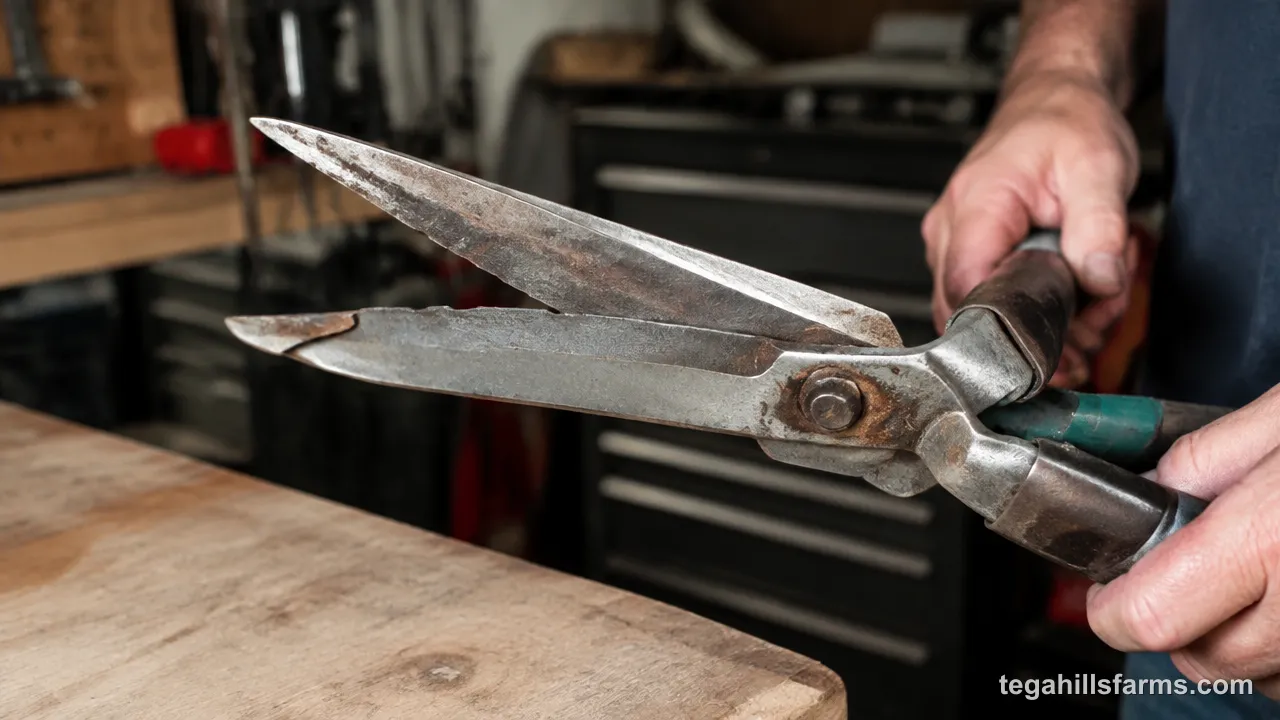
Signs that a tool is past home repair:
- deep chips that would take a large amount of steel off the edge to remove
- rust so heavy that the steel is pitted below the surface
- blades bent out of line
- hedge shears whose blades no longer meet along their length
- blades that can’t be removed or clamped safely
A hardware store or local sharpening shop has equipment a hand file can’t match. Powered grinding wheels with water cooling reshape an edge without overheating the steel. Shops also have the jigs to hold a precise angle along a long or curved blade, and the tools to straighten a bent blade or replace a worn spring or anvil.
Sometimes repair isn’t worth it. A low-cost tool with thin, soft steel and a riveted pivot may need more work than it is worth. Before paying for repairs on several worn tools, weigh the bill against how much a garden tool set costs new.
How Often Should You Sharpen, and What Are the Signs of a Dull Blade?
There is no fixed schedule. A blade needs attention when it starts to work against you, and how fast that happens depends on what you cut, how often, and how hard the steel is. Pruners used on woody shrubs every week dull faster than ones used for occasional deadheading. Shovels lose their edge quickly in sandy or rocky soil, because the grit acts like an abrasive on every stroke. Hard, high-carbon steel holds an edge longer than softer stamped blades.
A practical rhythm is a light touch-up before your heavy pruning and digging seasons, plus another after cutting thick woody growth or working gritty ground.
Watch for these signs between touch-ups:
- stems come out crushed instead of cleanly cut
- you need noticeably more force to finish a cut
- bark tears or peels back around the wound
- the blade slips sideways off a branch
Sharpening too often has its own cost. Every session removes metal, and frequent heavy filing narrows the blade, shortens its life and slowly changes the geometry the maker designed. A few light strokes when the edge first fades preserve far more steel than a long session after it has gone completely dull.
Sharpening Garden Tools: Quick Answers
Can you sharpen pruners without a file?
Yes. A diamond sharpener, a whetstone or a handheld pruner sharpener all restore a pruner edge, and fine sandpaper wrapped around a flat block works for light touch-ups. Whichever you use, stroke along the existing bevel and finish by removing the burr from the flat back of the blade.
Is WD-40 a good rust remover, or only a light lubricant?
WD-40 is mainly a water-displacing light lubricant. It loosens thin surface rust so steel wool can lift it off, but it doesn’t dissolve heavy scale. Its film also evaporates fairly quickly, so a light machine oil or camellia oil gives longer protection on stored blades.
Should you sharpen both sides of a pruner blade?
On bypass pruners, no. Sharpen only the beveled side and keep the back flat, removing just the burr with a single flat pass. That flat back has to slide tight against the hook to cut cleanly. Anvil pruners are usually beveled on both sides, so you sharpen both bevels evenly.
What is the best tool for a beginner?
A two-sided diamond sharpener is a forgiving place to start. Its fine side removes steel slowly, so a wrong angle can be corrected before it does harm. It also works on pruners, loppers and knives. Add a flat mill file once you are ready to take on shovels and hoes.
Does sharpening need to be done wet or dry?
It depends on the abrasive. Water stones need soaking and stay wet during use, and oil stones use honing oil. Diamond sharpeners work dry or with a little water, while files and sandpaper are used dry. The liquid carries away loose metal particles so the stone keeps cutting cleanly.


Write Your Review
No reviews yet. Be the first to share your experience!