

Setting up an underground sprinkler system means planning zones around your water pressure and flow, buying pipe, heads, valves, a controller and a backflow preventer, trenching and laying the pipe, setting pop-up heads on swing joints, then wiring the controller and testing each zone before the yard goes back together.
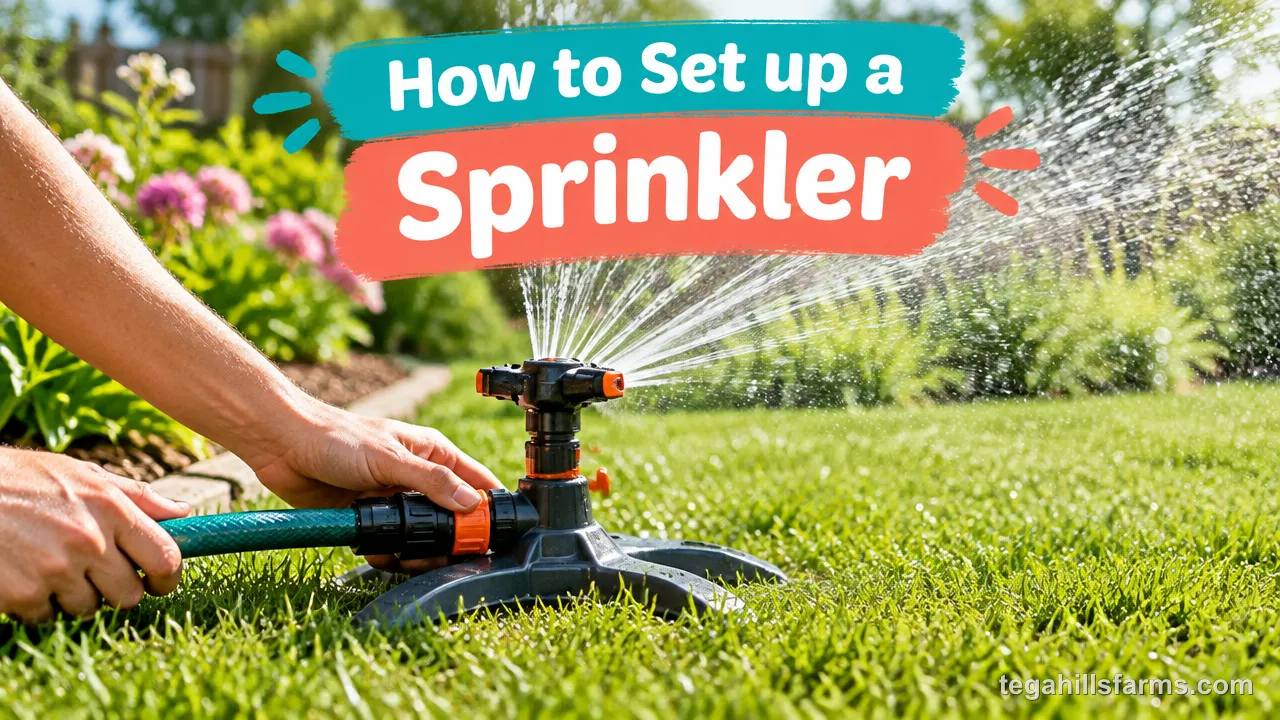
Two measurements shape almost every choice after that: the static pressure at your outdoor faucet in PSI and the flow your supply delivers in gallons per minute (GPM). Together they cap how many heads a single valve can run. They also decide how many zones you need and which head types make sense for each part of the yard.
The real risk in a DIY install is a system that runs but waters badly. Heads spaced past their rated radius leave brown patches, and mixed head types on one valve flood some areas while others stay dry. Pipe glued without a dry-fit can leak underground for months before a soggy spot shows up.
Call 811 several business days before the first shovel goes in. Marked utility lines change where trenches can run, so it pays to have the flags in place before you finalize the layout sketch.
What Does Setting Up a Sprinkler System Involve?
The work covers designing zones, burying pipe and valves, and connecting heads and a controller so each area of the yard waters automatically on its own schedule.
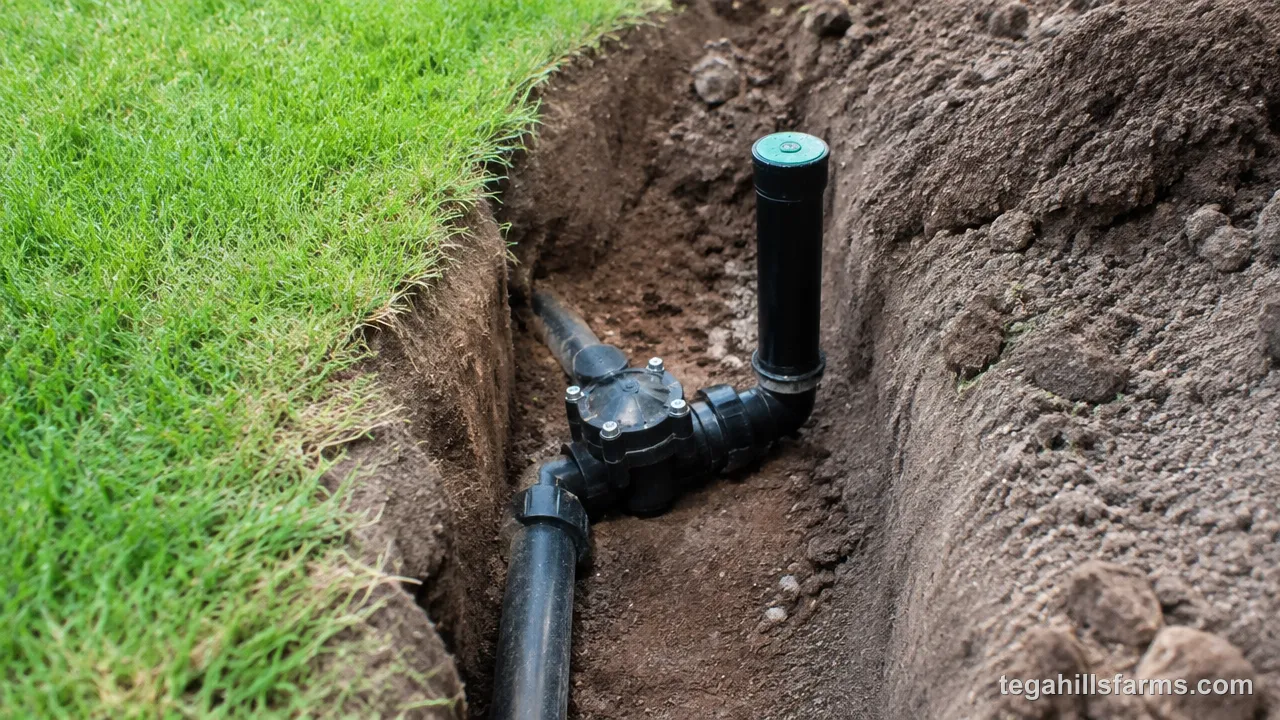
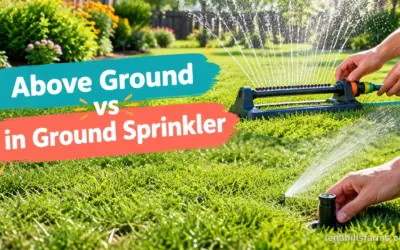
An underground system is permanent. Rigid or flexible pipe runs below the lawn from your water supply to a group of electric valves, and each valve feeds its own set of pop-up heads that retract flush with the grass when the water shuts off. An above-ground setup is a hose-end sprinkler moved by hand or on a simple faucet timer, with nothing to dig and nothing to wire. Most of the effort in a buried system goes into planning and trenching, not the heads themselves.
Before you dig or buy materials, knowing how to choose a sprinkler that matches your yard size and water pressure will save you from installing heads that underperform or waste water.
How Do You Plan Your Sprinkler System Layout?
A layout works when the heads on each valve stay within your supply’s flow and every zone serves plants with similar water needs. Getting this right on paper costs nothing, while fixing it after the trenches are backfilled means digging again. Your drawing, your pressure numbers and your zone map also tell you what size sprinkler you need for each part of the yard, because a narrow side strip and a wide open lawn call for very different throw distances.
Measure Your Yard and Identify Obstacles
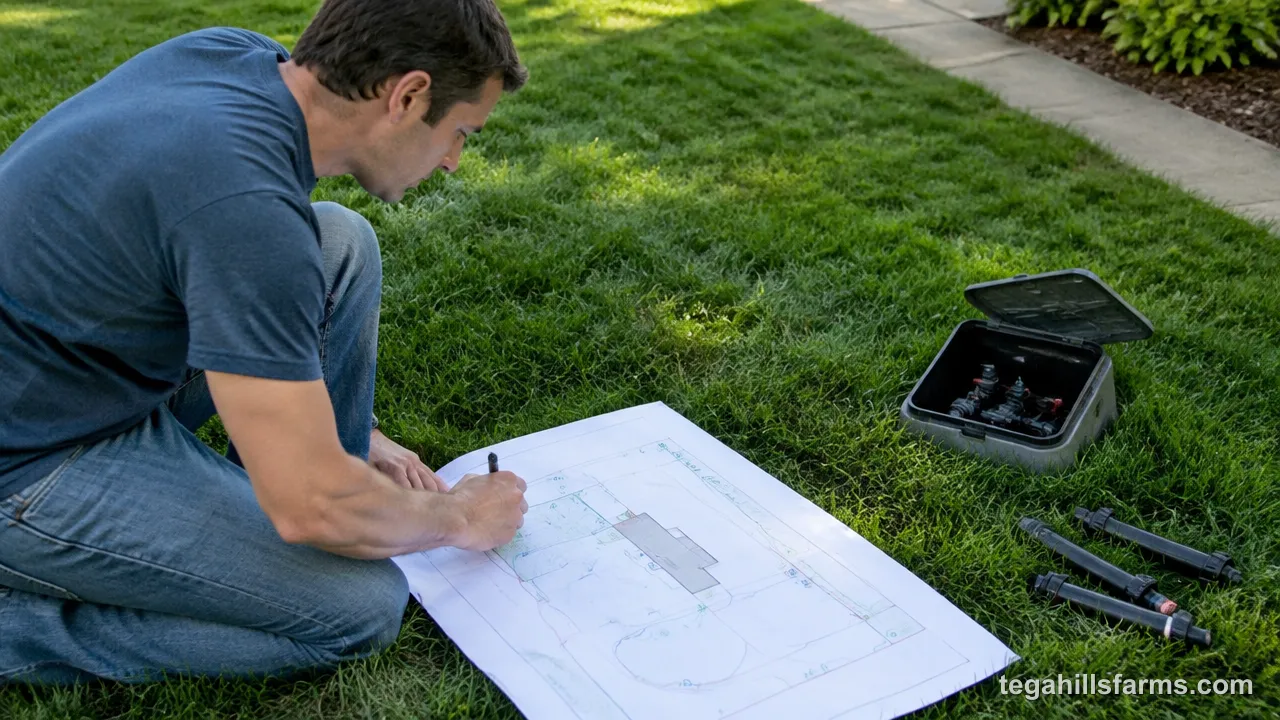
A scaled drawing on graph paper is the foundation, with each square standing for a set number of feet. Measure the lawn and beds with a long tape and record every dimension in feet.
Mark the house, driveway, walkways, patio, fences, trees and established shrubs, since these block spray and force pipe to route around them. Note slopes as well, because water runs downhill and affects zoning later.
Two points matter most on the sketch. The first is the water source: the main water line, the meter, or the outdoor faucet you plan to tap. The second is where the controller will mount, ideally near a GFCI outlet in a garage or on an exterior wall. Every trench in the plan starts from those two locations, so place them accurately.
Calculate Water Pressure and Flow Rate
Static PSI comes from a pressure gauge threaded onto an outdoor faucet. Open the faucet with every other fixture in the house off and read the gauge. That figure tells you whether your supply sits inside the operating range printed on each head’s package. Below that range, heads throw short. Above it, they mist and drift.
Flow comes from a bucket test. Open the same faucet fully, time how many seconds it takes to fill a bucket of known volume, then divide the gallons by the seconds and multiply by 60 to get gallons per minute.
Each head lists its own GPM on the manufacturer’s chart. Add the heads planned for one zone. The total has to stay below your supply’s GPM with some room to spare, or the heads at the end of the line lose pressure and fall short.
Divide the Yard into Irrigation Zones
Hydrozoning groups areas that need the same amount of water onto one valve. A sunny front lawn dries faster than a shaded side yard, and turf needs a different schedule than a shrub border or flower bed, so each belongs on its own zone.
Head type is the second filter. Spray heads put down water much faster than rotary heads, so a zone should hold one type only, with spray heads on small or narrow areas and rotary heads on larger open lawn.
The flow limit from your bucket test sets the final boundary. If a sunny lawn needs more heads than one valve can supply, split it into two zones that run back to back. Draw each zone in a different color on the sketch and count its heads against your GPM before you buy anything.
Which Materials Do You Need for Installation?
The parts list breaks into pipe and fittings, sprinkler heads with swing joints, and the valves, controller and backflow preventer that manage water flow. Each group affects how well the system holds pressure and how it survives frost, mowers and years of cycling on and off. The parts you choose, more than anything else in a DIY job, determine how much a sprinkler costs, so buying to match your zone plan avoids paying for heads and fittings you will never install.
Pipes and Fittings
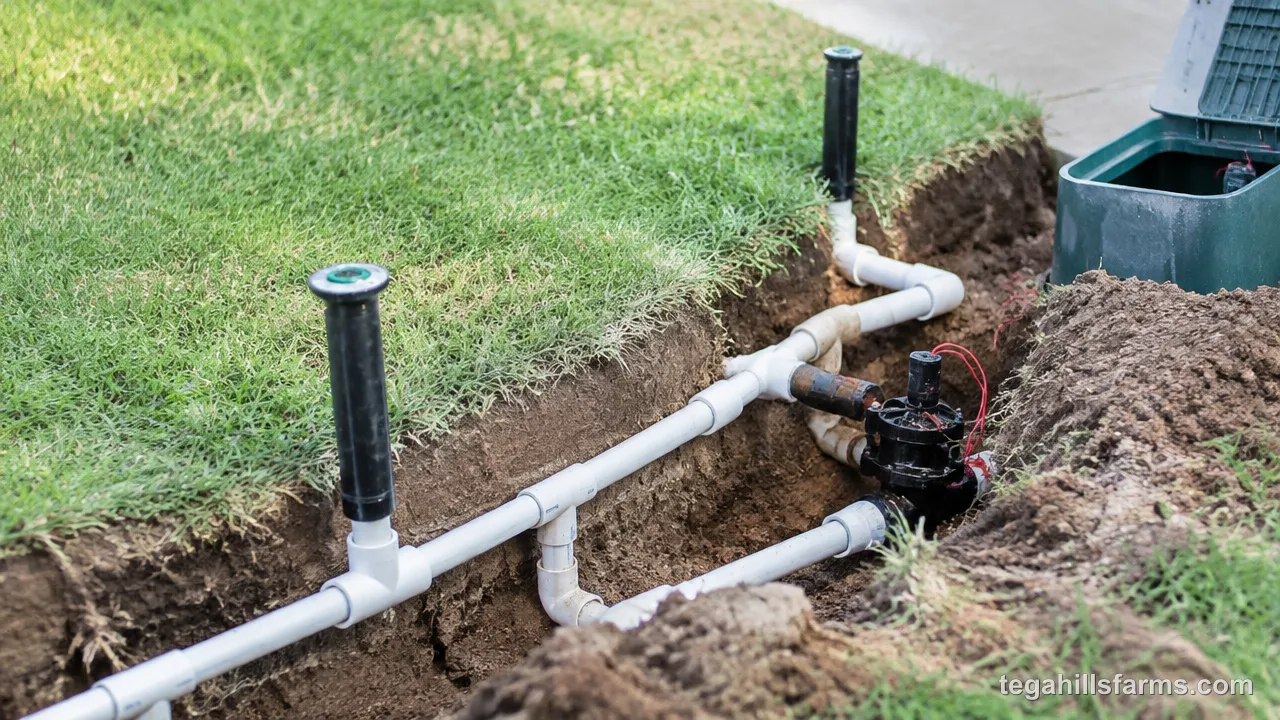
PVC is rigid, holds its shape in a trench and glues together with primer and cement. Poly pipe is flexible black tubing that bends around obstacles and joins with barbed insert fittings and clamps, which makes it easier to snake through roots and more forgiving where the ground freezes.
For PVC, common diameters are 3/4 inch, 1 inch and 1 1/4 inch. A wider pipe carries more water with less pressure lost to friction, so the main line from the supply often runs a size larger than the lateral lines feeding the heads. Schedule 40 PVC has a thicker wall than lighter grades and stands up better to pressure surges and shifting soil.
Fittings handle every change in direction: elbows for corners, tees for branches to heads or laterals, and couplers to join straight runs.
Sprinkler Heads and Swing Joints
Pop-up spray heads emit a fixed fan of water and suit small lawns, narrow strips and curved bed edges where a short throw keeps water off pavement. Rotary heads use multiple rotating streams on a pop-up body, covering mid-size areas at a slower application rate. Rotors are gear-driven heads with a single rotating stream for large, open lawns.
Each head’s coverage radius on the manufacturer’s chart decides where it goes on your zone map, and every head in a zone should be the same type.
Swing joints connect each head to the lateral pipe through a short, jointed fitting. When a mower wheel or foot presses on a head, the joint flexes instead of transferring the force to the pipe, which prevents cracked tees and leaking laterals. The joints also let you raise or lower the head to sit flush with the soil.
Valves, Controller, and Backflow Preventer
The controller is the timer that runs the system. On schedule, it sends a low-voltage signal through a buried wire to the solenoid on one electric valve, which opens and lets water flow to that zone’s heads. Valves are usually grouped into a manifold inside a valve box near the main line, so all the zone connections sit in one accessible spot.
A backflow preventer installs between your water supply and the valves. It stops irrigation water, which can carry soil, fertilizer and lawn chemicals, from siphoning back into household drinking water when supply pressure drops. Local plumbing codes commonly require one and specify the type and height above ground, so check with your water utility or building department before buying.
How Do You Install Underground Sprinkler Pipes?
The sequence runs trench, lay pipe, connect valves and backflow preventer, then backfill, working outward from the water source. Leave trenches open until the pipe has been flushed and checked under pressure, because a leak at a glued joint is easy to fix while you can still see it and costly to find once sod covers it.
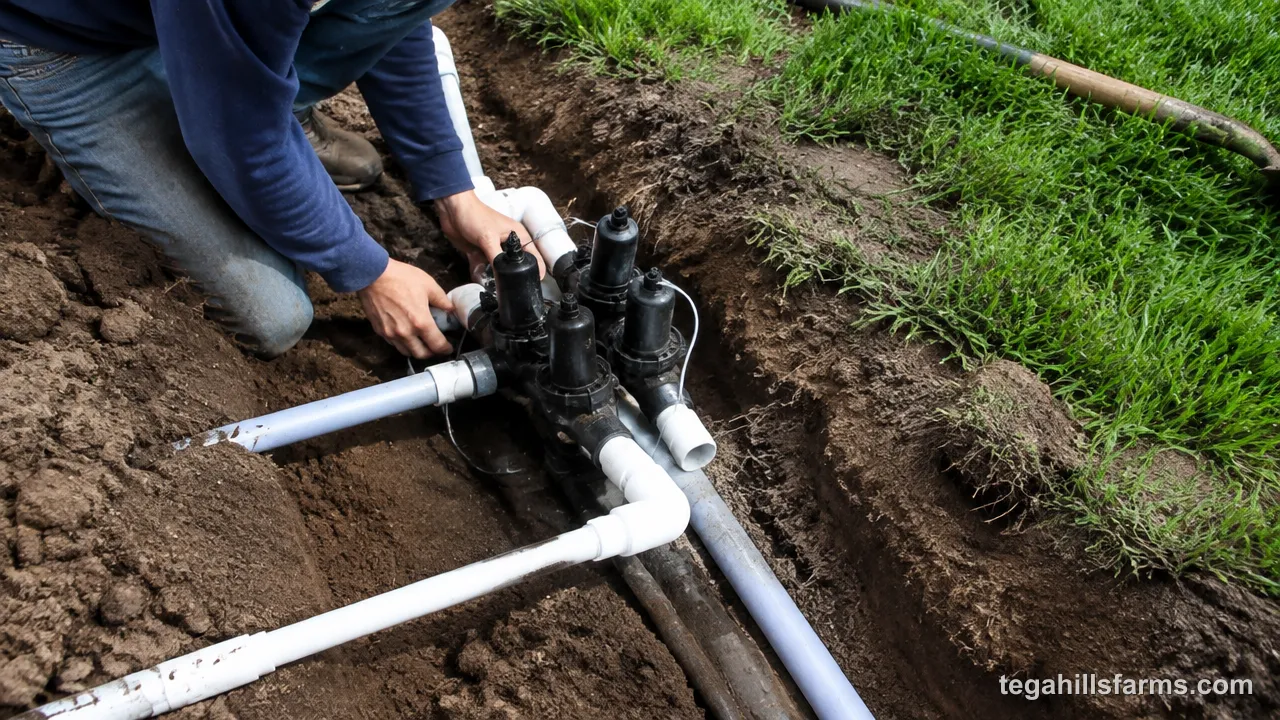
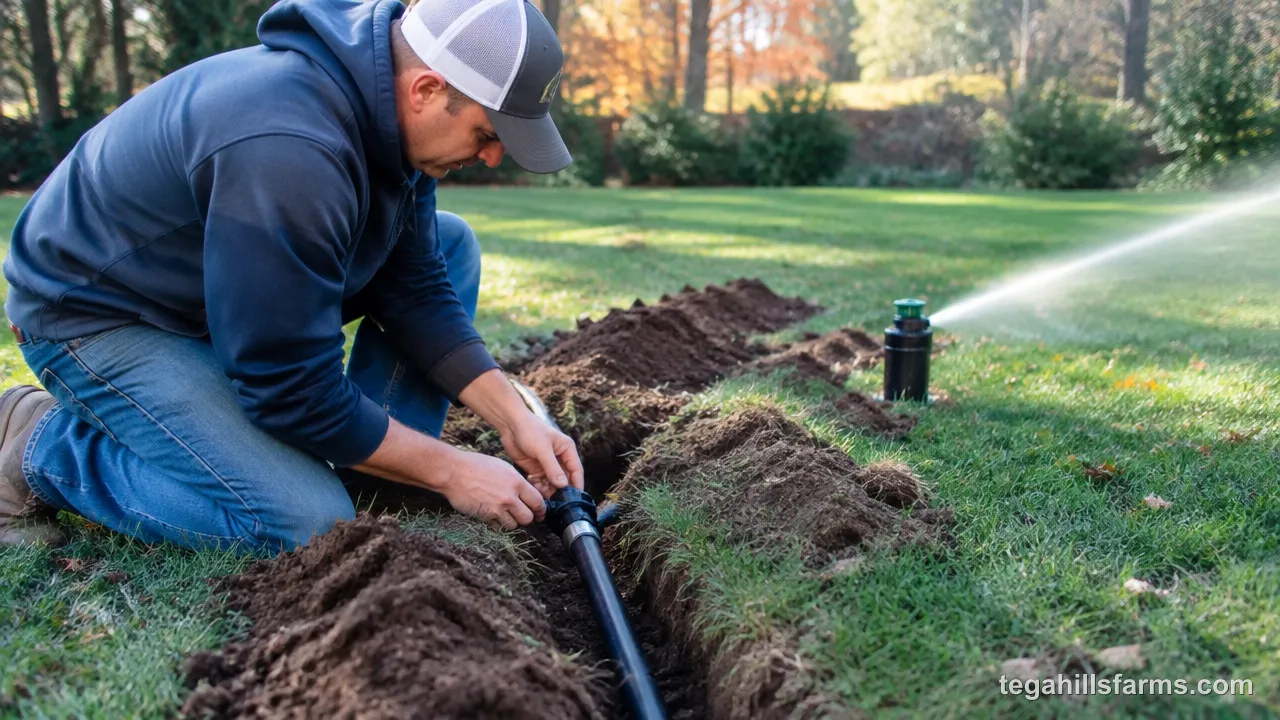
Dig Trenches Along Your Layout
Call 811 several business days before digging so utility companies can flag buried gas, electric and cable lines. Trench routes that cross a flag should be shifted or dug by hand around the marked line.
Trenches for sprinkler pipe typically run 6 to 12 inches deep. Deeper keeps pipe safer from aeration tines and edging tools, and where winters bring hard freezes it gives a little more protection. Your local building department can tell you what depth holds up in your climate.
For a large yard with long runs, a rented trencher saves days of digging, though it is heavy to steer and handle. In a small yard, a flat shovel and a sharp spade work well. Cut the sod in strips and set it aside on a tarp so it goes back down cleanly. Spread the digging over several sessions if your back and wrists feel it, since trench work is repetitive bending and lifting.
Lay and Connect the Pipe
Start at the backflow preventer and lay the main line to the valve manifold, then run a lateral line from each valve out to its heads. Measure each section against the trench and cut PVC square with a pipe cutter, then remove the burrs so the joint seats fully. I’d reach for a ratcheting cutter over a hacksaw if your grip tires easily, since it cuts with a series of short squeezes rather than sustained sawing.
Dry-fit an entire run before gluing anything. Assembling without cement shows whether every tee lines up with a planned head location and every elbow turns where the trench turns. Mark the alignment across each joint with a marker.
To glue, coat both the pipe end and fitting socket with primer, then cement, push them together with a quarter turn to spread the cement, and hold for a few seconds. Follow the cure time on the cement can before running water through the line.
Install the Valve Manifold and Backflow Preventer
The valve manifold is a row of tees off the main line with one electric valve per zone. Each valve has a flow arrow on its body that must point away from the main line and toward its lateral. Set the assembly in a valve box with the lid flush with the soil, so you can reach the valves later without digging.
Lay direct-burial irrigation wire in the trench alongside the pipe from the valve box to the controller location. Each valve needs its own zone wire, and all valves share one common wire, so choose a multi-conductor cable with enough wires for every zone plus the common. Join valve leads to the cable with waterproof gel-filled connectors, because ordinary wire nuts corrode underground.
The backflow preventer installs where the irrigation line leaves the water supply, mounted above ground at the height your local code requires.
Backfill and Compact the Soil
Backfill only after flushing the lines and checking every glued joint under pressure. A joint that weeps while the trench is open takes a few minutes to cut out and replace.
Shovel loose, fine soil around the pipe first, picking out stones that could crack PVC or dent poly pipe as the ground settles. Fill the rest in layers, tamping each layer with the back of a shovel or a hand tamper so the soil firms up rather than collapsing later.
Water the filled trench to settle it, top up any low spots, and lay the saved sod back down. Skipping compaction leaves a shallow dip along every trench line that shows up after the first heavy rain and makes mowing uneven.
How Do You Position and Install Sprinkler Heads?
Heads go where each one’s spray reaches the next head, mounted on swing joints set flush with grade. Placement decides how evenly water lands, and the installation method decides whether heads survive a mower running over them. Both carry more weight than the head brand you choose, since even a well-made head waters poorly when it sits too far from its neighbors or tilts on a stiff connection.
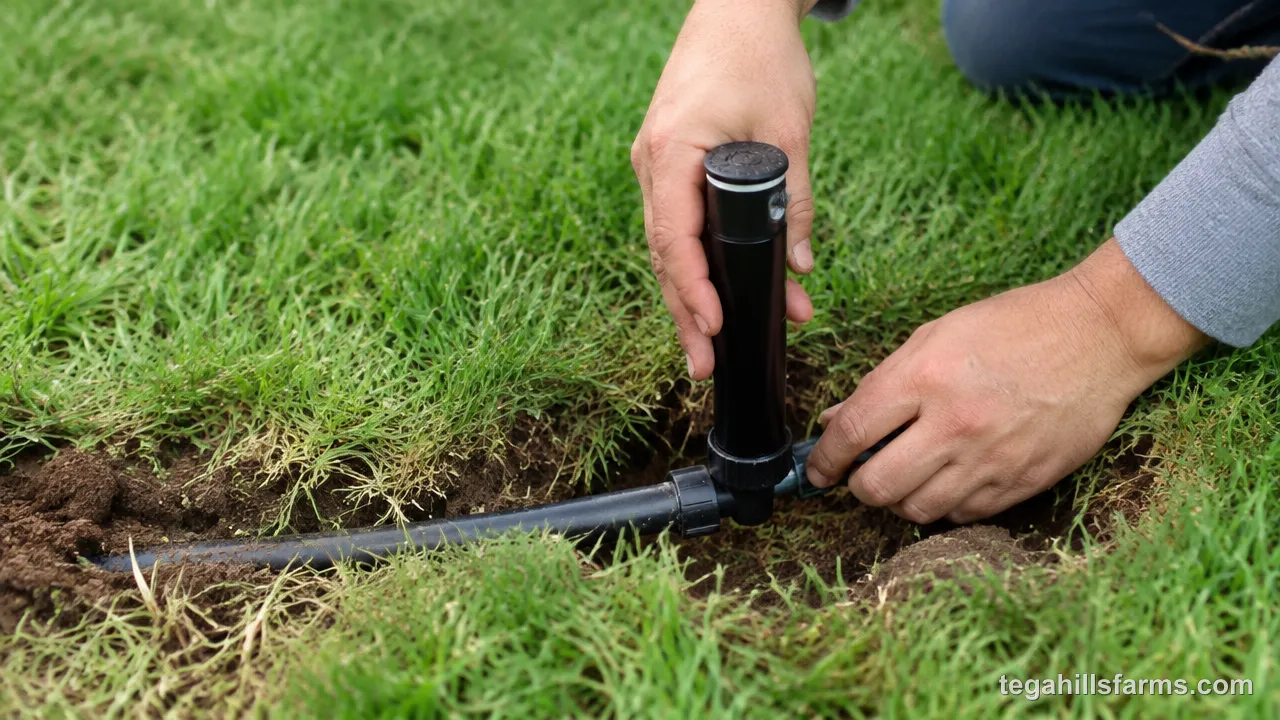
Follow Head-to-Head Spacing for Even Coverage
Head-to-head coverage means each head throws water all the way to the heads beside it. Water falls heavier near a head and lighter toward the edge of its throw, so overlapping patterns fill in each other’s weak outer edges and the whole area gets a similar amount.
The spacing distance equals the radius listed on the manufacturer’s chart for the nozzle you are using. Spray heads have shorter radii and sit closer together, while rotary heads and rotors cover more ground per head and sit farther apart. Lay heads out in squares or triangles across the lawn, with part-circle heads along edges and corners.
Wind shortens and bends the spray, pushing water away from upwind areas. In exposed, breezy spots, space heads a bit tighter than the chart radius so gusts don’t open dry gaps between them.
Attach Swing Joints and Screw in Heads
Thread one end of the swing joint into the tee on the lateral pipe and the other end into the base of the head. Before attaching heads, run water through the open laterals to flush out soil and pipe shavings, which otherwise clog nozzles on the first cycle.
Rotate the swing joint’s elbows to raise or lower the head until its top sits flush with the surrounding soil. A head set too high gets clipped by the mower. One set too low gets buried by grass and thatch, and its spray hits the turf instead of clearing it. Keep the head straight up rather than tilted, then backfill around it and firm the soil by hand. When the zone runs, each head should pop up fully and drop back down cleanly.
How Do You Set Up the Controller and Test the System?
The final stage is connecting each valve wire to a controller station and running every zone by hand to check for leaks and dry spots before setting a schedule. A test cycle catches problems while every head is still easy to adjust. Once coverage checks out, how long to run sprinklers in each zone depends on head type, sun exposure, soil and season, which is why separate zones get separate run times.
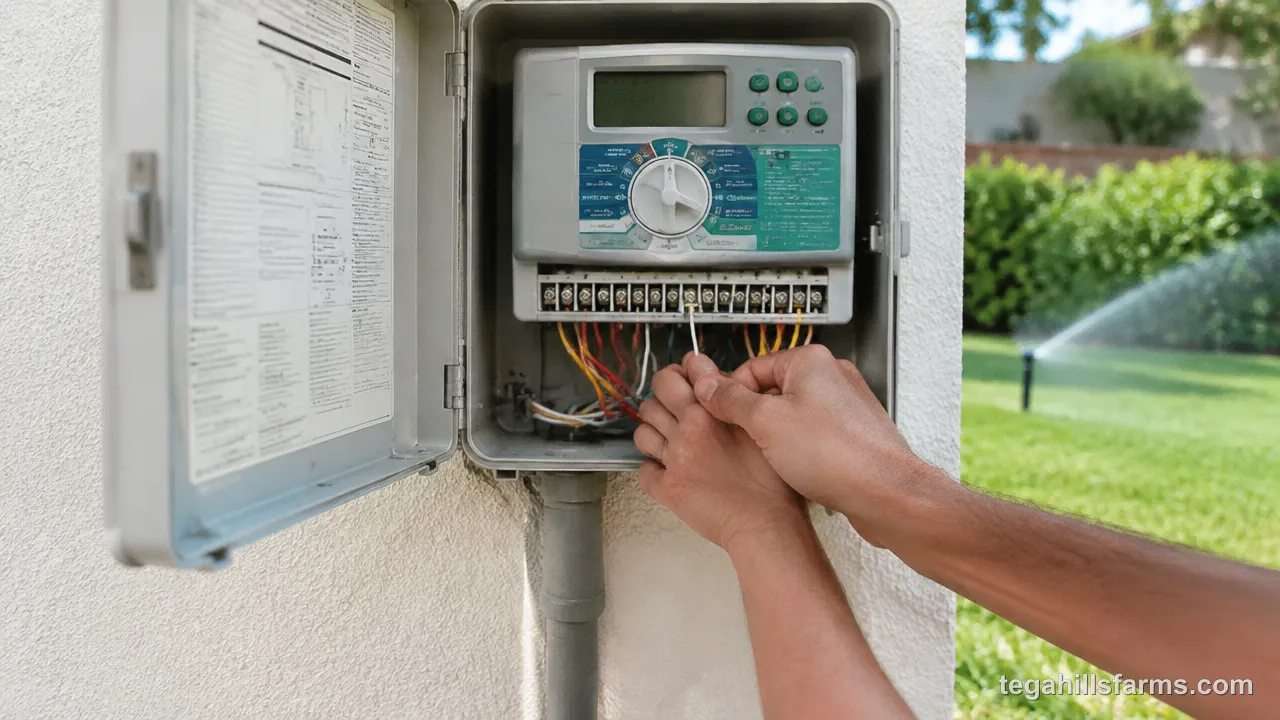
Wire the Controller to the Valves
Mount the controller near a GFCI outlet, either indoors in a garage or outdoors in a weather-rated model. Bring the cable from the valve box up to the controller and strip a short length of insulation from each wire end.
Each zone wire connects to a numbered station terminal, so the wire from zone one’s valve goes to station one, and so on. The common wire, shared by every valve, connects to the terminal marked COM and completes the circuit. A mix-up here is easy to make, so trace each wire back to its valve and label the stations as you connect them.
Plug in the controller’s transformer, set the date and time, and enter each zone’s name. A labeled controller makes adjustments far easier a season later, when you no longer remember which station waters the side yard.
Run a Manual Test and Adjust Coverage
Start each zone manually from the controller and walk it while it runs. Look first for leaks: water bubbling at the valve box, puddles forming along a trench line, or a head that sprays from its base instead of its nozzle.
Pressure problems show up next. Heads that barely pop up or throw well short of the chart radius usually mean too many heads for the zone’s flow. Heavy misting points to pressure above the heads’ operating range, which a pressure-regulating head body or nozzle can correct.
Adjust spray heads by turning the nozzle so the pattern covers lawn, not sidewalk or siding, and use the radius screw to pull back a throw that reaches pavement. Rotary heads and rotors have their own arc settings, set with the tool the manufacturer specifies.
A zone can pass every test cycle and still pour water into the street a month later, when the clay under a sloped bed seals over and the run time that looked right on paper outpaces what the soil can absorb. Small layout errors like that only show up on the water bill and in the lawn, as dry patches next to soggy ones that no amount of extra run time will fix.
What Installation Mistakes Waste Water?
Water waste in a new system nearly always traces back to a zone that applies water faster or less evenly than the ground can use it. The fix in each case is to match the heads, the run time and the layout to the conditions in that zone rather than adding more water. The same errors also shorten how long sprinklers last, since heads that run at the wrong pressure or get flooded with soil wear out and clog sooner.
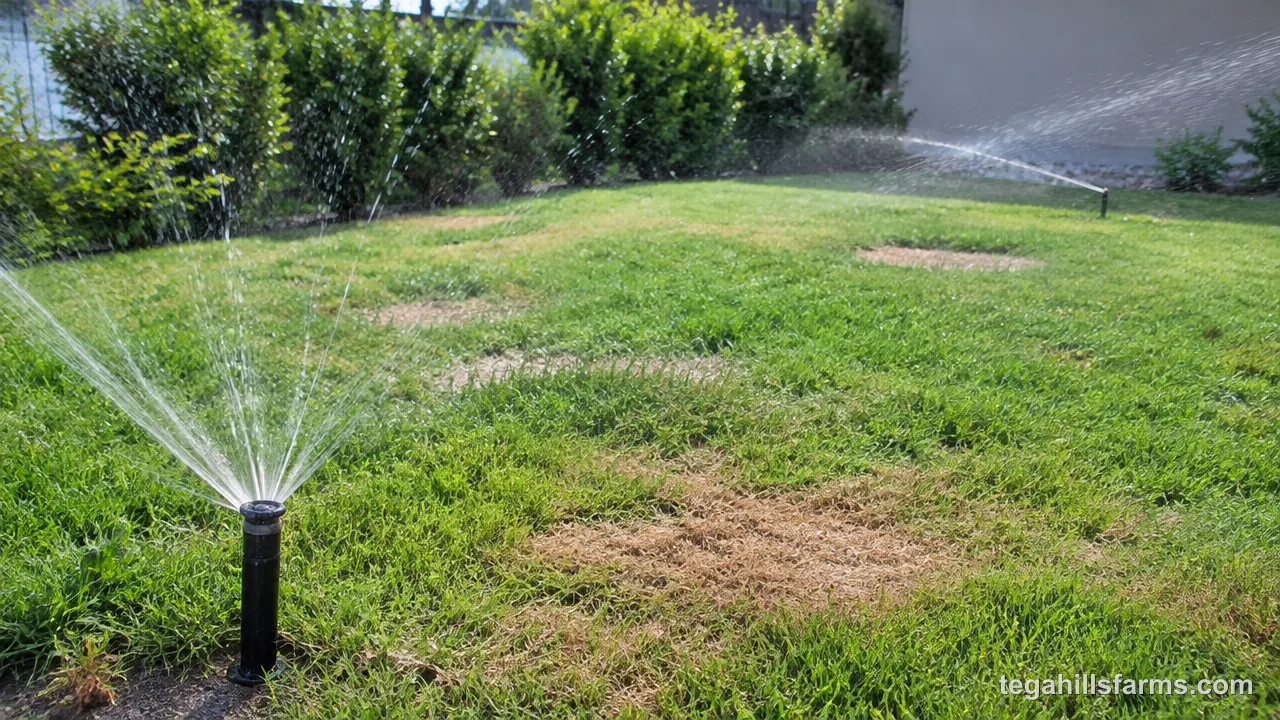
Spacing Heads Too Far Apart or Too Close
Heads set past their rated radius leave the space between them underwatered. Those dry spots turn brown first, and the usual response is to lengthen the run time for the whole zone, which drowns everything else to rescue a few gaps.
Bunching heads too close causes the opposite problem. Overlap well beyond head-to-head coverage puts down more water than the lawn needs, and the extra runs off or soaks below the roots.
Sticking to the manufacturer’s radius for your specific nozzle keeps both mistakes out of the layout.
Mixing Head Types on the Same Zone
Spray heads put down water many times faster than rotary heads and rotors. Put both on one valve, and every run time becomes a compromise that fails both: long enough for the rotary heads means the spray-head areas flood, while short enough for the spray heads leaves the rotary-head areas dry.
The same mismatch applies across brands and nozzle types with different application rates. Keeping each zone to one head type, ideally one nozzle series, lets a single run time water the whole zone evenly.
Ignoring Slope and Soil Absorption Rate
Clay soil absorbs water slowly, and sloped ground sheds it before it soaks in. A run time that works on flat loam sends water off a clay slope and down the driveway into the street.
Cycle-and-soak programming solves this. Instead of one long run, the controller splits the zone’s watering into several short cycles with a pause between them, giving the soil time to absorb each round before the next starts. Most controllers have this setting built in.
Putting slopes on their own zone is the other half of the fix, since the top of a slope dries faster than the bottom and needs a different schedule than flat lawn.
When Should You Install a Sprinkler System?
Fall and early spring are usually the easiest seasons to install. The soil is workable, neither frozen nor baked hard, so trenching goes faster. The lawn is also out of its peak summer growth, which means cut sod recovers before stress from heat sets in.
Spring installs have one extra advantage: you get several weeks to test coverage and adjust heads before the hottest weather. In colder regions, finish before the ground freezes, and check with your local building department on frost depth and when water lines should be drained for winter.
Common Installation Questions
Do you need a permit to install a sprinkler system?
Many municipalities require a plumbing permit for the connection to the water supply and an inspection of the backflow preventer. Requirements vary by city and water utility, so contact your local building department before buying parts. Some areas also restrict watering days, which affects how you program the controller.
Does a DIY installation save money over hiring a pro?
Doing it yourself removes the labor portion of the bill, which is usually a large share of a professional quote. The trade-off is time and physical effort, especially for trenching. Renting a trencher and buying the right cutting and gluing tools adds some cost back but still leaves meaningful savings.
What is the lifespan of an underground system?
Buried PVC and poly pipe can last for decades when installed at proper depth and protected from freezing. Heads, nozzles and valves wear faster because they have moving parts. Swing joints, proper pressure and annual winterization in cold climates all extend the life of the components that see the most wear.
Can you connect a sprinkler system to an outdoor faucet?
Yes, though tapping the main water line usually delivers more flow than an outdoor faucet. A faucet connection limits the GPM available to each zone, so you may need more zones with fewer heads. Either connection still needs a backflow preventer installed where your local code specifies.
When is it better to hire a professional?
Professional installation makes sense when your yard has steep slopes, very low water pressure, rocky or heavily rooted soil, or a main line connection you are not comfortable tapping. A contractor also handles permits and inspections, which helps where local code requirements are strict.


Write Your Review
No reviews yet. Be the first to share your experience!